How to Repair Water Damaged Plaster
by: Dale Cox
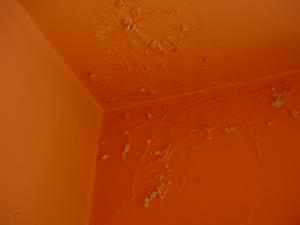
When three-coat plaster gets wet, even slightly, the surface will usually show some visual signs. A brown stain may appear in ceilings or walls. With a heavy soaking, the surface may begin to bubble from the chemical reaction of the lime. As the surface dries, it may harden and the surrounding paint will begin to flake off. Water damage effects may be minor, isolated to the surface layer of the wall, or it may penetrate the whole 3-coat structure, causing crumbling brown and scratch coats that fall off the lath. In some cases, the lath may also be damaged, showing rotted wood or rusted metal under the plaster coats.
Plaster that has gotten wet is best repaired using setting-type joint compound, also called mud. Ready-mixed compound will not be hard enough and is vulnerable to any residual moisture in the wall material. The repair process on this page can be used to repair water damage to the surface layers of plaster walls and ceilings. Check here for a video demonstrating how to repair water-damaged plaster If you have more severe plaster damage with wall material falling off the lath, use the process at this link to make repairs.
What You'll Need
#1 - Remove the Damaged Plaster
Before beginning repairs to walls or ceilings that have been damaged by water, locate and stop the source of the leak or you will be repairing the same damage again very soon. Also, be sure the plaster has time to dry out completely before attempting to start repairs.
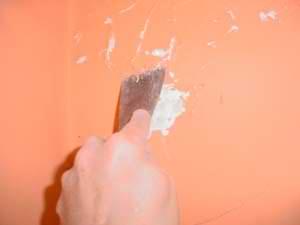
The first step to making repairs is to remove all the damaged material. This includes: all the bubbling and peeling paint, crumbling plaster coats, and any degraded lath. Use a putty knife to lift off flaking paint and bubbling plaster. Apply firm pressure with the blade to dig out all the soft, loose material.
Go around the edges of the damaged area, digging with the knife until you reach hard, undamaged plaster. Test the paint coat immediately surrounding the area to see if it will peel off easily. Work out from the center of the damage with a putty knife to remove any loose paint.
#2 - Seal the Water Damage
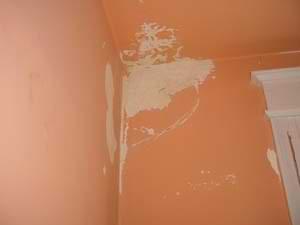
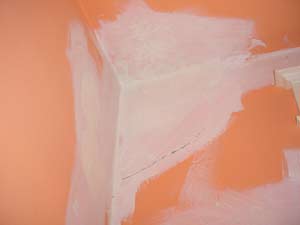
Go over the surface with a stiff nylon brush and shop-vac to remove any loose particles. Wash the surrounding surfaces using a sponge and bucket of clean water to remove any residual lime deposits and let the wall dry completely before proceeding.
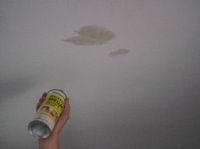
With the surface clean and dry, coat the area with oil-based or quick-dry primer-sealer. Priming is essential to block any residual contamination that may remain in the surface and inhibit the bond with the patching compound. It will also prevent stains from bleeding through the finish paint which could result in bubbling of the new paint coat.
Stir the primer or shake the can vigorously to be sure it's completely mixed. Coat all affected surfaces and overlap onto the surrounding wall paint. Let the primer dry completely before applying any repair compound. Quick-dry primers will dry in about an hour, oil paint may take as long as 24 hours to dry completely.
#3 - Fill the Plaster Damage
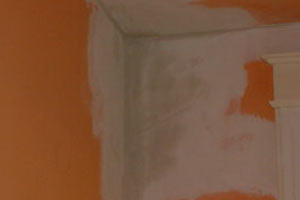
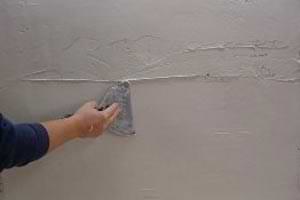
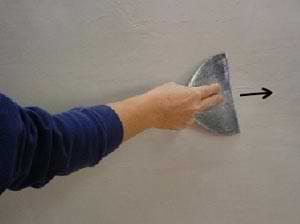
Repair shallow surface damage using several thin coats of joint compound to fill in the missing plaster and level out the wall. Mix a small amount of compound and use a flexible joint knife to apply a first coat. "Butter" the area with about a ¼ inch coat of mud and then immediately go back over it to skim off the excess using parallel strokes from one side of the repair to the other.
Float the blade across the deeper damage to fill it in and skim harder on the surrounding walls to leave a very thin coat there. As you work, don't let mud build up higher over the repair area than it is on the surrounding surfaces to keep things level. Also, avoid leaving thick mud around the perimeter to avoid unnecessary sanding when you're done.
If you have a large area to repair, use a long, thin board like a piece of lattice molding to go over the whole area at once. Rest the board on the surrounding surface and drag it across the wet mud a couple times to smooth out the high points in the overall repair. Ignore any ridges or other inconsistencies in the mud surface. After it sets you can scrape these off before applying another coat of mud.
Let the joint compound set until it hardens and then use the joint knife with an upward stroke to shave off any ridges or other roughness in the surface. Use course to medium sandpaper to remove any other bumps, etc. if necessary. A completely smooth surface is not required here, just remove any high points. Brush off the dust and wipe the area with a clean, damp rag or sponge to remove the scraping and sanding dust before coating it again with mud.
#4 - Apply More Joint Compound
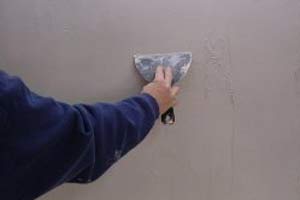
Apply a second thick coat of mud buttering the surface as before. Concentrate on filling in the deepest parts of the damage and keeping a lighter coat around the edges.
Immediately skim off the excess mud using parallel strokes again but this time go in a perpendicular direction to the first coat. If you used horizontal strokes the first time, use vertical strokes this time. Ignore any ridges left by the knife blade but keep the mud as thin as possible on the surrounding wall surface to minimize sanding when you're done.
When the second coat has set, scrape, sand, and wipe off the dust as before. Apply as many additional coat as needed to fill in all the damaged plaster. As you work, remember to avoid a build up of mud on the surrounding surfaces and reverse direction with each new coat to keep the repair level. The final coat of mud can be done using ready-mix joint compound. This will make it easier to sand a smooth finished surface.
#5 - Sand and Touch Up Paint
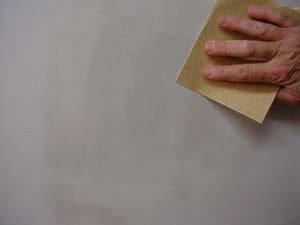
Let the last coat of joint compound set and dry completely and then sand the whole patch with 120 sandpaper. Be sure to smooth the outer edges of the patch into the surrounding wall surface. Wipe off the sanding dust with a damp rag and prime the new repair and surrounding surfaces with the same primer-sealer used before.
Using a solvent-based primer-sealer instead of latex paint is essential here to prevent any residual water contamination from inhibiting the bond with the new paint coat. Latex is fine for a finish coater over the primer but it may bubble if applied directly over previous water damage. Let the primer dry completely before touching up or applying the finish wall paint.
