How to Reglaze Window Glass
by: Dale Cox
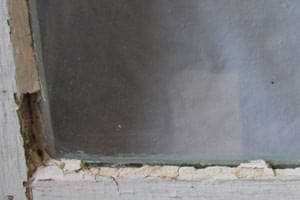
If you need to paint the exterior of old wood and glass windows, you will probably be dealing with window glazing that needs attention as well. Window glazing starts out as a soft, doughy putty made of powdered calcium carbonate whiting and boiled linseed oil.
To seal the joint between window glass and wooden framing, this putty is pressed into the space around the glass and smoothed out to create a flat bead. When the putty hardens, it creates a solid, air-tight seal around the glass.
To restore old wood and glass windows like this, the missing and cracked glazing will need to be replaced. This page contains instructions for removing damaged window glaze and reglazing to restore these types of windows. Check here for a video demonstrating how to reglaze window glass.
#1 - Remove the Damaged Window Glazing
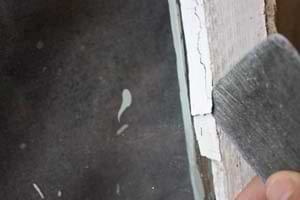
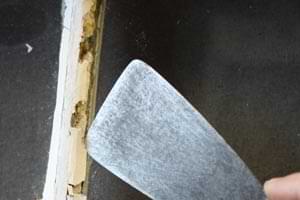
Old window glaze will usually either be completely popping off the wood dividers, or mullions, or it will be cracking on the surface and still stuck tightly to the wood underneath. The popping glaze is easily removed by wedging a putty knife under it to pry it off.
To treat the cracking glaze that still has a good hold on the wood, use a putty knife to dig into the cracks and pry off all the old glazing that will come free. Be careful not to press too hard with the putty knife to avoid accidentally breaking the window glass.
Unless you need to remove all the old glaze in order to replace a broken glass pane, the remaining tightly stuck glazing can be left in place. The new putty can then be applied to fill in around and over it to restore a smooth finished glazing bead.
#2 - Prepare the Glazing
With all the loose glaze removed, use a vacuum to extract all the dust and debris from the sash, mullions, and glass. Apply an oil-based primer to all the bare wood along the mullions. Priming the mullions will prevent the bare wood from leaching oil from the new putty which can weaken the glazing bond over time.
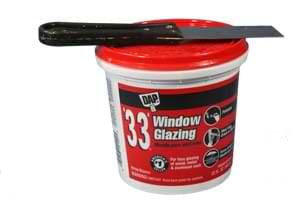
When the primer is dry, reglaze the glass using a putty like the one pictured here. This glazing putty will take some time to become completely hard but it can be painted after about 2 weeks and then left to cure and harden completely.
This putty can be very oily and sticky just out of the can. The problem is, over time the oil separates from the whiting and rises to the top of the can. The two components need to be remixed to get the right putty consistency for glazing a window.
Use a putty knife or wood chisel to dig into the can, pulling the whiting up to stir it with the oil. When you have the oil and whiting mixed well in the can, pull some putty out and knead in your hand until it has a consistently smooth texture like thick dough and it no longer sticks to your hands.
#3 - Reglaze the Glass
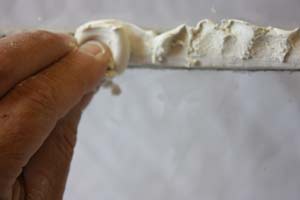
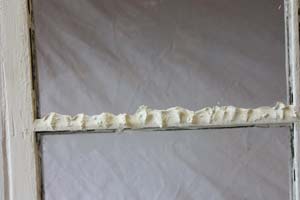
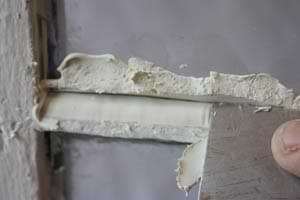
Use your fingers to push putty into the joint between the wood and glass. Overfill with plenty of putty along the whole length of one side of the pane. Using a clean putty knife or wood chisel, smooth the putty out while pressing it firmly into the joint between the glass and wood.
Start at one end and hold the blade so it forms an angle from the wood edge to the glass. Pull the blade in one continuous motion from one corner of the pane to the other. As you go, the excess putty will begin to collect and fall from the window. Catch this putty in your other hand as it drops and return it to the putty ball.
Make another pass with the blade working in the opposite direction to smooth out any remaining excess putty. Putty may stick to the glass along the edge of the new glazing bead. This can usually be removed with a pass of your finger but you may need to use a small putty ball to "grab" the stray putty instead.
Reglaze the remaining sides of the pane one at a time. At the corners where the new glazing beads meet, point the knife blade into the corner and smooth the putty out moving toward the other side. Reverse direction with the blade at the other end of the mullion to work out from there leaving a clean, sharp union of glaze beads in the corner.