How to Repair Large Wall Holes
by: Dale Cox
The method on this page can be used to patch holes of up to a square foot or so and down to a few inches. This will work on drywall and plaster walls but not on ceilings. The patch would sag if used on a ceiling causing a bulge in the finished repair. Try the method at this link to repair large holes in ceilings. Check here for a video demonstrating how to repair large holes in walls.
What You'll Need
#1 - Mark Around the Hole
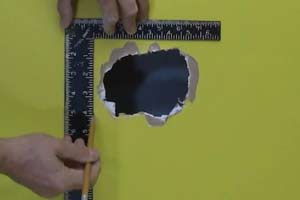
Place a pencil mark about ½inch from the top, bottom, and both sides of the hole. Hold a framing square along two marks at a time to draw a square around the hole in the wall.
#2 - Cut Out the Square Hole
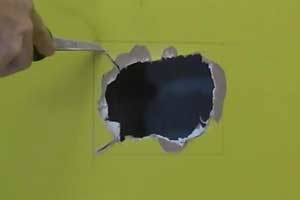
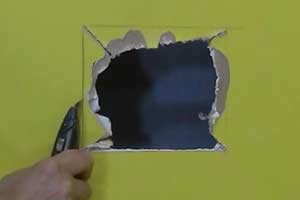
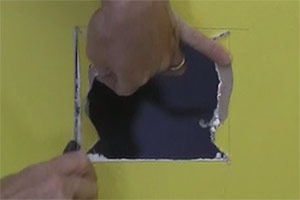
Cut from the center of the hole, out to each corner of the square using a drywall saw on wallboard. Don't try to cut wood-lath plaster like this. Just break the putty coat off the lath using the scoring technique in the next step.
Score the sides of the square around the hole on wallboard using a utility knife. With wood-lath plaster, use the side of a sharp chisel to score several times along each side of the square.
With drywall, break the pieces off along each side of the square. Push in on the gypsum board to snap it along the score line and then cut the backing paper to remove the piece.
With wood-lath plaster, tap inside the score lines with a hammer to break the putty along each line. Break the putty away from the lath and then use a small sharp handheld saw like a japan saw to gently cut the wood slats free.
Most other saws won't work well here because they will cause too much vibration in the wood lath that will crack the surrounding plaster.
In some cases, the wood lath may be left in place. But if the original putty coat is not thick enough, which is usually the case, leaving the lath will push the new patch out too far. Because a piece of drywall will be used to fill the hole, it would have to be as thin as the wall plaster coat. The only way to avoid this problem is to remove all the wood lath from the opening or use a different method to repair holes in lath plaster.
#3 - Make a Drywall Patch
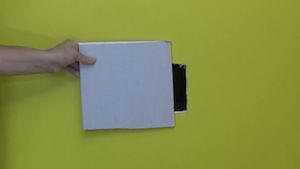
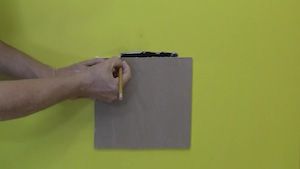
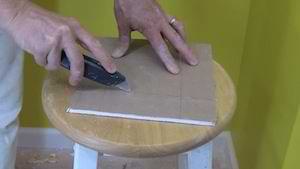
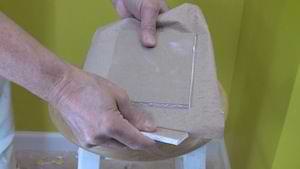
Cut a piece of drywall (any thickness) measuring 2 or 3 inches larger than the squared hole along all four sides. If the hole is 4 inches square, then the patch should be 8 to 10 inches square.
Turn the drywall to the back and hold it against the wall partially covering the hole. Mark the size of the squared hole on the back of the patch with a pencil. To make sure the patch fits easily without forcing, mark the dimensions to be a little smaller than the opening in the wall.
Use a straight edge to join the marks on the back of the patch with a pencil line creating a hash pattern. Score each line with a sharp utility knife going completely across the piece of drywall.
Working from the back of the patch, snap the gypsum along each scored line. Pull the gypsum core and backing paper off the patch leaving the facing paper and center gypsum intact. Do all four sides to create a piece of drywall with paper "wings" around the perimeter.
#4 - Install the Patch
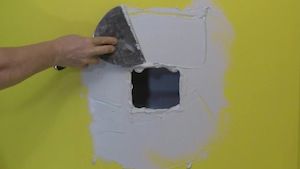
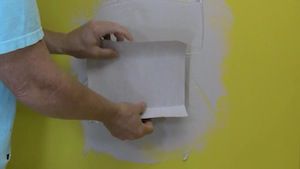
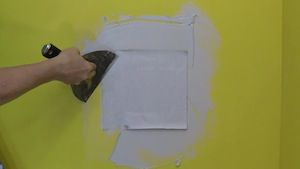
We use a 30 minute setting-type joint compound for the first few coats on this repair. The final coat is made using ready-mixed compound for easier final sanding and a smoother finish.
See the instructions for mixing and handling setting joint compound, also called mud, and mix about a cup of the powder as directed and then thin it with a little more water than recommended to improve bonding with the patch.
Apply a thick coat of the mud around the perimeter of the hole, letting it overlap the inner edges and spread out several inches onto the wall.
Press the drywall patch into the opening and lightly press the paper wings into the mud so they make good contact all around.
Push lightly on the center of the patch to be sure it is seated well into the hole and level with the surrounding surface. The patch surface can be slightly indented but don't allow it to sit above the wall level, this will create a bulge in the finished repair.
Use a 6 inch joint knife, held as shown, to press while stroking out from the center to squeeze the excess mud from between the wall and the paper wings of the patch. Work around the perimeter in a radial pattern, pressing firmly with the joint knife to squeeze all but a very thin coat of mud from under the wings. Check again to make sure the patch is flush with or just below the wall surface and let the mud set.
#5 - Apply a Coat of Joint Compound
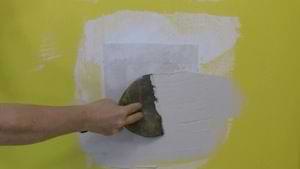
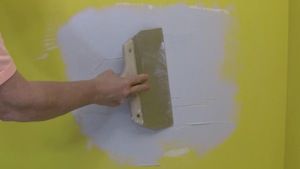
When the first coat is dry, cover the entire patch and surrounding wall with another thick coat of setting joint compound. Let it spread out to overlap the edges of the first coat.
With a wider joint knife, immediately skim off the excess mud to level out the patch as much as possible. Go over it a couple times with firm pressure to leave a semi-smooth finish. Ignore any ridges left by the edge of the knife blade.
Let the mud set until hard and shave off any ridges in the surface using an upward stroke with the joint knife. Sand any other rough spots using medium sandpaper and wipe the dust away with a damp rag. If the surface has deep scratches or pits in it, apply another coat of setting compound. If it is fairly smooth with only small flaws, go on to the final coat.
#6 - Apply a Finish Coat of Joint Compound
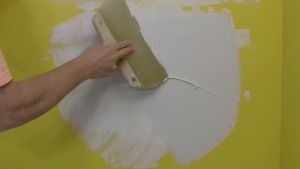
When the patch is dry, use ready-mixed joint compound to apply a final coat. As before, apply a thick coat first and then skim off the excess to leave a smooth finish. To help level the patch, skim the mud with perpendicular strokes to the pervious coat. If you stroked horizontally with the last coat, stroke vertically with this one.
#7 - Sand and Touch Up the Paint
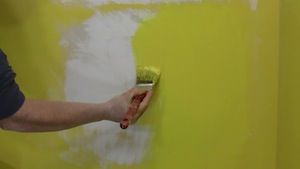
Allow the final coat of joint compound to dry completely and sand the repair, feathering the edges into the surrounding wall surface. Lightly wipe the dust away with a damp rag before priming and painting.
If you are using flat latex finish paint here, you can use it to prime the repair. If you are using semi-gloss or other shiny paint, prime with flat latex paint or primer first.
 Repair Large Holes in Walls and Ceilings
 Repair Drywall Paper