How to Repair Paint Bubbles on Walls and Ceilings
by: Dale Cox
This page contains instructions for repairing blisters and paint bubbles in wall and ceiling paint. These techniques work to permanently repair both plaster and drywall surfaces. Check here for a video demonstrating how to repair bubbling paint.
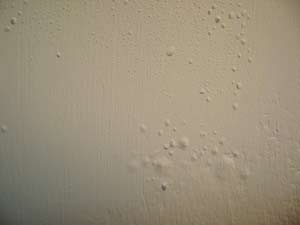
Bubbling or blistering in newly applied paint is often an indication of a problem with the bond between the new coating and the wall or ceiling surface. It may also be a case of the old paint bubbling up as it gets wet, revealing a bonding problem in the original coating. Bubbling is usually a problem with latex paints more than with alkyd or oil. In addition, shiny finishes like semi-gloss and eggshell are more likely to bubble than flat latex paint.
In some cases, blistering may not appear in a new paint coat for a couple of hours or not until the next day. In other cases, it will appear immediately. The blisters may shrink as the coating dries and disappear all together. This will sometimes be the last you see of the problem. In other cases, the bubbles will begin to crack as they dry further and over time, the paint will peel.
What Causes a Paint Bonding Failure?
- Dust, oil, water or any number of other contaminants may be covering wall, ceiling, and trim surfaces.
- The underlying paint coat may have been applied over surface contamination, causing it to bubble with the application of the new coating.
- Moisture in concrete, wood, drywall or plaster may cause a bubbling paint problem.
- Failure to sand shiny, slick surfaces or failure to prime them may be to blame.
- When doing new wall repairs, failure to remove all joint compound dust may cause blisters and bubbles to develop.
Preventing Paint Blisters
The best way to cure this problem is to prevent it before it happens. Trying to fix the bubbling by scraping and patching immediately after it occurs will not work. You will have to wait a couple of weeks for latex paint to cure and a couple of days or more for alkyd and oil to dry before doing repairs. To avoid bubbling in a new paint coat, prepare the surface as follows:
- Look for stains and dirt on the surface you're working with and wipe or wash them off.
- Remove dirt film covering surfaces with soap and water; for oily film add a degreaser. Rinse with clean water and let the surface dry completely before continuing.
- Seal all other stains from smoke, chemicals and water with primer-sealer and let it dry completely before doing any repairs.
- Be sure to remove any sanding dust from repairs or drywall finishing using a damp rag or sponge to wipe it away. Rinse frequently and wipe gently to avoid marring the new joint compound finish.
- Prime new joint compound with flat latex paint or latex primer and let it dry completely before painting.
What You'll Need
Repairing Bubbling Paint
Be sure to let new paint dry completely before trying to make repairs. This can take up to a couple of weeks for water-based coatings. Try scraping the bubbles with a putty knife, if the paint film is soft and peels off easily, it's not dry enough. Wait until scraping produces peeling just around the bubble but doesn't lift off large areas.
#1 - Scrape All Bubbling Material
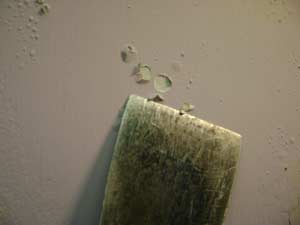
When the surface is ready, pop the blisters with the point of a putty knife and slip the blade under the paint coat to peel all the loose material away. Scrape working out from the center. Remove all the paint that will come easily, if not removed, it will bubble again with the next paint coat.
#2 - Prime the Damaged Area
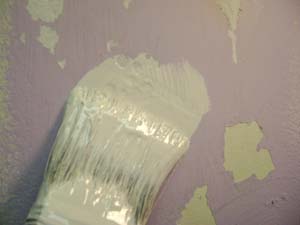
Remove the dust and debris from scraping and then seal the surface with a primer-sealer. Stir the sealer well or shake the can to be sure it is mixed thoroughly. Apply a thick coat over the whole area with a brush and let it dry for about 30 minutes. Apply a second coat if the surface has been wet or you are repairing bubbling in fresh paint. Let the final coat of primer set for an hour or more to be sure it is completely dry.
#3 - Apply a Coat of Joint Compound
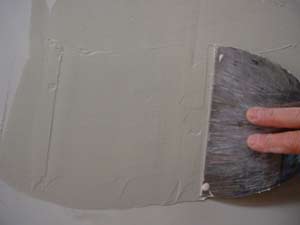
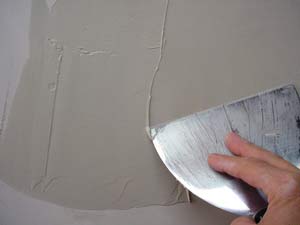
If the surface you are dealing with has a chronic bubbling problem or you are repairing bubbling in fresh paint, using setting-type joint compound, also called mud, for this repair will minimize the chance of the blisters recurring. Ready-mixed compound tends to add too much moisture to the surface and can induce bubbling in the finish.
Mix some mud and apply a thin coat over the damaged area. Use a joint knife held at an angle to "butter" the surface with back and forth strokes, leaving about 1|8in. of mud behind.
Immediately skim the excess mud from the surface to leave a thin covering over the damage. Hold the knife at about a 30° angle and press down hard but not hard enough to dig into the surface. Skim from one side to the other without stopping. Scrape the collected mud from the knife onto the rim of a mud pan and continue skimming the remaining mud in parallel strokes, cleaning the knife after each stroke.
Ignore any ridges left between the rows by the edges of the knife blade, these will be removed later. Around the perimeter of the patch, skim the mud as thin as possible to help blend it into the surrounding wall. Let the mud set for about 30 minutes.
#4 - Apply a Second Coat of Joint Compound
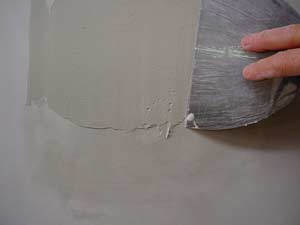
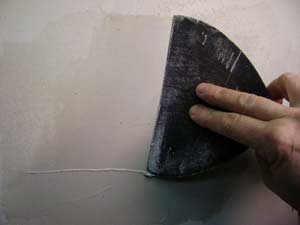
When the mud is dry, remove any ridges using the joint knife to shave them off with upward strokes of the blade. Also, lightly sand the whole patch if necessary to smooth out any other bumps or protrusions before applying another coat. At the edges of the patch, sand to feather the mud with the surrounding surface.
Wipe the sanding dust off with a damp rag and apply a second coat of mud, skimming perpendicular to the first coat. If you skimmed the first coat vertically, apply the next with horizontal strokes. This will help to level out the surface.
Let the second mud coat dry and, if necessary, apply another to build up the patch until it hides the damage and smoothes out the surface. As before, skim the mud stroking perpendicular to the previous coat.
#5 - Sand and Touch Up the Repair
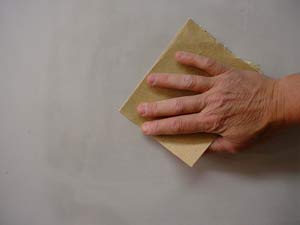
Let the patch dry well and then sand it using light pressure in wide back and forth strokes. Along the edges, sand harder to feather the patching material into the surrounding surface but avoid digging into the wall. Wipe the sanding dust away with a damp rag or sponge being careful not to wipe away the new joint compound.
Let any moisture from the rag dry before priming. If you are repairing bubbling in fresh paint or a water-damaged surface, prime with the same primer-sealer used before to be sure the problem doesn't recur. Let the primer dry for an hour or so before touching up the finish paint.
 Repair Drywall Paper