Doing Rag Painting on Walls
by: Dale Cox
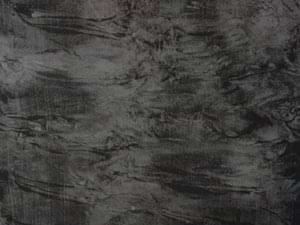
The techniques demonstrated on this page can be used to produce a faux finish that simulates leather or suede. This effect can produce the look of leather on walls, furniture, or decorative items like vases or picture frames.
To create these finishes, painting glaze is applied and while it's still wet, some is lifted off using a rolled-up rag for leather and wadded-up plastic wrap or rags for suede. Faux painting techniques like these work best on small wall features such as under wainscoting or as a leather or suede inlay on furniture.
What You'll Need
- Cotton Rags or Kitchen Plastic Wrap
- Paint for a Base Coat
- Coloring Tints
- Painting Glaze
- Paint Brush
- Latex Gloves
1# - Prepare the Rags and Plastic Wrap
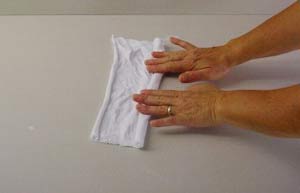
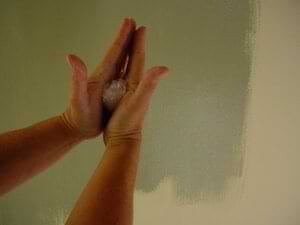
See this link for surface preparation, base coating, and glazing mixing instructions if you need help with those steps. To better simulate real leather and suede, the base and glaze should be two shades of the same color with the glaze being the darker of the two.
Use cotton rags similar to bed sheets to roll several one foot squares into tubes and set them aside. Wear latex glove to keep the glaze off your skin while doing the ragging part of this process.
For the suede effect kitchen plastic wrap or cotton rags are used to dab at the glaze. Cut several strips of plastic about 18 inches long and wad them into tight balls and straighten them out several times to create multiple fine creases in the film. Place the plastic balls in a box or bucket to keep them tight until ready for use. To use rags for this effect, an old cotton t-shirt works best. Cut it into one foot squares and wad them up just before you're ready to use them on the glaze.
2# - Base Coat the Surface
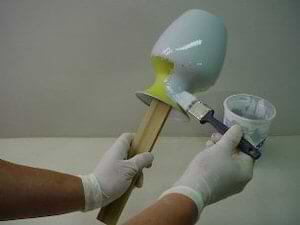
Base coat the project with a semi-gloss paint using a brush or roller to apply a solid coat of color. While you're at it, coat a piece of cardboard or similar suface to use as a practice board to perfect your technique before applying it to your project. Use a base color in the same hue as the glaze but considerably lighter in shade to get the most realistic leather effect. Let the paint dry completely before proceeding.
3# - Apply the Glaze
Apply the glaze over the base paint with a brush to get a good, thick coat that almost completely hides the color underneath. If you're doing a small space like a table top, coat the whole thing with glaze at once. If you're doing a larger area, coat a manageable section of a couple feet at a time and leave a border of untouched glaze along the leading edge to keep it wet and aid in blending the finish into the next section.
Roll the Glaze for a Leather Look
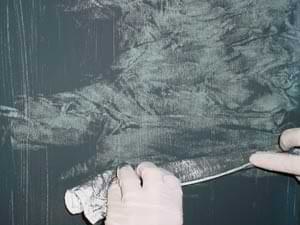
Use the rolled rags you prepared to create a leather look. Work on small spaces that can be rolled all at once with the rag before the glaze dries.
Roll one of the rags through the glaze all the way from one side to the other without stopping or lifting the rag. Lifting the rag in the middle of a run will create an unwanted pattern that may ruin the effect. If this happens, try to roll over the glaze again with the rag before it dries to blend the finish. Otherwise, brush it out with fresh glaze and try again. Rolling horizontally or vertically is optional. Experiment to see which creates a more realistic leather appearance on your particular project.
On large spaces like walls, roll in parallel rows letting the end of the rag overlap each row slightly to blend them together. Continue until you reach the glaze border but don't touch it. Start a new section brushing the glaze from the border and out another couple of feet. Roll the first pass with the rag in the new section letting the end overlap the first section a bit to blend the two together. Continue with this process until you reach the end of the wall.
Avoid letting the glaze stand for more than 10 minutes before rolling it. If a delay causes it to become tacky, coat the area with the brush to soften it before applying the rolling technique again. When the rag becomes saturated, discard it and use a new one. A rag will probably cover several square feet before it will need to be replaced.
After rolling the project, let the glaze dry for at least 24 hours before handling. If your project will see a lot of traffic such as with a tabletop, use a clear varnish to protect the finish. Apply two coats for added protection.
Dab the Glaze for a Suede Look
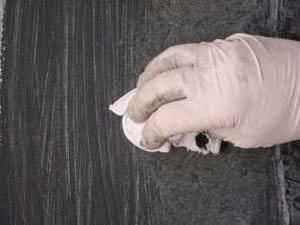
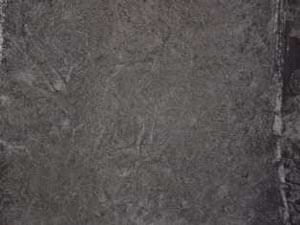
To create a suede look, you can use either wadded plastic wrap or rags to dab at the wet glaze. Experiment with both to find a technique that works. Rags will create a finish closely resembling suede while plastic will create a finer grained appearance like lizard skin. As with the leather simulating process above, this technique works best on small spaces.
Brush the glaze onto the project as described previously. If you're doing a small space, coat the whole thing at once and then apply the dabbing technique. If you're doing a larger area, coat a manageable section of a couple feet at a time and leave a border of untouched glaze along the leading edge to aid in blending the finish into another section.
Before the glaze can dry, begin dabbing at it with the wad. Go over the glaze in the same place repeatedly until you have the finish you want. As you move across the surface, turn the wad frequently in your hand to avoid creating a regular pattern that would diminish the realistic suede effect. If you don't like the finish you've created, you can brush the glaze out again before it dries and try again until you find a finish you like.
 Mixing Painting Glaze