How to Do Dragging and Combing Faux Painting
by: Dale Cox

Combing or dragging techniques can be used to create patterns in painting glaze to add a subtle stripe or to simulate linen as a decoration for walls and furniture. These effects can be used on small spaces like cabinet doors or wainscoting as well as an alternative to wallpaper on larger wall spaces.
As with most faux techniques, glaze is applied to the surface first and then the tool is used to create the finish. A comb can be used to create a pattern of thick lines or a brush can be used to produce more delicate lines in the effect. You can buy a rubber comb made specifically for faux finishing. These are triangle shaped with different sized teeth on each side. For brush dragging, any soft-bristled brush 3 or more inches wide will do the job or you can buy a brush made specifically for glaze dragging.
Of the two dragging methods, brushing is the easiest to do because it requires only limited control to get a regular, consistent pattern. By contrast, combing requires more precise control to keep the strokes straight and aligned or the thicker lines will immediately show any inconsistency in the pattern. Because of this, it's better to use combing on small areas where control is easier to maintain.
Preparation for Faux Combing

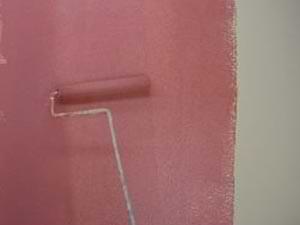
See this link for instructions on surface preparation, base coating, and mixing glaze colors if you need help with those steps. Mask the ceiling and adjacent walls with wide painter's tape to keep stains off those surfaces. When you're ready, apply the glaze using a brush to go around corners and a roller on the wide spaces.
Lightly fill a short-napped roller but avoid overfilling. Too much glaze in the roller will put too much glaze on the wall and cause the lines to bleed together when the dragging technique is applied.
Work on a manageable section of wall space at a time and roll repeatedly to spread a thin, even coat. Along the leading edge, roll about a 6 inch border of extra thick glaze to keep it wet while you work and make it easier to blend the finish into the next section.
Begin the dragging process right away before the glaze can dry. Use continuous strokes without lifting the dragging tool until you've done the whole surface from ceiling to floor or side to side. Wipe the dragging tool clean on a rag after each stroke to absorb the excess glaze and help maintain a consistent pattern across the whole project.
Doing a Brush Dragging Faux Finish

If you're working on a wall, start at one corner with the ceiling and point the bristles toward the ceiling with one hand while pressing them flat to the wall with the other hand. Drag the brush through the glaze, in one continuous motion to the floor. If you're working on a large areas it may be necessary to hand the brush off to a helper to keep it moving the whole length.
When you reach the other end of the run, lift the brush straight off to avoid disturbing the pattern. Clean the bristles on a dry rag to remove the excess and go back to the top to start another row. Let the bristles of the brush overlap the lines in the first row a bit to blend the two together. Drag the brush in parallel rows like this across the first section of glaze to the thick border but don't touch it.
Coat another section of wall with the roller, spreading the thick border from the first section out into the second. Again, leave an extra thick coat at the leading edge to form a border to work into the next section. As you work keep the rows as straight as possible for the best result.
Repeat this process until you get to the end of the wall or the other side of the project. As you go, work quickly so the glaze doesn't become tacky. If this happens, coat the area again with the roller before pulling the brush through it. Don't stop in the middle of a wall or let the glaze dry before finishing. This could create a noticeable pattern and ruin the overall effect.
Creating a Crosshatch Pattern
Brush dragging can be used to create a linen look by adding a second line pattern running perpendicular to the first. For the most realistic linen effect use the same color to apply the second coat. A contrasting color can also be used to create an original effect. Experiment with this process to find a look you like.
Be sure to let the first coat dry for a day or so before proceeding. For the second coat, add a little water to the glaze to thin it a bit. If the second coat is too thick, it will not be transparent enough to allow the lines in the first coat to show through. Try using about a 4 to 1 ratio of mixed color to water or vary the ratio to thin it until you have a consistency that works.
Roll a thin coat over the first dragging pattern and apply the dragging technique with the brush starting in one corner. This effect will require dragging the brush in one continuous motion from one corner to the next which can be difficult when working horizontally across a wall from a ladder. You can use an improvised scaffolding to make it easier to work across the whole wall without stopping.
Start at the ceiling and roll a couple feet down and horizontally across the wall, from one corner to the other. As with the first coat, leave a thick border at the bottom edge to allow for working it into the next section. Starting at the ceiling, drag the brush across the wall in one continuous motion to the next wall. Hand the brush off to a helper if necessary to keep it moving across the wall. Clean the brush on a rag at the end of the run to remove the excess glaze from the bristles. Start a second run at the same corner and drag the bristles so they overlap the first run a bit to blend the finish together.
Doing a Comb Dragging Faux Finish

Combing is best done on small areas like furniture or cabinet doors. When working with these, disassemble the piece as much as possible to make it easier to get a consistent pattern. Spread the glaze and drag each section of the piece, one at a time. Work on the smaller parts and then the larger ones. For instance, do the rails and stiles first, then the drawers, and then the side panels, etc. Leave handles and other small parts in the base color for an accent to the finished project, or do everything with the same combing pattern if you prefer.
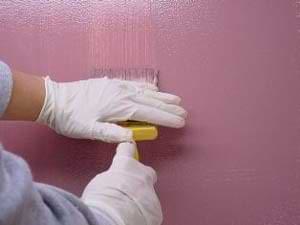
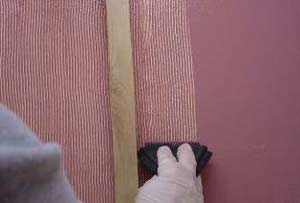
To keep the lines straight, use a board to aid in keeping the comb aligned. Hold the comb at a slight angle and pull it along the side of the guide without stopping, to form the first row of stripping. Wipe the comb on a dry rag to remove the excess glaze after the first stroke. Form the second row of lines by placing the board parallel with the first lines but don't touch the surface. Rest the comb against the guide and line the teeth up with the first lines. Place the comb teeth to overlap a couple of the lines in the first row. Hold the comb at a slight angle and pull it along using light pressure against the guide. Move across the piece like this to complete the pattern.
If the glaze coat is too thick, it may bleed or run between the teeth. If this happens, work the roller on newspaper or cardboard to remove the excess glaze and then roll the surface again. This will help to absorb some of the excess glaze and spread it out to a thin coat. The combing technique can then be applied to achieve the pattern you want.
When the first coat is dry, if you prefer, you can add a second pattern running perpendicular to create a more interesting finish. You can use the same color, a slightly different tone or a contrasting color. Experiment with this process to find an effect you like. For furniture and doors with distinctly separate parts such as drawers or panel, you can add this crosshatched pattern to some feature and leave others with a single combed finish.
Points to Remember for This Faux Finish
- -Always wipe the dragging tool on a dry rag after each stroke to control the excess glaze.
- -Keep a wet border from one section to the next to aid in blending large areas together.
- -Always use a very thin coat of glaze to avoid bleeding between lines.
- -Don't allow the glaze to become too tacky, roll it again to refresh it if necessary before combing.
 Mixing Painting Glaze