How to Caulk Trim Molding
by: Dale Cox

If you want to improve the overall appearance of a paint job, it's a good idea to caulk between the walls and trim moldings to fill any gaps before applying the finish paint.
Take care to choose a caulk labeled paintable latex/silicone. Don't use a cheap caulk here, they tend to crack very quickly even if the label makes claims of 20 or 30 year durability. Use a high-end caulk like GE® Paintable Silicone Supreme. Be careful not to use pure silicone for painting, it tends to repel both latex and oil-based coatings causing them to separate while wet and to peel when dry. Pure silicone should only be used for non-painted surfaces like tubs, showers, and tile or for weather-proofing to block drafts. Check here for a video demonstrating how to caulk trim and
here for a video demonstrating how to caulk a shower.
#1 - Start With a Clean Surface
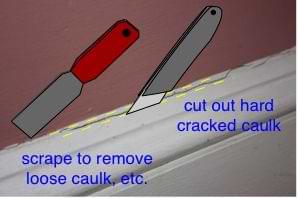
To help the caulk adhere to new, bare wood and drywall, prime these surfaces first and let it dry completely before proceeding.
To re-caulk old trim, remove any loose material from the gap between the two surfaces first. In some cases, a putty knife can be slipped under the old caulk and the whole bead can be removed at once. Otherwise, you'll have to wedge a putty knife into the crack and drag it along the length a few times to loosen the cracking material so it can be removed.
If the old caulk is cracked but not loose, trim it out with a sharp utility knife. Cut cleanly along both sides of the crack but avoid cutting into the wood trim or the wall surface.
The gap to be filled should be no wider than about 1|4in when using caulk alone to fill it. If you have a wider gap than this, fill in with something else and then caulk it. You can use a strip of wood to fill extra-wide spaces, or fill the gap with spray-foam insulation first and then re-caulk it.
#2 - Setup the Caulk Gun
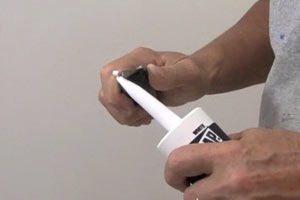
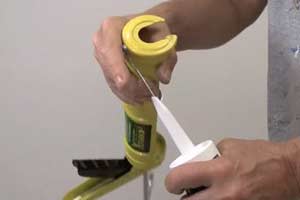
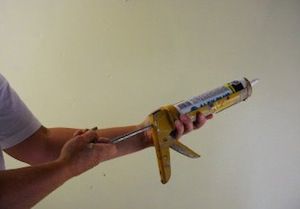
Cut the applicator tip of the caulk tube at an angle far enough down to make about a 1/4in. opening. There's a foil seal where the applicator tip meets the tube, pierce this with a long nail or the piercing rod included on some caulk guns.
Insert the prepared tube into the gun and push the plunger down with your hand until it makes contact with the push plate inside.
Engage the trigger until caulk begins to flow from the tip but watch for excess that may run quickly from the tube. If this happens, pull back on the plunger to release the pressure. Some caulk guns are designed to reverse pressure on the push-plate as soon as you release the trigger. These are convenient and can make for a cleaner application.
If the caulk continues to run even with the pressure off, hold a rag over the tip and begin filling the crack as soon as possible to prevent excessive caulk running out uncontrolled.
#3 - Fill the Cracks with Caulk
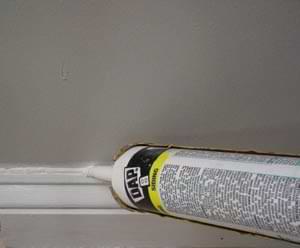
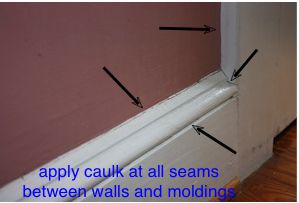
Point the applicator tip into the crack starting at one end. Pull the gun along to leave a bead of caulk that just fills the space between the two surfaces. Avoid overfilling or you will have a lot to clean off before it sets. Fill a few feet of crack at a time and smooth it out before moving on.
Fill all the seams between walls and trim molding, as well as between the individual molding pieces. If you have 2 or more pieces of trim that makeup your molding profile, be sure to fill each union to conceal any gaps that would otherwise be distracting once everything is painted.
Some pros recommend pushing the gun along the crack rather than pulling it as illustrated here. We don't recommend the pushing method because it can be difficult to monitor the flow of caulk, causing gaps to form in the bead. Going back to fill these gaps can cause problems with excess caulk and smears on the surrounding surfaces.
#4 - Smooth Out the Caulk Bead
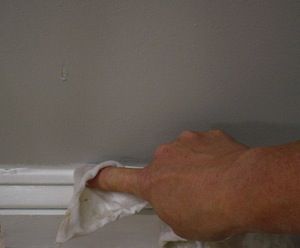
Wet an old, cotton t-shirt or similar cloth and squeeze out the excess water. With your index finger inside the cloth, run over the bead to smooth it out, while pushing caulk deeper into the crack. Turn the cloth to a clean spot frequently to avoid a buildup and rinse it as needed to remove collected caulk and avoid spreading it to unwanted areas. After you've smoothed the bead, go back and wipe any excess from the wall and trim surfaces before it can dry.
When you've finished, be careful not to disturb the caulk until it has time to set and cure. It should set -become firm- in about an hour and cure -become hard- in about 24 hours. For the best finish, wait for the caulk to cure before cutting-in around the corners with a paint brush.
How to Re-Caulk a Shower
The cracks that commonly appear around a shower or tub are caused by the weight of water and bodies forcing the floor to sink with every use. When the tub is empty again it returns to its original level, leaving cracks around the base. To fix this problem and compensate for future movement, use a pure silicone caulk to fill the seams.
#1 - Scrape Off the Loose Caulk
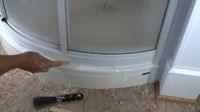
First, remove any cracking or loose caulk. If it's very loose and coming away at the edges it may be possible to remove most of it by running a plastic putty knife under the bead as you pull it free.
To remove more stubborn caulk, begin by working a plastic or wooden scraper back and forth along the seam to remove as much as will come free and then use solvent to remove the rest. You can scrape ceramic tile and porcelain with a metal putty knife or razor-blade scraper, but fiberglass tubs and showers should be treated with plastic or wood to avoid damage to the finish.
#2 - Dissolve the Old Silicone Caulk
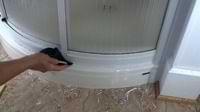
When all the loose material is removed, soften the remaining, old silicone using denatured alcohol. Soak a soft, absorbent rag with plenty of alcohol and apply it to the seam and surrounding edges. Let the solvent sit for several minutes and then use the rag to rub off as much caulk as will come free.
Soak the rag again, wrap it around your plastic or wooden knife and use it to force the remainder off. This can take a while and repeated soaking to get it all but it will clean the surface completely and give you a fresh, smooth surface to work with.
On ceramics or porcelain, you can use a razor-blade scraper and steel wool to finish cleaning the surface. But if you're dealing with fiberglass or metal parts, use a plastic kitchen scrubber like those made by 3M® to remove the last bit of residue. When all the old caulk is removed, wipe the seam with a fresh rag soaked with alcohol and let it dry for about 10 minutes before re-caulking.
#3 - Fill the Gap with Caulk
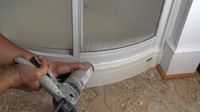
You can buy silicone caulk for tub and tile in a tube that resembles toothpaste or you can get it in a standard tube that will fit a caulk gun.
Cut the applicator tip on the tube at 45° and pierce the seal at the base using a long nail. Soak an old, cotton t-shirt or similar cloth in water and wring out the excess. Use the rag to smooth out the bead and wipe off excess caulk. Water won't dissolve the silicone but it will help to smooth the surface and wipe away wet caulk.
Begin working at one corner and fill the gap moving all the way to the next corner without stopping. Go slowly enough to fill the gap but not so slow that it overfills with caulk to avoid a mess. Don't stand in the tub or shower while working to avoid overfilling. This will cause caulk to squeeze back out when you move and ruin your new finish.
#4 - Smooth Out the Caulk Bead
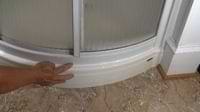
Use the wet rag to smooth out the bead while at the same time removing the excess caulk. Turn the rag frequently to avoid spreading the collected caulk to unwanted areas.
When you have wiped the excess caulk away with the rag, wet your index finger with water and go over the bead again lightly working from one end to the other without stopping.
Allow the caulk to set for an hour or two before touching it and don't use the shower for 12 to 24 hours to give it time to cure completely.