How to Paint With a Roller
by: Dale Cox
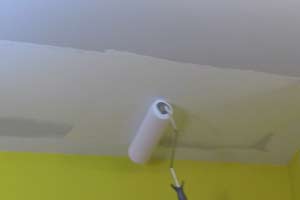
Painting walls and ceilings with a roller is not complicated but it can require a certain touch to avoid roller marks, especially when using finishes like semi-gloss and eggshell. To sidestep this problem, consider using flat latex paint for your walls and ceilings. The easiest, most foolproof way to get a professional looking finish when rolling paint is to use flat latex, instead of a shiny finish for these surfaces. Flat latex is very forgiving and will not show marks from repeated rolling and brush touch-ups. Check here for a video demonstrating how to use a paint roller and
here for a demonstration of how to paint walls with a roller.
If you must use a shiny finish on walls and ceilings, you should always roll the final pass in one complete stroke. For example, roll nonstop from a baseboard to a ceiling when making the last pass with the roller. This will minimize the possibility of leaving visible roller marks. On ceilings and high walls this may be a problem because of the difficulty rolling complete strokes. So, if at all possible, use a flat paint in these situations for the best results.
Preparing to Roll Paint
Stir the can of paint or shake it well just before beginning to mix all the ingredients and ensure a consistent finished color. Use a one gallon or larger paint tray to hold the paint and fill the roller. Fill the tray to about one half or three quarters full. Have a brush handy and use it to clean paint from the rim of the can after pouring. With the paint at a manageable level in the can, you can then use it as a pail and to cut in around corners and light fixtures with the brush before rolling.
Fill the roller by rolling it repeatedly into the paint pool. When loading, don't place the nap directly in the paint or roll too deeply into the pool. This will put excess paint on the ends of the roller sleeve which will leave runs and roller marks in the wall finish.
Turn the roller back and forth into the edge of the paint pool several times until the nap is saturated around the whole circumference. If the nap soaks up too much paint on one side of the roller, causing it to resists turning, hold it stationary with a putty knife or screwdriver and force the dry parts into the edge of the pool until the nap is evenly saturated and the roller will turn freely.
After it's full, work the paint well into the nap by turning it repeatedly on the inclined area of the tray until the roller moves freely and leaves a smooth coat on the surface. With the paint evenly distributed in the roller, attach an extension pole and begin rolling at one corner of the room.
Rolling Paint on a Ceiling
To brush around edges before rolling paint, see How to Paint a Ceiling for help.
Begin at a corner of the room and roll the ceiling starting near one wall and about 5 feet out from the corner with the other wall. Roll parallel with the near wall back toward the corner. At the end of your stroke, go slowly and roll just into the edge of the brushed paint to blend it with the roller. Stop the roller just before touching the wall and immediately roll back toward the center of the ceiling again, moving out a little farther from the parallel wall as you go. Always keep the roller in contact with the ceiling surface.
Continue rolling back and forth like this, out toward the center of the ceiling to leave a zigzag pattern of paint a few feet wide. Be careful not the bump the wall with each return stroke.
At the end of the zigzag, keep the roller in contact with the ceiling and begin rolling back toward the parallel wall again. As you go, fill in the missed spaces in the zigzag pattern. When you reach the parallel wall, carefully roll into the brushed paint to blend it in and then move back toward the center again. Continue rolling back and forth like this to go over the whole area several times until you've got an even paint coat and you've flatten out any roller marks.
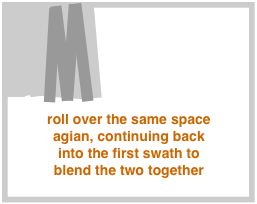
Refill the roller and start a new swath of paint a few inches from the first one. Roll a few feet farther out toward the center of the ceiling leaving a zigzag pattern.
Roll back the other way and into the first section of paint, filling the gaps in the zigzag as you go. Roll back and forth gently until the coat is smooth with no roller marks and the two sections blend together seamlessly.
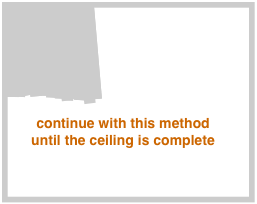
Continue in this way until the ceiling is finished. Blend the rolled paint into the brush work around light fixtures and at walls using a lightly filled roller. Roll repeatedly but gently until the two areas are blended into a smooth, consistent coat.
Let latex flat paint dry for an hour or more and apply a second coat if necessary. Let eggshell, semi-gloss, and high-gloss latex dry three or four hours and let alkyd or oil dry 12 to 24 hours between coats.
Rolling Paint on Walls
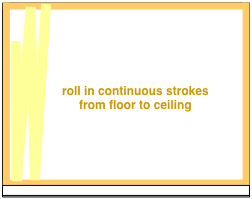
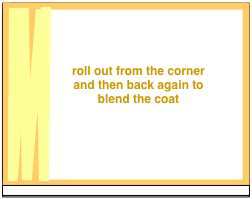
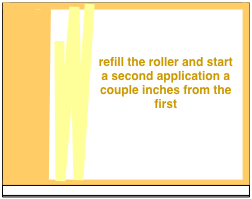
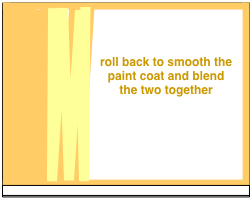
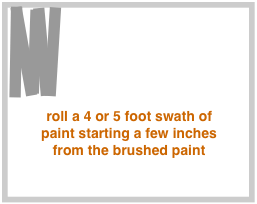
Brush paint around the edges of the walls, ceiling, and trim moldings before rolling. Roll the walls starting a few inches away from one corner and a little down from the ceiling. Roll parallel with the corner, down to the baseboard, and then back up to the ceiling without lifting the roller. Go slowly as you reach the ceiling to avoid bumping it. Immediately roll back down to the baseboard and out into the wall to leave a W pattern with the paint.
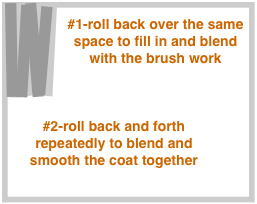
Stop a couple feet out into the wall space and roll back toward the corner again to fill in the missed space in the W pattern. When you reach the corner, roll over the edge of the brushed paint to blend it with the roller work. Go slowly near the corner to avoid bumping the other wall with the roller edge. Continue rolling from floor to ceiling and move back and forth over the whole area several times to blend the paint coat and smooth out any roller marks.
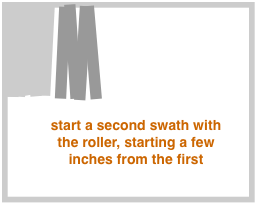
Refill the roller and start a second swath a few inches from the first. Begin a little down the wall from the ceiling and roll in complete strokes working out a couple of feet more into the wall to form a W pattern.
Roll back toward the corner and into the first swath of paint to blend the two areas into one smooth coat. Continue in this manner to finish painting the wall. If one coat won't cover completely, let it dry and do a second coat using the same method. If necessary, apply a second brush coat along the edges and then roll starting at the corner again.