How to Paint Wood Trim Molding
by: Dale Cox
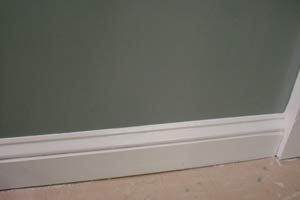
Neatly painted trim can make a big difference in how a room is viewed and give the impression things are clean and well run. It can be hard to get such neat lines using a brush and painting freehand if you don't do it very often. If you want clean lines along your trim moldings, and you're not steady enough with a paint brush to cut a straight line by hand, you have two options.
You can take the time to practice with the brush, and fix a lot of mistakes along the way, until you're able to paint like a professional. Or you can use masking tape to form the clean lines you want.
The problem with taping, in addition to the extra work of applying tape to everything, is the tendency of the paint to bleed and blur the sharp line between colors. To prevent bleeding and get sharper lines try this method. Paint the trim first and let it dry, then mask it with delicate masking tape before painting the walls. Continue below for more tips to get the straight paint lines you want along your trim molding using this method.
Prepare the Wood for Paint
Prepare your wood trim whether it's bare wood or previously painted, so it's primed, clean, and has no holes or gaps. "Primed" simply means the trim has a good base coat foundation, whether that's because it's been painted before or you've just applied primer, it amounts to the same thing.
If your new color will be much darker than it is now, tint your undercoat primer to more closely match the final color before applying it. For a durable finish that will last, undercoat with an oil-based product and let it dry for 12 to 24 hours. Lightly sand the dry primer and remove the dust with a vacuum or tack cloth before applying the finish enamel.
Trim molding is usually done with an enamel finish paint. Enamels are available in both latex and oil-based formulas and come in shiny finishes like semi-gloss and high-gloss. Because it dries to a hard, durable finish, enamel paint provides lasting protection for trim surfaces that tend to see a lot of wear and tear. And because it is so durable, enamel can be washed to remove dirt and still maintain its shine and beauty.
What You'll Need
- Masking Tape
- Paint Brush
- Paint Pail
- Enamel Top Coat
#1 - Paint the Trim First
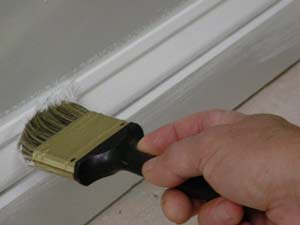
Paint the trim with the finish paint and as you work, let it overlap onto the walls a bit. Cover the crease along the two surfaces completely but avoid leaving a very thick coat in the corner. If the paint is too thick, it may crack as it dries and the cracks will catch the wall paint, ruining the straight line effect.
If your trim will take more than one coat to cover, do as many coats as necessary and let the final coat dry completely before proceeding with the next step. If you're using an oil paint, it should dry sufficiently overnight. If you're using latex, let it dry for several days or up to a week if the weather is humid. This will give the water-based coating time to harden so the masking tape won't easily pull it off.
#2 - Mask the Trim
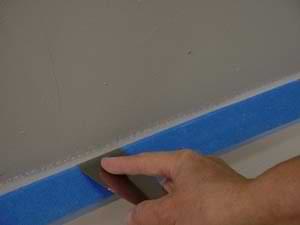
Mask the trim using short strips of tape to control placement and produce a straight line. Overlap the ends of each piece a bit and press it tightly to the molding using a clean putty knife. Make sure each piece of tape is flat with no bubbles or gaps between it and the molding before moving to the next.
#3 - Paint the Walls
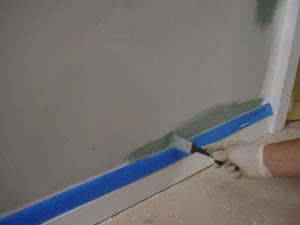
If you need to do more than one coat on the walls for good coverage, brush near the tape but avoid touching it as much as possible until you're ready to do the last coat. On the last coat, paint along the tape using a lightly filled brush and overlap the tape slightly. Avoid applying a heavy coat of paint that would bleed under the tape. If necessary, let the brushed paint set up a bit and apply another thin coat to get complete coverage.
#4 - Pull the Masking Tape
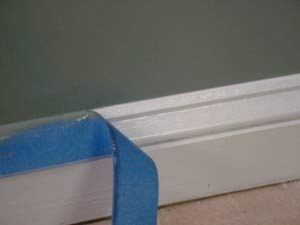
Before the wall paint can dry, pull the tape slowly and at a sharp angle. To minimize the chance of peeling, it's a good idea to do the final coat on one wall at a time so you can remove the tape immediately. This is especially true if you're using a shiny paint on the walls. Watch for peeling and if the paint starts to come away with the tape, run the point of a putty knife lightly along the edge to break the film and keep the paint in place.