Guide to Drywall and Painting Tools
by: Dale Cox
This page contains a guide to drywall repair and painting tools. We refer to these in many of the articles on this website, this information is provided for visitors unfamiliar with these tools.
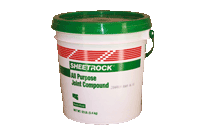
Ready-mixed joint compound, also called mud, comes wet premixed in a bucket and is used mostly for finishing drywall seams but it's also well suited for repairing minor damage to drywall and plaster surfaces. It is very soft and extremely easy to sand. In fact, a small patch of dry ready-mixed compound such as over a nail pop, can be remove completely in just a few strokes of 120 grit sandpaper. This can be a problem when you remove more of the patch than you need to and have to redo the repair to smooth out the wall again.
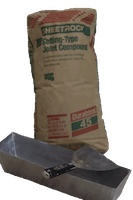
Setting-type Joint Compound
Setting-type joint compound comes as a fine powder which is mixed with water to make a spreadable mud. It is very well suited for making thick applications to repair deep wall damage. This compound is similar to concrete in that it sets after mixing with water due to a chemical reaction rather than drying from evaporation like ready-mixed does. Because of this, setting-type can be much harder to sand than ready-mixed joint compound. To make sanding easier, the manufacturers came up with softer formulas, Easy Sand Durabond® is one of these. While this newer product is easier to sand than the original, it is not as versatile. Don't, for instance, try to skim coat with Easy Sand Durabond. It tends to curl up and fails to bond well when applied in very thin coats. Because of this, we don't recommend these softer setting compounds. Instead we suggest applying regular setting compound thinned down with extra water or using ready-mixed for the final coat to make it easier to sand.
Drywall Sheets
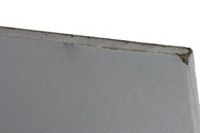
Drywall sheets consist of a gypsum core sandwiched between two sheets of heavy paper. The paper is wrapped around the gypsum on two sides to form finished edges.
Drywall sheets are commonly available in 4ft x 8ft and 4ft x 12ft pieces with thicknesses of 1|4, 3|8, 1|2 and 5|8 inches. Drywall available at your local home store includes three basic types: standard, fire retardant, and moisture resistant. Some building codes require fire retardant drywall on ceilings and moisture resistant is used in bathrooms and kitchens to standup to the high humidity in these rooms.
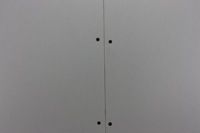
The finished edges on the sheets are compressed so when two pieces are placed finished-edge to finished-edge, a small depression is formed. The seams between the sheets are taped and the depression is filled with joint compound to create a flat, smooth, finished surface.
Drywall Finishing Tools
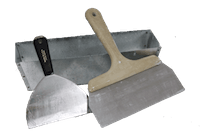
Tools for applying drywall joint compound include a mud pan and joint knife. Mud pans are available in plastic and stainless steel. The metal pan is the best choice for keeping the knife blade clean and controlling the mud. They're also easier to clean and will last a lifetime. Plastic pans on the other hand will degrade fairly quickly. They have a metal strip embedded in the rim that quickly becomes clogged with mud which is hard to remove and after a while, rust will form and the strip will dislodge from the groove holding it in place.
Joint knives are available with varying flexibility. A medium flexible blade is the best choice for drywall work. If the blade is too flexible, it can bow when finishing seams, causing a dip in the finished joints. If the blade is too stiff, it can be impossible to smooth the surface of the mud when skimming.
Drywall Joint Tape and Corner Bead
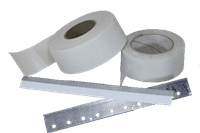
Inside drywall corners should be finished with paper tape. Flat drywall seams can be finished with paper tape or self-sticking, fiberglass-mesh tape. Paper tape should be applied with plenty of joint compound and pressed down tightly or it will come free easily. The mesh tape can be easier to use and it usually requires fewer coats of mud to finish a seam. The mesh should be lightly sanded after the first coat of joint compound to knock down the fibers and make the surface easier to smooth out. Outside drywall corners can be finished with metal or paper drywall corner bead. Metal corner bead is the best choice in most cases for a square, durable corner.
Using Joint Compound
It's best to use ready-mixed compound for finishing drywall seams and inside corners, setting-type will harden too quickly in most cases, causing problems. Exceptions to this are finishing butt joints and metal corner bead, where a thick first coat is required. In these cases, setting compound will not shrink like ready-mixed and it is much harder when set, making for a more durable joint.
Use a small joint knife of about 6 inches for the first coat or two of joint compound on seams and inside drywall corners. A larger knife can be a good choice when first coating metal corner bead and for the finish coat on flat seams and inside corners.
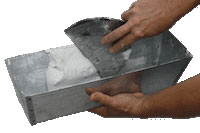
To handle and apply mud, scoop some into a mud pan and collect a portion onto the rim. From the rim, work the mud onto the wall a little at a time to get good coverage. See Skim Coating Techniques for more on handling joint compound.
Painting Tools
Broad Chisel:
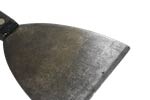
A wide-bladed chisel can be used to remove moldings without damage, or to remove hard coatings like plaster and mortar. These aren't good for spreading joint compound because the blade is too stiff to get a smooth finish.
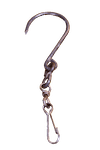
Bucket Hook:
Used to hang paint buckets and other tools from ladders or scaffolding when repairing and painting high stairwells and ceilings or when painting exterior trim molding and siding. A couple types are available from a simple band of metal twisted into a hook, to a hook with swivel spring clamp attached for snapping onto a bucket handle.
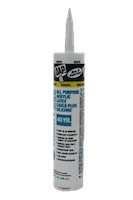
Caulk:
Used to fill gaps between two surfaces such as walls and trim molding or bath tubs and tile. For painting project use an acrylic latex, or silicone enhanced acrylic latex caulk. Pure silicone caulk is waterproof and will repel paint. It should only be used for tub and tile or similar non-painted areas. Cut the tip of the tube and pierce the seal inside before loading it into a caulk gun.
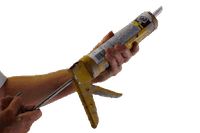
Caulk Gun:
Used to dispense caulk from a caulk tube. A trigger and ratchet system force pressure onto the plunger inside the caulk tube, pushing it out of the tip. Also, use a caulk gun for construction adhesives and other liquid materials that come in a tube dispenser.
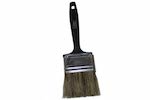
Chip Brush:
This is a typically small, natural-bristled brush original intended for removing shavings and "chips" from machinery by metal shop workers. These brushes have become very common in home and paint stores because many people like to use them for spreading adhesives and sealers. They also work well for dusting off sanding debris when prepping trim molding, etc. for painting. Because these brushes are so cheap, most people throw them out after one application. However, there's no reason a chip brush can't be washed and used again in many cases.
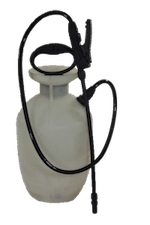
Compression Sprayer:
Used to spray deck sealer, wallpaper stripper, bleach wash for mildew and lots of other jobs around the house.
Delicate Masking Tape:
Used for masking off wall stripes and other decorative painting projects. This tape is made with smooth paper instead of the crape paper used in other masking tapes, prevents paint bleeding to create sharper lines between paint colors.
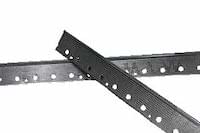
Drywall Corner Bead:
Used to finish outside drywall corners. Metal and paper beads are available. For a durable wall corner use metal corner bead.
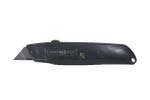
Utility Knife:
Use this knife to score and cut drywall as well a many other task associated with home improvement. Blades are retractable and replaceable.
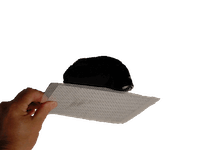
Drywall Patch:
A self-sticking, fiberglass patch for repair of holes in drywall and plaster. These patches come in a variety of sizes and may be reinforced with a perforated aluminum plate for ceiling repairs.
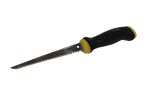
Drywall Saw:
Use this tool to cut holes in drywall for new electrical outlets, light fixtures, plumbing access, etc.
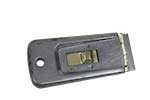
Glass Scraper
Use to remove paint from glass window panes and other hard surfaces. Retractable blade.
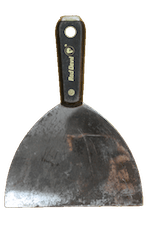
Joint Knife:
Spread drywall joint compound for wall repair and drywall finishing. Several sizes are available starting at about 3 inches going up to about 16 inches and more. Use a size that's easy to control while providing a broad coverage area. A medium flexible blade is the best choice for wall repairs and drywall finishing.
Lightweight Spackling Paste:
Very soft spackling paste makes sanding easy but won't stand up to heavy traffic. This is not a good choice for wall repairs unless they are very minor.
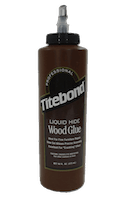
Liquid-Hide Glue:
Titebond® brand usually available from wood working suppliers is the only liquid-hide glue we can find on the market. This wood glue is made from cow hide and is used to cause paint to crack for a faux finish on furniture as well as for gluing wood joints.
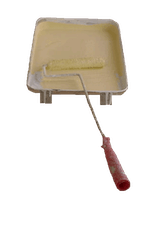
Mini Sausage Roller:
A small 6" roller with about a 1" diameter. This roller will make small spaces easier to roll. Use one to paint kitchen cabinets, wall stripes, furniture, and other small areas.
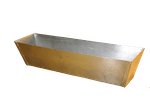
Mud Pan:
Available in plastic and stainless steel. The steel pan will last longer and be easier to clean. Use a mud pan to handle joint compound as it is applied to wall joints, etc. Also handy for mixing powdered wall repair compounds.
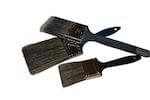
Paint Brush:
Use a sash brush for most paint jobs but choose the brush bristles for the paint you are using. As a general rule use a natural china bristle brush for alkyd and oil paints and a nylon or polyester brush for latex paints. The synthetic bristles propel water-based paints better and the natural bristles are compatible with the oils in the paint. There are also blended bristle brushes intended for use with oil and alkyd paints but they may not be as good for oil-based paints.
Paint Mitt:
Painting iron work and rail balusters is fast and easy with a painting mitt. Improves coverage and cuts work in half.
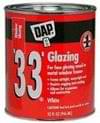
Painter's Putty:
This is a glazing putty traditionally used to glaze the jamb between window glass and the wood framing it. It can also be used to fill small nail and screw holes in trim molding and other wood features around the house.
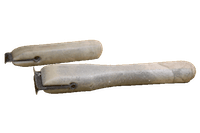
Paint Scraper:
Pull this tool to scrape peeling paint on trim molding and wood siding. Removes old paint quickly and easily. Sharpen the blades with a file as needed to keep the tool working effectively.
Paper Tiger:
This tool will perforate the surface of wallpaper to allow liquid stripper to penetrate, making it possible to loosen the paper and dissolve the paste.

Plaster Hawk:
Used to hold and transfer wet plaster to walls and ceilings. You can make one by attaching a piece of ½inch plywood to a 2by2 block handle.

Putty Knife:
Used of multiple purposes, scraping, prying, smoothing, application of patching materials, etc.
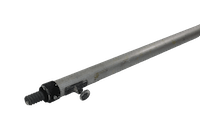
Roller Extension Pole:
Makes rolling paint faster and easier. Eliminates hand and arm fatigue and improves control of paint rollers. Extensions from two feet for painting average-height ceilings, up to about 16 feet for painting stairwells and high ceilings.
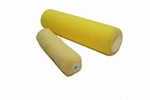
Roller Cover:
Choose a quality roller cover when possible. These will last through dozens of jobs and maintain a quality finish if cleaned properly.
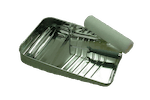
Roller Tray:
Roller trays come in all sizes, from 6 to 20 inches. A standard one gallon, 11 inch roller tray, like the one shown here, can be used for most rollers. For a jumbo roller, the larger jumbo tray will be the only one that will work.
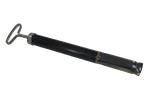
Roller Spinner:
Wash paint rollers and use this spinner to remove all paint and solvent. Save money using rollers over and over.
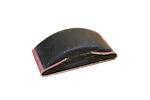
Sanding Block:
Helps when sand a flat surface. Eliminates ripples and uneven surfaces. Make your own sanding blocks for home and shop.
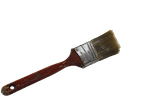
Sash Brush:
Because this brush is cut at an angle it can be a big advantage for painting detailed work. Great for "cutting-in" window sashes, ceilings, and trim. A sash brush is the professional's choice for most jobs.
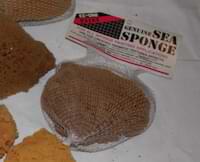
Sea Sponge:
A natural sponge can be used to create faux finishes including'; simulated granite and other stone effects, wood graining and sponge painting on walls.
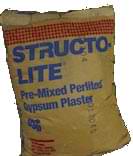
Structo-Lite:
This is a plaster product made by USG. It's used to replace damaged plaster brown coat. To restore 3-coat plaster use this product over the plaster lath. Follow with a white coat of setting-type joint compound.
Vinyl Spackling Paste:
This spackling paste tends to shrink, takes a long time to dry and can be hard to sand. Use this product for filling large holes and smoothing out nicks in trim molding. For small holes a better choice is a painter's putty.
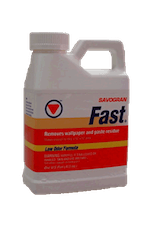
Wallpaper Remover Solvent:
We recommend "Fast Wallpaper Remover" from Savogran® because it is fast and effective at removing paper and paste.
Household Adhesives
Adhesives work in one of two ways: by welding or hardening. Welding adhesives dissolve the two surfaces to be joined and solidifying them into one piece. PVC cement is one example of a welding adhesive. Hardening adhesives stick to and/or soak into material fibers, then harden into one solid mass to hold two surfaces together. Most common household adhesives work by hardening.
Below is a list of household and shop adhesives. Descriptions, surfaces best suited, and adhesive characteristics are included in each listing as well as solvents to use for clean-up of wet adhesive.
- Aliphatic Resin
- Used for bonding wood in furniture making. Dries in about an hour. Allow to set for about 3 hours before stressing the joint. Titebond® and Elmer's® Carpenter's wood glues are two you will find at home centers. This is a very strong, waterproof adhesive for structural bonding of wood and furniture. This adhesive is not flammable but is mildly toxic. Solvent: water.
- Contact Cement
- Used to bond wood, fabric, paper, glass, cork, felt, formica, and laminates. Apply to both surfaces and let the cement dry before joining the two. Dries in 30 to 60 minutes. Comes in 5, 2, and 1 gallon as well as quarts and smaller sizes. 3M® makes a spray form "Super 77" that is handy for quick applications. This is a strong adhesive and is waterproof. Contact cement is flammable and toxic. Solvent: paint thinner or acetone. Use with plenty ventilation, extinguish pilot lights, and don't allow smoking in the vicinity when working with contact cement.
- Casein Glue
- Used for wood bonding. Dries in about 24 hours. This glue is made using a protein found in milk, mixed with an alkaline solvent. It is not used much today but was used in the past to bond wood. Apply with a brush. This is a very strong adhesive when not exposed to water. Casein glue is not waterproof, toxic or flammable. Solvent: water.
- Cyanoacrylate (Super Glue)
- Use for non-porous surfaces such as metal, rubber, plastic, ceramics, and glass. Apply sparingly to one surface and join the two surfaces immediately. Dries instantly. Hold the union for 10 to 30 seconds. Allow to dry for about 12 hours before stressing the new joint. Super Glue and Krazy Glue are two well known brands of cyanoacrylate glue. This is a very strong adhesive and is water-resistant. Cyanoacrylate is flammable and toxic. Solvent: acetone.
- Epoxy
- Used to bond virtually any surface. Mix two parts, the resin and the hardener in equal portions. Setting time can be from a few minutes to a few hours depend on the type of epoxy. Some special epoxies are available for special surfaces such as fiberglass showers and tubs.
- Hide Glue
- Used to bond wood. Also used for crackled paint faux finishing. Once the only glue available for woodworking, it has been replaced by aliphatic and resorcinol resins for use as wood glue. Dries in about 6 hours. This is a strong adhesive. It is not toxic or waterproof. Solvent: water.
- Hot Glue
- Used to bond wood, metal, leather, fabrics, and plastics. Well suited for hobbies and crafts. A heat gun melts glue sticks. Glue hardens as it cools. This is a strong adhesive if a construction grade is used. If the smaller, craft grade is used, some joints can be broken easily as the glue separates from the surface. This adhesive is waterproof and non-toxic. Solvent: Denatured alcohol or heat.
- Mastic
- Bonds floor and wall tiles as well as gypsum board and plywood for construction. Also works to bond concrete, asphalt, leather, fabric, and other common household materials so try this adhesive for repairs all around the house. Both water and resin based types are available. Quarts and gallons containers are available as well as tubes that fit a caulk gun for easy application. Sets in about 10 minutes to a couple of hours depending on the type used. Will cure in most cases in 24 hours. This is a strong adhesive and most are waterproof. Mastics may be flammable while wet and emit toxic fumes. Solvent: Resin mastic will clean-up with mineral spirits. Use water to clean up water-based mastic.
- Mortar
- Used to set bricks, cinder block, and some stone floor tiles. A mixture of portland cement and fine sand, when mixed with water mortar will set in about 30 minutes and cure in 6 months. Mortar is very strong, non-flammable and non-toxic when mixed with water. Solvent: water while wet.
- Polyvinyl Glue (White Glue)
- Used to bond wood, paper, ceramics, and most other household surfaces. Dries in 30 to 60 minutes. Sometimes called school glue because it is frequently used by elementary school kids. Elmer's® is a familiar brand in the U.S. This is a very strong adhesive but it is not waterproof. White Glue is not flammable or toxic. Solvent: water.
- PVC Cement
- Use to join pvc plumbing pipe as well as other plastics. Use a primer to clean contaminants from surfaces to be joined before applying the adhesive. Coat both surfaces and hold union until set, 30 to 60 seconds. Cures in 4 to 30 hours depending on the size on the pipe joined and the temperature. Pint and half pint sizes are commonly available. This is a very strong adhesive. PVC cement is flammable and toxic when wet. Solvent: acetone.
- Resorcinol Adhesive
- Used for bonding wood when a waterproof joint is required such as with outdoor wood furniture and boat building. Dries in 2 to 12 hours; allow 24 hours before exposing to water. This is a two part compound that is mixed before using. This is a very strong adhesive, it is waterproof and non-flammable. Solvent: water.
- Rubber Cement
- Well suited for bonding paper for art projects. Also good for temporary bond on virtually any surface from ceramics to plastics. Available as a spray adhesive or liquid applied with a brush. Dries in 10 to 15 minutes. This is a relatively weak adhesive. Not for structural bonds. Rubber cement is flammable and toxic. Solvent: rubber cement thinner or acetone. Use with ventilation.
- Silicone Adhesive
- Used to bond glass, metal, pottery, porcelain, and most other surfaces. Used to caulk fiberglass and porcelain sinks, tubs and showers. Dries in about 24 hours. This is a strong adhesive. It is waterproof, flammable, and toxic. Solvent: Denatured Alcohol.