How to Paint Vertical Stripes on Walls
by: Dale Cox

Painting stripes on your walls can be an exciting way to jazz up your room. Use the techniques on this page to paint vertical stripes on one or all of your walls. Instructions include: determining widths, measuring, marking, and painting. Using the formula and methods here you can paint two-toned or multi-colored stripes using equal or varied widths.
Finding a Stripe Width
If you want more than one width for your stripes, choose the widest one first. You can then divide that into progressively smaller sizes to get as many different widths as you want. Start by measuring the wall and take note of the length in inches or centimeters. Divide that length by the width you want for your stripes. This will give you the total number that will fit in the available space. Here's the formula:
Wall Length ÷ Stripe Width = Number of Stripes Across a Wall
Unless this results in a whole number, which is very unlikely, there will be a bit of extra space at the end of the wall. To get rid of this extra space we distribute it equally across the wall. For example, if you want 7 inch stripes on a 10ft-7¾in (127.75 inch) wall, the equation would be as follows:
127.75 ÷ 7 = 18.25
This results in 18 whole stripes and .25 of another. To get rid of that extra ¼ on the end of our wall, first determine what portion of 7 inches .25 represents by multiplying the two:
7 × .25 = 1.75 inches
This results in 1¾ inches of extra space. Divide this by the total number of 18 stripes to distribute it equally between them:
1.75 ÷ 18 = .0972222
This results in .0972222 or about 3/32 of an inch to be added to the original width for a total of 7-3/32 inches. Mark a ruler or a 1x2 board with this length and use it in the steps below to mark the wall.
When the Result Isn't Precise
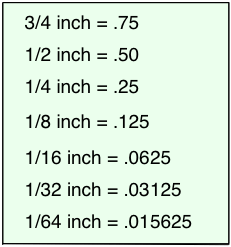
As in this example, you can't always divide the extra bit at the end of your wall equally and come up with an easy answer that can be added to the total for a precise width. In our example, we have a little more than 3/32 inch to add to our original stripe width of 7 inches. Over the distance of the wall this extra bit is going to add up to about 1/16th of an inch of space at the end.
To deal with this extra space you can just make your last stripe 1/16 inch wider than the rest, which won't be very noticeable in a large space. But if you have more than this small fraction to deal with and you think it will be noticeable, you can distribute this extra space evenly by dividing it again by the total number of stripes and adding that result to 7-3/32 inches for a more precise measurement. To make all this math a little easier use the fraction-to-decimal conversion table here to translate your calculator readout into fractions of an inch.
Varying Stripe Widths
If you have an even number of total stripes, you can convert it to varying widths by multiplying or dividing your final total by an even number. If you have an odd number of stripes, this won't work because you'll end up with a half stripe on one end of the wall or the other. You can use this half-width to transition around a corner and continue the theme to the next wall, or you can recalculate with a different width to ensure you have an even number to work with.
To get smaller sizes than the 7-3/32 inches above, divide by 2 to get 3-35/64 and again to get 1-3/4 inches. To get wider sizes multiple by 2 to get 14-3/16 inches. Using even numbers as the variable for either equation will break the wall up into equal widths that will fit into the available space. You could theoretically keep dividing to get smaller and smaller widths but doubling the size will reach a limit. This is because as these get wider you will run out of available wall space, forcing the width to be halved at one end.
To vary the widths further you can add or subtract any of the figures above after multiplying. For example, add 3-35/64 to 7-3/32 to get 10-5/8 inches. Using this method we can divide a wall into virtually any width we want. You can use just one of these sizes or you can use several different widths and mix them up across the wall. For example, we can use all these: 14-3/16, 10-5/8, 7-3/32, 3-35/64 inch on the same wall. If you choose to do this, you will have to work out the arrangement on paper first to make sure the sizes you choose will all fit harmoniously into the wall space.
Choosing Paint Colors and Finish
Decide on the colors you want to use for your stripes. When you want a subtle effect that will blend into the background, use two slightly different shades of the same color. For example, two shades of a bone white done in very wide stripes can be largely unnoticeable but still add interest to the decor. For a bolder effect, use more contrast in the colors or try brighter colors. Also, using lots of small stripes or varied widths will make the striping effect more prominent.
Using flat latex paint for this project will make the job easier and help to prevent peeling. Flat latex is easier to touch up and won't form a film over the masking tape like shiny paints will. If you must use semi-gloss or eggshell finish, pull the tape before it can dry to minimize the chance of peeling.
Painting the Stripes
Start this project by painting the walls with the lightest of the colors you plan to use. To make the job easier, you can use the existing wall color for one of your stripes and choose a darker color to do the contrasting stripes. In any case, using the lightest color first and then progressively darker ones will limit the work required for good coverage. If you plan to paint your wall a new color, be sure to let it dry for a week or more before proceeding with the stripes. When you're ready, mask the baseboards, ceiling, and any window or door frames before marking and taping the walls.
#1 - Mark the Stripes on the Wall
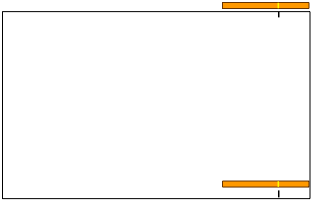
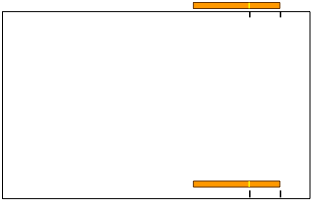
Mark your measuring stick as describe above and begin measuring from one corner of the wall. At the top, make a small pencil mark on the wall just below the ceiling. Move down to the baseboard and mark the wall just above the molding at the same distance from the corner.
To paint stripes of equal widths use this first mark as the starting point for the next one and mark the wall at top and bottom.
Go across the wall like this, marking at the ceiling and the baseboard, until reaching the next corner. If you're painting all the walls, move around the corner and continue the same method across the next wall. If the next wall isn't the same length, which is very likely, you can adjust the stripe width to fit the new space using the formula again. Calculate the new stripe widths to be as close as possible to the original so the slight difference isn't noticeable. Mark this new width on your measuring stick and proceed to mark off the stripes on the next wall.
Mark Varying Stripe Widths
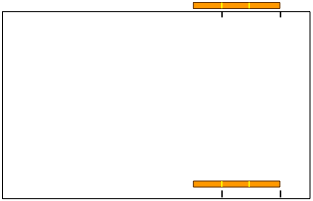
To vary size between two widths, mark the ruler with the two different sizes worked out in the math above and alternate them across the wall. Start with the smaller width and use that mark to start the second, wider one. Alternate like this across the wall.
To get multiple widths you can add the two sizes to get a third, wider one or divide to get smaller sizes. Use this method of halving and doubling the original width to create as many different sizes as you want.
#2 - Mask the Stripes
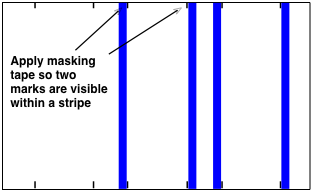
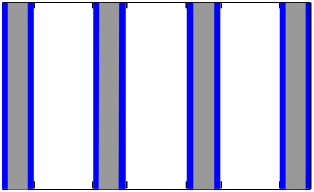
Use "delicate" masking tape to mask the stripes on the walls. This tape is specially made to be smoother than standard painter's tape for sharper lines when painting over it.
Apply the tape so that two pencil marks are visible within the same space to be sure that all marks are covered with paint. Use one continuous piece of tape to join the ceiling and baseboard marks to ensure no breaks in the masked line.
To avoid accidental splatter onto the base color while painting the stripes, it should be covered with newspaper. This is not absolutely necessary but it will prevent any accidents that could ruin the effect. Fold the paper so it fits over the tape and each alternate space. Stick the paper to the wall tape using light pressure to minimize the possibility of peeling the new paint when pulling the tape off.
#3 - Apply the Paint
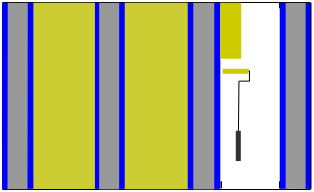
Paint the exposed wall spaces with the accent color. Make sure to cover the pencil marks so they are hidden by the paint. Use a sausage roller and work the paint into it well before applying it to the wall. Roll the color out evenly and avoid using a very thick coat when rolling over the tape.
If your accent color requires two coats to cover, you should use flat latex paint because it is less prone to peel off with the tape. If you're using semi-gloss or eggshell, try to use a color that will cover with just one coat so you can remove the tape immediately to minimize to possibility of peeling.
#4 - Pull the Tape Off
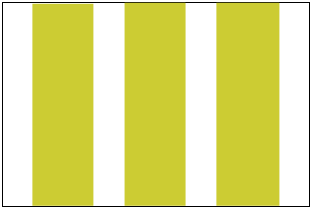
If you used shiny paint, pull the tape off before it can dry. These finishes create a plastic-like film when dry that will not break along the tape edge but instead will pull away from the wall. If you pull the tape while the paint is still wet, it will come off cleanly with little trouble. Be sure to pull slowly and watch for peeling as you go. If the paint starts to come away from the wall, pull slower and use the edge of a putty knife to break the paint film as you go.
If you used flat latex and you're doing two coats, use only a light coat over the tape with the first coat and let it dry completely before applying the second coat. After the second coat, let it dry completely and then pull the tape and newspaper off slowly. Watch for the edge of the coat to pull away from the wall with the tape. If it begins to peel, use a plastic credit card to gently hold the paint coat down at that point as you continue to slowly pull the tape.