DIY Home Improvement Tools
by: Dale Cox
This page contains a guide to hand and power tools that will help make home repairs and improvement projects easier and more successful. We refer to these in many of the articles on this website and provide this information for those unfamiliar with these tools.
Portable Belt Sander
A portable belt sander can make short work of tough sanding jobs. The most aggressive of hand sanders, a belt sander can be used to remove paint or sand down a wood surface very quickly. If you've never used a belt sander, practice on a scrap piece of wood before using it on the work surface. Use caution whenever operating a belt sander to avoid accidental damage.
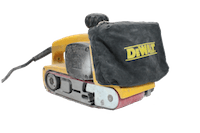
Two sizes of belt sanders are commonly available for home use: 3x18 inches and 3x21 inches. The first number is the width of the belt; the second is the length. Most belt sanders will have a dust collection bag attachment. Because the sander will remove a lot of material quickly, dust will be a serious problem if no collection bag is installed.
Installing Belts
Install belts on the sander by loosening the tension on the pulley and slipping the belt over the end. An arrow on the back of the belt indicates the direction of travel. When installing a new belt you will probably need to adjust it so it doesn't rub against the housing. To do this install a new belt and hold the sander out while depressing the switch. With the sander running adjust the tracking knob in small increments until the belt runs centered on the rollers.
Sander Operation
To operate the sander, hold it with two hands, one on each handle. Start the tool before engaging the work surface. Place the spinning belt onto the work surface, heel first and then drop the front of the sander down, in one smooth motion.
Move the sander in short, straight, back and forth strokes keeping it in motion at all times. Move across the surface one row at a time. Don't swirl the sander or drag it side to side as this will dig into the surface. Lightly shift position to sand a new row.
Sanding Belts
Use coarse, 60 or 80, grit sanding belt to remove a lot of material quickly such as when sanding down a sticking door or stripping paint. Use a lighter paper such as 120 or 150 grit to sand a smooth finish for staining or re-painting.
Circular Saw:
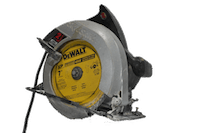
Make fast crosscuts for framing projects like building walls. Use a square to mark the cut line with a pencil first. Some practice is needed to develop accuracy. Use a fence attachment to make rough rip cuts.
Compound Miter Saw
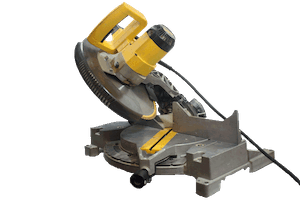
A compound miter saw will make many wood cutting jobs for construction framing and woodworking projects quick, accurate, and easy. With miter adjustments to the left and right, and bevel adjustments in one or both directions, just about any wood framing joint including cutting crown molding angles can be done with extreme accuracy.
From the center position miter angles of 90 down to 45 degrees are possible. Using the center position as 0 degrees, all angles up to 45 degrees are possible. Add the blade bevel function and these angles can be cut in two directions at once. With this versatility the user is able to cut square joints for wall framing, mitered joints for picture frames and compound mitered joints for installing crown molding, as well as less demanding wood cutting jobs, with professional results.
Saw Capacity
The size of the blade will determine saw capacity (size of wood that can be cut). To cut small crown moldings and most other trim carpentry jobs a 10 inch compound miter saw will serve well. A 12 inch saw will cut larger crown moldings as well as most other wood projects. Use the larger saw if you foresee cutting a lot of wide boards or large timbers such as 4x4's. This may be true when cutting fence posts or wide boards for planters and similar projects. It's always better to buy the best and largest saw you can afford and grow into it rather than needing a better saw as your skills improve and projects expand.
Saw Features
Compound miter saws are equipped with a fence and table for keeping the wood stationary while cutting. The table pivots left and right to make miter cuts in both directions. Use the miter feature alone to make cuts for joining two pieces of wood to form any flat, angled joint needed for a given project. Simple projects such as shoe molding installation or building window and door frames can be done using the miter feature alone. The miter feature combined with the bevel feature allow the user to make more complicated wood joints.
Saws are available with single-bevel or double-bevel capability. A double bevel feature makes for fewer blade adjustments and allows for some angles of cut, not possible with only one bevel direction. The bevel feature in combination with the miter feature are what make cutting compound miter joints possible with this saw.
The bevel feature allows the blade to tilt either in one direction for a single-beveled saw or in both directions for a double-beveled saw. Setting the blade bevel to the proper position and then setting the miter position, allows one to cut the compound miter joints needed to join crown molding and for making frames or boxes with slanted sides as with some ornate portrait frames.
Compound miter saws feature a blade guard. This covers the saw blade when ever it is in the raised position. As the blade is lowered the guard swings up through a spring loaded mechanism on the back, exposing the blade. Small slits in the blade guard allow the user to see the teeth as the blade is lowered. This allows one to line the blade up with the cut line before engaging the motor. When the switch is depressed the blade spins away from the user. As the blade is lowered into the work piece the guard swing up and the wood is cut. When the user raises the blade to finish the cut the guard swings down to cover the blade again.
Most saws are equipped with an automatic brake that stops the blade quickly after the switch is released. A dust bag which attaches to the rear of the saw will catch most of the sawdust produced or a vacuum hose is easily connected to the dust spout for better dust collection. A clamp accessory may be available to hold work firmly against the fence and table while cutting. These may be more trouble than they're worth for most jobs but if small pieces of wood will be cut, a clamp should be used to avoid putting hands too close to the blade.
Other accessories include an adjustable stop for making multiple cuts of the same length. An extension attachment is available for supporting long boards although a shop-made support will do the same job when attached to the workbench next to the saw. A portable saw stand may be needed to support the saw and lumber for projects away from the shop.
For storage and transporting, the saw the blade assembly is held in the down position by a lock down pin. There is a handle on top of the saw for lifting and carrying. A wrench for changing blades is included and is tucked under the saw table for storage and easy access.
After many years of use the motor brushes may need replacement as they are worn down by the spinning armature. Replacement brushes are available from the manufacturer and are easy to install. With new brushes the saw is ready for many more years of service.
Saw Blades
When possible a carbide tipped saw blade should be used with the saw. A good carbide blade will last through years of woodworking projects. While they are a bit expensive compared to basic steel blades they last many times over and can be re-sharpened. Use a fine saw blades with about 60 or more teeth to make smooth cuts in hard woods like oak and maple. If you're cutting lumber for wall framing and similar construction projects a blade with fewer teeth, 20 to 40, will do a nice job.
Cordless Drill/Driver
A cordless drill/driver can make short work of most fastening jobs. And the quick bit changes possible with a keyless chuck shave tons of time off of any project that requires boring holes and driving screws. With a keyless chuck, an eighth inch drill bit, and a phillips/slotted screw driver bit installing curtain rods, towel bars, door and window hardware, cabinets, or just about any installation requiring pilot holes and screw fasteners is suddenly quick and easy.
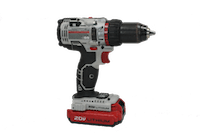
A basic 9.6 volt cordless drill/driver, starting at around $100.00, is more than adequate for any task around the house and even tougher jobs like hanging drywall and remodeling projects.
Drill/Driver Features
Virtually all cordless drill/drivers include a variable clutch, usually with at least a dozen settings. The clutch disengages the drive motor at a preset torque level. Set the clutch by turning the collar just behind the chuck. A graduated scale on the collar allows for precise torque settings every time. Use this feature for countersinking screws in wood or drywall. Avoid stripping brass screw heads and other delicate fasteners by setting the clutch to disengage before any damage is done. A setting at the end of the clutch scale allows for instant switching from clutch control to full torque for boring holes.
A ratcheting keyless chuck is a standard feature for most cordless drill/drivers. The chuck consist of a collar that turns to tighten a metal sleeve around a drill bit shank. The collar can be turned by hand to loosen and tighten the chuck, eliminating the need for a chuck wrench. The ratchet feature keeps the chuck tight around the shank for less slipping as the bit meets resistance.
Chuck size will be either three eighths or half inch for most cordless drills. A 3|8's chuck may limit the choices for drill bits and other attachments although many attachments will have a reduced shank to fit the smaller chuck.
Variable speeds are another standard feature on these drill/drivers. Speed is varied by depressing the trigger switch to varying degrees. Usually there will be two speed settings averaging 0-400rpms and 0-1,400rpms. A slide switch on the back or side of the tool switches between the two.
Use low drill speeds for boring holes in metal, ceramics, plastic, and for starting screws or using large attachment. Also, use low speeds when high torque is needed and whenever boring large holes or holes in hard materials. Use high speeds for soft materials like wood and whenever using small drill bits. High speeds should also be used for sanding and polishing attachments.
Although variable speeds are a standard feature, drill manufacturers recommend limiting the use of low speeds for extend periods because of the heat build-up in the motor which will shorten tool life.
Torque ratings for NiCd and NiMH powered drill/drivers start at about 200in.-lbs. for a 12 volt tool and up to about 500in.-lbs. for the larger models. All these drill/drivers are reversible to spin clockwise and counter-clockwise. Use the reverse direction to remove screws and for backing a drill bit out of a jamb. This can be a life saver for small bits that can break easily when binding becomes a problem.
Choosing a Drill/Driver
Choose the smaller 9.6 to 12 volt model drill/driver for most do-it-yourself and home uses. A cordless tool of this size will have a 3|8's chuck and can handle most requirements around the house. Drive 3 inch screws and bore holes in 2x4's easily. Hanging drywall will be no problem for this tool.
The next step up the power scale is the mid-range 14 or 15 volt model. These larger models may have a 3|8 or 1|2 inch chuck. These will hold their own on most construction jobs. With increased torque over the smaller drill, boring through framing and concrete, driving long screws, and other more difficult tasks are made easy.
High torque, 18volt cordless drill/drivers and hammer drills are the top of the heap when it comes to power for NiCd and NiMH powered tools. Chuck size for these tools is half inch as opposed to the three eighths of the smaller sized models. These tools are the best choice for serious construction projects where boring large holes and driving lots of screws is typical.
Weight and balance should be a consideration when choosing a cordless drill/driver. Because of the weight of the battery packs for these tools the design and placement of the power source will have an impact on ease of handling. Hand fatigue can become a problem if the battery weight pulls on the user. Most manufacturers deal with this problem well using the battery weight to counter the weight of the motor and other drill parts.
Look for a battery pack that is streamlined in design to avoid problems when working in tight spaces. Most manufacturers consider this issue in their tool design, however a large 18 volt drill/driver may require a battery pack that is simply too large for tight spaces.
It can be very helpful to have a compact 9.6 or 12 volt model in addition the larger one if you plan to do many and various projects using your cordless drill/driver.
Drill Press
The drive system of the drill press consists of a motor, a pulley system, a spindle shaft, and an adjustable chuck. Work is drilled from above by lowering a spinning bit in a smooth, controlled, perfectly straight stroke. A recoil spring pulls the spindle shaft back to start again when handle pressure is released.
A drill press is indispensable for projects requiring multiple, accurately bored holes but it will also make many drilling job much easier. Use one to bore holes at an angle or at any depth. A stop adjustment on the bit spindle allows for adjusting the stroke of the bit to stop at any desired depth. The attached table tilts, in some cases, both directions, and has a scale for setting precise angles of tilt from 90 to nearly 0 degrees.
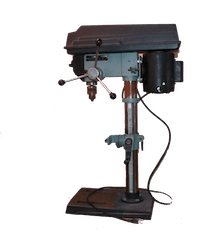
Add jigs to the drill press to use it as a mortising tool, drum sander or polisher. Both bench and floor models are available from most manufacturers with the bench models usually the more affordable.
Features
The stroke of the drill press (the distance the bit head will travel up and down) is adjustable so a specific depth can be set. A dial on the spindle assembly is used to set the depth and can make incremental changes as required.
The tool's motor is mounted at the back and attached to varying sizes of pulleys (a stack of at least three sizes for 3 speeds). A drive belt, similar to a car fan belt, is used to transfer the motor torque to a second set of pulleys attached to the spindle shaft which is attached to the drill chuck. The drill chuck holds and spins the bits and other attachments.
The pulleys are reversed at both points so that the bottom pulley on the motor is the smallest of the set and the bottom pulley on the chuck is the largest of that set. With this arrangement, the drill speed can be varied by moving the belt up and down between the pulleys, with the slowest speed being at the bottom and the fastest speed being at the top of the pulley stack.
The number of speeds a drill press has depends on the number of pairs of pulleys. Five speeds is typical and versatile enough for most requirements. Adjusting the speeds requires releasing tension on the motor and retightening after moving the belt. Fortunately, the tool is engineered to make shifting the motor simple and easy. With several different speeds it's possible to drill nearly any material and any size hole.
Choose Boring Speed
Use low drill speeds for boring holes in metal, ceramics, and plastic or when using large attachment for sanding or shaping. Also, use low speeds when high torque is needed such as when boring large holes. Lower speeds will also help limit heat when boring hard materials or plastics like plexiglass.
Use high speeds for soft materials like wood and whenever using small bits, 1/16th inch or so. High speeds can be used with polishing attachments to improve results.
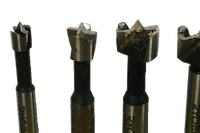
Forstner Wood Boring Bits
To join woodworking project with screws, a forstner bit can be used to drill a perfectly round, smooth hole. After the screws are installed, the hole can be plugged for an invisible fastener. Also, use a bit like this to install hardware and other elements in woodworking projects to be painted or stained.
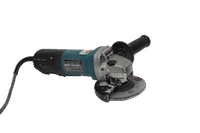
Grinder
This hand-held grinder can be used to hone down metal, ceramic, concrete, and other masonry, or to rough cut nails and screws that have degraded and don't function properly anymore.
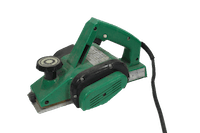
Hand Planer
This planer is best used to remove small amounts of wood at a time. Care should be used to avoid gouges which can occur easily if too much wood is removed at once. Using this planer first, and then following with a belt sander can be an effective way to remove unwanted wood from sticky doors and the like.
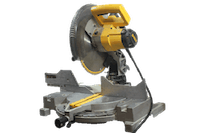
Miter Saw
Make fast, accurate crosscuts and miters for trim molding, cabinetry, frames, and furniture making. A large miter saw can also make wall framing and other rough carpentry project easier and more accurate.
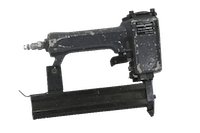
Pneumatic Nail Gun:
An air compressor with a regulator is required for this tool. Drive nails and stables instantly. For big framing projects this tool makes the job quick and easy. For fine work like molding installation a pneumatic nail gun drives brads and sinks them without marring the wood surface.
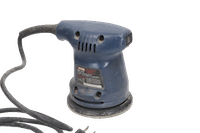
Random-Orbit Sander:
Sands in all directions for a consistently smooth finish. Keep the sander moving at all times to avoid leaving gouges in the wood. Also a good choice for auto body finishing.
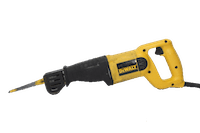
Reciprocating Saw:
Make quick, rough cuts of plaster lath, wood, and metal framing to demo walls. Metal and wood cutting blades are available for this saw ranging from 4 to about 12 inches. To demo walls, drill a pilot hole first to allow for inserting the blade and then begin cutting. Press the base of the saw firmly against the surface you're cutting while operating the saw and watch for the tip of the blade hitting nearby surfaces as it moves in and out.
High-Speed Wood Routers
A wood router is a very versatile tool for cutting and shaping wood. With a high speed (20,000 to 28,000 rpm) wood router, a few carbide tipped bits, and some specialty or shop-made jigs you have a tool that will cut almost any wood working joint.

Cut dados, rabbets, dovetails, tongue and groove joints, and mortise and tenon joints, as well as decorative shapes in wood for handmade molding and signs. In fact, many of the jobs in the wood shop can be done with a well accessorized router.
Portable wood routers include plunge and fixed base (pictured) types. A plunge router allows for setting the router base on the wood to be cut before engaging the bit. This enables more control of the router, minimizing the kick-back effect that occurs as the high speed bit hits the wood.
A plunge router is a must to cut handmade signs and other cut-out jobs. A fixed base router may be more rigid but it is fixed, meaning there's no need to keep the bit engaged in the wood manually, which can be difficult at times. The base position of the fixed model is adjustable for varying depth of cut. A dial system with a scale attached is used to set the depth accurately.
Router bits are locked into the tool by threading a nut over a collet, forcing it to tighten around the bit shaft. Collet sizes are usually 1|4, 1|2 or 3|8 inches, although some routers have adapters for more than one. Choose router bits with shafts that match the collet size of the router.
Accessories for tapping the full range of router capabilities are seemingly endless. Many shop-made tools and jigs have been devised for use with a portable router. Probably the most useful is the router table.
A router table is built by mounting the router upside down under the table top so that the bit extends through a hole in the center. With this configuration the router cuts from the bottom of the wood like a shaper. The addition of a fence to aid in guiding wood work makes the router table complete. When using large bits such as the ones available for cutting raised panel doors, a router table is a must.
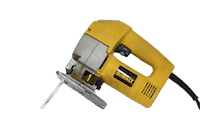
Saber Saw:
Cut curving lines to make circles and other shapes for decorative wood projects. Also called a jig saw, this tool can be used to cut all types of materials from metals, to PVC, to fiberglass.
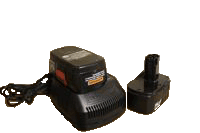
Cordless Tool Batteries
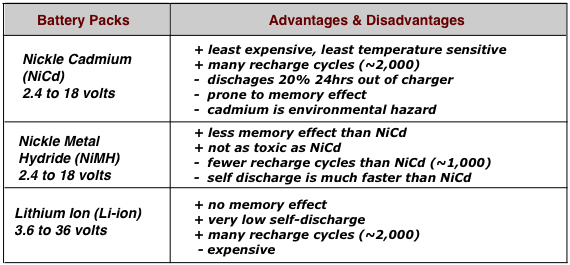
Until around 2010 or so there were three choices when it came to battery packs for cordless power tools. The first of these to be developed when cordless tools first became widely available was the Nickel-Cadmium (NiCd) battery. The second, coming along at about the same time was the Nickel-Metal-Hydride (NiMH) battery. The third and best rechargeable batteries on the market, the Lithium-Ion (Li-Ion) battery started to become more popular and available several years later.
NiCd and NiMH battery packs supply voltages from 2.4 to 18 volts and were used exclusively to power cordless tools like drill/drivers, reciprocating saws, and small circular saws for sometime. As an alternative Li-Ion batteries were developed to provide more voltage and longer life for cordless tools with voltages up to 36 volts for the best tools of the time. Higher voltage translates to higher torque making it possible to build cordless power tools that rival or surpass the performance of some corded power tools.
Rechargeable Battery Packs
Battery packs for cordless tools are built using several individual cells wired together in a series, similar to an electronic device where 2 or more AA or AAA batteries are joined together to supply the needed voltage.
Adding the voltage of each cell, many voltage levels can be achieved. Individual NiCd and NiMH cells supply 1.2 volts each. Ten of these cells wired together make a 12 volt battery pack (10x1.2=12). Eight cells make a 9.6 volt pack, 12 make 14.4 volts, etc.
NiCd and NiMH power tool battery packs are limited to about 18 volts due to the cumulative weight of the cells. The 15 cells required for an 18 volt NiCd/NiMH battery pack is about the limit for manageable tool weight. Li-ion batteries changed all that. Because lithium is much lighter than NiCd and NiMH the cells are much lighter, allowing for more cells in a battery pack. This translates to higher voltages and more torque for cordless power tools. Li-ion cells supply 3.6 volts each. Ten of these cells wired together provide 36 volts which was the maximum Li-ion battery pack available at the time. Today most Li-ion power packs top out at 40 volts.
It took several years but Li-ion batteries have made NiCd and NiMH batteries obsolete. Today it's virtually impossible to buy a new cordless tool with NiCd or NiMH battery packs. Although Li-ion is more expensive and is in finite supply, the advantages for powering tools have driven makers to abandon the older options for rechargeables altogether. The problems associated with NiCd and NiMh batteries and their extra weight have made them a much less attractive technology.
Memory Effect
NiCd and to a lesser extent NiMH batteries can suffer from memory effect due to repeated discharge/recharge cycles at the same level each time. This creates a sudden voltage drop each time the battery reaches that level. This was a common problem with cell phones and other electronic devices that are operated for the same period of time repeatedly. Because power tools are operated at various levels through out the discharge period, memory effect is not usually a problem. Some chargers have an equalizing mode that reconditions batteries that have developed memory effect.
Another effect found with NiCd batteries known as "lazy battery effect", occurs with repeated overcharging. This effect is evident when the battery is removed from the charger fully charged but discharges quickly after brief use. This effect can be reversed with repeated deep discharge cycles. The charger maintenance cycle will recondition batteries with this problem.
Chargers and Charging
All rechargeable battery packs for cordless tools have special charging needs. The charger that comes with the tool should have functions to control temperature, charging speed, and maintenance of the charge level. One hour chargers are the standard for most makers, however 15 minute chargers and 12 volt automobile chargers are also commonly available. Ambient temperatures should remain between 40° and 105°F while charging NiCd and NiMH batteries, otherwise battery life can be reduced.
Likewise, Li-Ion batteries should only be charged when temperatures are above 40 degrees and it's critical that they be allowed to cool before moving them from tool to charger if you want them to last. Li-Ion battery packs include electronic circuitry built into the casing that monitor many aspects of the battery's condition while charging to ensure, among other things, that they don't overheat and possibly explode. Also, these packs should be keep at a minimum charge level of about 40% when kept in storage for extended periods of several months. Otherwise, the cells reach a depletion point where they will no longer accept a charge and must be replaces. To keep them in top condition, put the pack into the charger every 30 days or so to top the charge level off while not in use.
Below is a comparison chart for the three types of cordless tool battery packs.
