How to Paint Faux Stone
by: Dale Cox
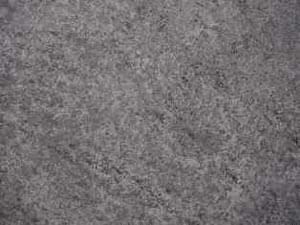
Using the process described on this page you can apply a faux stone finish to just about anything around the house. With just two or three glaze colors you can simulate real stone like granite on household objects like vases, picture frames, and even furniture.
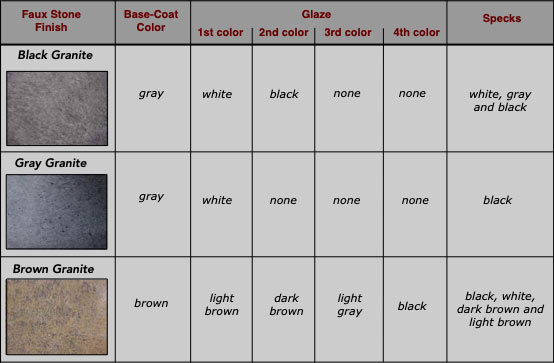
Natural granite can be found in a few different colors in nature: gray, brown, and black shade are common and we use those for the projects described here. The gray stone finish is the simplest to do with just two colors involved. The brown finish is the most complex, requiring five different colors of paint and glaze to create. All these finishes are easy to simulate, just follow the chart below and apply the colors in the order and density called for.
What You'll Need
#1 - Prepare Your Surface
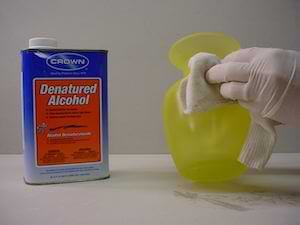
Start the process by preparing and priming the surface as described in the following list. It's best to tint your primer to the same color you will be using for the base coat so coverage will be easier. For the base coat an eggshell paint finish will most closely resemble real stone. Either latex or oil-based paint can be used for base coating but latex will be easier to work with. For shiny stone like polished granite, a clear coat of shellac or varnish can be applied after the faux painting is done to complete the effect.
- Ceramics and Glass: prepare these surfaces by wiping with denatured alcohol to clean it. Apply a coat of primer-sealer followed by an alkyd-based eggshell or semi-gloss base coat. Allow each coat to dry according to the label directions. Don't use latex on these hard, slick surface, it will peel very easily and ruin your faux finish.
- Metal: remove any rust from the surface using steel wool or a wire brush and then prime the rust spots with a rust inhibiting primer. When the primer is dry, apply an alkyd-based eggshell or semi-gloss base coat. Allow 24 hours for drying. Latex paint is not a good choice for metal surfaces, it tends to encourage rusting.
- Plaster and Drywall: remove any peeling paint and repair any water damage or other major blemishes. Prime any new repairs with flat latex paint or primer then base coat with two coats of eggshell or semi-gloss latex paint tinted following the instructions in the next section. See Drywall and Plaster Repair for more about wall prep.
- Plastic: plastic doesn't typically hold a painted finish well but for plastic objects that won't see high traffic like vases or picture frames, a faux finish can be applied. Prime plastic with a general purpose spray paint and use it as the base coat as well. There are also spray paints made specifically for plastic that will work too. A gray color will do for most of the finishes on this page. For the others use a light brown color.
- Wood: remove any peeling paint from wood surfaces, sand the finish, and apply a latex or alkyd primer to any bare wood. Allow the primer to dry and apply a latex base coat tinted following the instructions in the next section.
#2 - Mix the Glaze and Paint Colors
Painting glaze, also called extender, is used to create the stone effects on this page as well as all the other faux finishes on this website. For the projects described here we use latex glaze and mix it with latex paint. If you choose to use an oil-based glaze, be sure to only mix it with oil-based paint. The colorants you will need for all these stone finishes are available at paint stores and include: lamp black, raw umber, and burnt umber. These are used to mix the primer, the base paint, and the glaze. Colorants are usually universal and can be used for either latex or oil paint but check any you buy to be sure this is the case.
Choose your finish using the chart below and then mix all your colors in plastic cups or other containers that can be covered easily to keep them from drying out. You will need several different shades of paint and glaze depending on the stone finish you are creating. Before mixing, mark each cup with the color it contains.
For a small project like a vase or planter only a small amount of each color will be needed. For each glaze color, add to your container: ½ cup of the mixing glaze, a tablespoon of white paint, and a quarter cup of water. Mix these together well and then add the colorant in the following quantities for the color you want:
- Light Gray— ½ teaspoon raw umber
- Dark Gray— ½ teaspoon lamp black
- Light Brown— ½ teaspoon burnt umber
- Dark Brown— 1 teaspoon burnt umber
- Black— 2 teaspoons lamp black
- White— add no colorant
To the base paint containers add half cup white paint and then colorant in the following quantities:
- Gray— ½ teaspoon lamp black
- Brown— 1 teaspoon burnt umber
Color Chart to Simulate Stone
#3 - Base Coat Your Surface
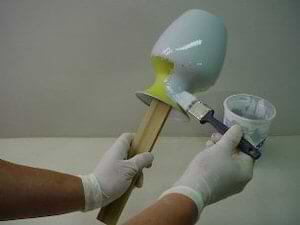
For each of the stone finishes described here you will need to apply a base coat of the proper color paint. While you're at it, base coat a piece of cardboard or simular material to use as a test board to practice your technique before applying it to the surface. For the brown granite project on this page use the brown paint to base coat and use the gray paint for the black or gray granite finish.
#4 - Fill the Sponge and Practice Your Technique
When the base paint is dry, apply the glaze colors in the order listed in the above chart. Apply each color using a natural sea sponge and the techniques described below. The steps to creating a black granite effect are covered here but the same techniques should also be used for the other stone finishes in the chart.
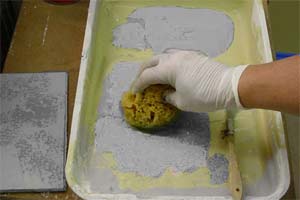
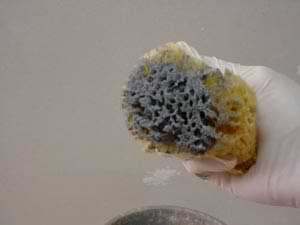
Start by submerging the sponge in a cup of clean water and then wring it out well to remove all the excess. Dry the sponge repeatedly on a clean, dry rag or paper towel before dipping it into the glaze to avoid adding any extra water to the mix.
Pour some glaze into a paint tray or other container and dip the sponge into the pool. Squeeze the excess out and swirl the sponge around on the tray surface or a practice board to distribute it evenly.
Use the test board to practice your sponging technique before applying it to your project. With the sponge held as shown, dab at the board, touching the surface lightly and lifting it immediately in a light pouncing action. Avoid rocking or dragging the sponge while it is in contact with the surface.
Try to leave a semi-dense impression of the sponge texture on the surface while still allowing the base color to show through. If the glaze runs as it's applied, immediately wipe it off with a clean, damp rag. Dry the sponge thoroughly on a paper towel and try again. When you have the technique right, move to the project.
#5 - Apply the First Glaze Color
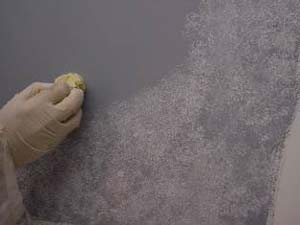
To create a black granite finish, first base coat with the gray paint and let it dry completely. Next, apply the white glaze with the sponge so it mostly covers the gray base paint while still allowing some of it to show through. Work across the surface in a random pattern and dab repeatedly if necessary to get a consistent coat of white without too much buildup in one place or too little glaze in others.
Let the white glaze dry on the project for a half an hour or more. You can also use a hairdryer on the cool setting to speed up drying if you're pressed for time. Be careful not to heat the surface too much with the dryer though.
If you're using just one sponge, before it dries, rinse it out with plenty of water until all the white glaze is removed. Dry it on a clean rag or paper towel before proceeding with the next glaze color. If you have a second sponge available, as with the first, saturate it in clean water and remove all the excess before filling it with glaze to apply the next color.
#6 - Apply the Second Color
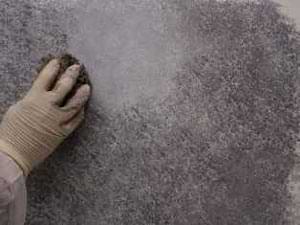
When the white is dry, apply the black glaze using the same method. This time though, use a lighter touch with the sponge to apply only a slight texture that allows the underlying colors of the base coat and white glaze to show through. Work across the surface in a random pattern but don't overlap where you've already touched.
Let the black glaze coat dry completely before proceeding with the speckling. Be sure to promptly rinse all the glaze out of your sponges before it can dry and set them aside for future projects.
#7 - Speckle the Finish
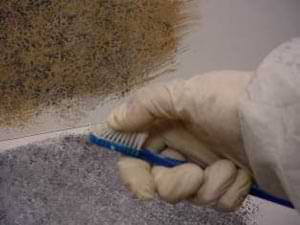
To finish this effect use a toothbrush to spatter the finish with specks of white, gray, and black glaze. Pour about a tablespoon of each color into separate mixing containers and add a tablespoon of water to each; mix thoroughly. Dip the toothbrush into the glaze and wipe any excess from the handle to avoid dripping on the finish.
Hold the toothbrush as shown and run your thumb across the bristles several times to remove the excess glaze. Next, practice spattering on the test board until only tiny specks are produced and then move to the project. Hold the toothbrush above the surface and let gravity assist to evenly distribute the specks. Spatter the project with the darker colors and move to the lighter ones. Each color does not need to dry before applying the next. Allow the finished project to dry overnight before applying a clear finish such as shellac or varnish.
Use the same methods to create the other stone colors from the chart. Apply the colors in the order called for and let each dry completely before going to the next. Apply each new glaze coat a little less densely than the one before, allowing more of the underlying colors to show through.
 Faux Painting Glaze