How to Repair Wood-Lath Plaster
by: Dale Cox
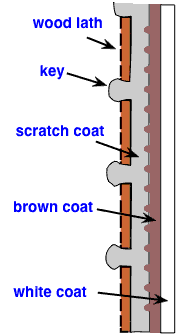
This page contains instructions for repairing and restoring old, damaged three-coat plaster. With this type of plaster, three different types of mud are applied over a lathing material to build up a smooth wall or ceiling finish.
With wood-lath plaster there are two basic components: the wood strips that make up the lath and the wet mixtures of plaster that create the hard, smooth wall surface. The wet plaster is made up of three separate components: the scratch coat; the brown coat; and the putty coat, also called the white coat.
The first wet coat -the scratch coat- is a mixture of sand, Portland cement, and some filler material such as horsehair. This mixture is applied over the lath and pushed into the gaps between the wood strips to form a key that locks the two together. While the scratch coat is still wet, it's roughed up with a stiff brush to leave scratches in the surface. This makes the next coat -the brown coat- adhere better and creates a strong bond between the two.
The brown coat is made up of the same basic ingredients as the scratch coat and it's applied in the same manner but the surface is left smooth to help make the next coat -the white coat- easier to smooth and level. The white coat consists of plaster of Paris and lime mixed together to create a hard, smooth finish when it sets. Because plaster of Paris is hard to work with and tends to crack easily, it isn't used much any more. Instead materials like setting-type joint compound are now used for repairing plaster white coat.
There are 4 possible types of plaster lath: wood, wire mesh, gypsum board, and masonry like brick or concrete. More than anything else the type of lath in the plaster will determine the difficulty involved in repairing it. Wire mesh lath can be replaced with new mesh which can be difficult. Masonry can be restored -which can require special skills- to repair damaged lath. Gypsum-board plaster is basically the same as drywall but with a thick white-coat covering. The methods for repairing it are relatively easy and basically the same as repairing water-damaged drywall. Repairing wood lath, as described on this page, requires replacing the wood strips or using drywall as a substitute for the original lath.
#1 - Gather Plaster Repair Materials
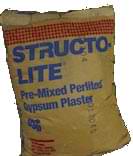
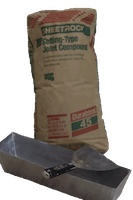
A product called structo-lite is commonly used to restore plaster scratch coat and the brown coat that follows. This product does not set quickly so it can be worked for a couple of hours or more before it becomes too stiff to use.
There are a number of products available for replacing damaged white coat. For the best results we recommend using a setting-type joint compound, also called mud. This product will set to a smooth, hard plaster-like finish that won't shrink. Because it sets quickly, several coats can be applied the same day to build up a smooth surface. In addition, this type of joint compound is sand-able and can be painted immediately after it dries.
Plaster of Paris is also available for repairing white coat but we don't recommend using it. Real plaster of Paris is very difficult to work with and weather conditions like humidity levels will greatly effect its performance. It also sets far too quickly for most do-it-yourselfer's to use before it hardens. In addition, it must be mixed precisely or cracks will form as it sets. Once set, it cannot be sanded at all and it must cure before painting. Curing can take 6 months for the alkali in the plaster to leach out before any finish can be applied.
What You'll Need
- Putty Knife
- Drywall Joint Knife
- Mud Pan
- 2x3ft Concrete Mixing Tub
- Wood Strips
- Setting-type Joint Compound
- Plaster Scratch/Brown Coat Mix
#2 - Repair the Lath
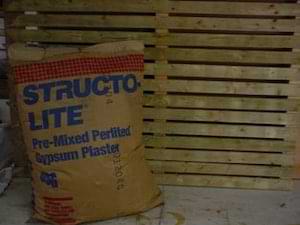
If the lath is damaged, start the repair by restoring it. For wood lath, nail 1½ inch wood strips such as lattice molding to replace the damaged wood. Leave a gap of 3/8ths to 1/2 inch between each strip. As an alternative, drywall may be used to replace the damaged wood. Attaching a piece to substitute the missing lath strips can be easier and make the overall repair process go faster. It should be noted that using drywall to replace damaged lath may not work if the depth of the repair isn't sufficient to bury the wallboard below the finished surface. However, drywall is available in thickness of 1/4, 3/8, 1/2, and 5/8 inches, so finding one that will work for your particular situation should not be too difficult.
#3 - Apply the Scratch Coat
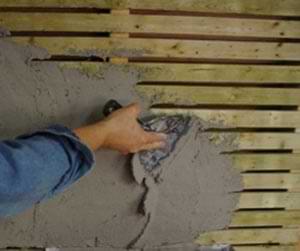
The next step is to apply the scratch coat. Use a tub to mix the structo-lite with water making a thick mud that holds its shape and doesn't slid off when applied to a vertical surface. Mix the whole bag at once for large repairs and just enough to fill the damage on smaller spaces.
Use a mud pan or a plaster hawk to work the scratch coat onto the wall. For larger spaces the mixing tub itself can be used to transfer more mud, easier. For ceilings use a hawk to hold the wet plaster and push it onto the surface with a trowel. Collect the mud into a pile, and holding the hawk pressed against the bottom of the wall, push the mud up and spread it over the wood strips. Push hard enough to press the coating between the wood strips to form a good key but not so hard that it's pushed completely through the lath.
Apply the scratch coat to fill the area to about ½ deep. While the mud is wet, use a stiff brush similar to a wallpaper brush to make shallow scratches in the surface. Let the mud set until it hardens and mix another batch of the structo-lite to apply the brown coat. Spread the mud to build up a coat that fills the void in the damaged plaster to just below the surface of the surrounding wall or ceiling. Leave about an eighth inch of space to be filled with the white coat.
#4 - Apply the White Coat
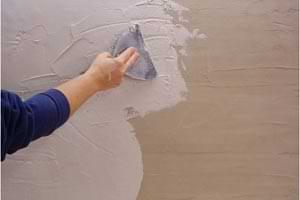
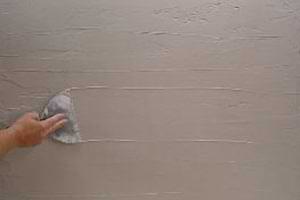
Let the structo-lite sit overnight and set to a hard finish before applying the white coat. Mix the setting compound a little at a time. This product will harden quickly so don't mix more than you can use right away. Use a ratio of approximately 1 part water to 2 parts powdered compound. Try to produce a mud that will hold its shape when held upside down on a joint knife. If necessary, add more powder or water as you go to get the right consistency. See Skim Coating Techniques for more on mixing and handling mud.
Using a small joint knife, apply the setting compound over the brown coat to achieve an even coat that levels the damaged area with the surrounding surface. Ignore any ridges in the mud surface left by the edge of the knife blade. If necessary, use a straight edge as described here to keep the mud level with the surrounding wall surface. Don't try to smooth out the area with this first application of white coat. It will require a couple more to build up a smooth, finished wall. Allow the mud to set for about an hour or until it hardens.
#5 - Skim Coat to Finish the Plaster
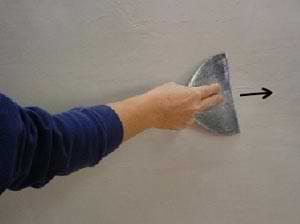
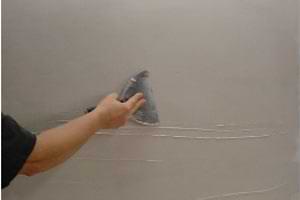
When the first white coat has set, use the joint knife in an upward stroke to shave off the ridges left by the blade edge and any other protrusions in the surface. Mix another batch of setting compound and apply a thick coat over the the first. Again, use a straight edge to level off the surface if necessary. Otherwise, use the skim coating techniques described here to smooth the surface.
In most cases, it won't be possible to smooth the surface with just these two applications of the white coat, it could take 2 or 3 more to do the job. Follow the same procedure to apply as many subsequent coats as needed to to build up a smooth, finished surface. Allow each coat to set until hard and scrape off any ridges in the surface before applying another.
When you're ready to apply the final coat, use ready-mixed joint compound for a smoother finish and to make final sanding easier. When the final coat has dried completely, sand the surface smooth with medium 120 grit sandpaper. The surface can then be primed and painted to finish the restoration.
 Repair Loose Plaster