How to Do Faux Painting on Walls
by: Dale Cox
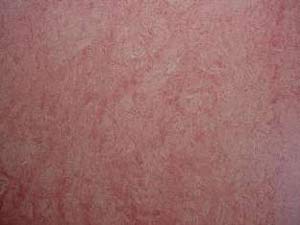
The faux painting technique demonstrated here involves the use of craft paper to manipulate the wet glaze. These finishes are a great alternative to wallpaper and a good choice for large wall spaces.
Other materials may also be used for this process like a crumpled rag or plastic sheeting. Craft paper is easier to use than these other options because it can be more readily controlled and it can be reused over the wall.
What You'll Need
#1 - Prepare the Surface and Applicators
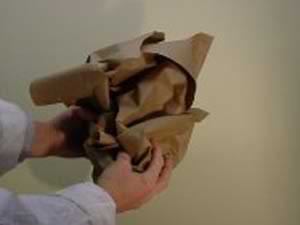
See these instructions for surface preparation, base coating, and mixing glaze if you need help with those steps. Mask ceilings and around trim moldings like door casing and baseboards to keep the glaze off of those places. Use two strips of 1½ inch painter's tape to create a wide border around the project. This will prevent any accidental stains that could be hard to remove later and would distract from the finished effect.
This faux finish requires that the glaze be apply first with a brush and roller and then some of it removed or "pulled-off" to create the effect. Craft paper is used for this purpose. The paper is laid over wet glaze and a dry brush is used to sweep over the surface, pressing it into the glaze. When the paper is pulled away again, it will remove some of the glaze and color. You may want to test this technique before doing it on the walls. Although, because this finish is easy to rearrange once it's on the wall, you could start there and "practice" as you go.
Cut craft paper in sheets long enough to cover the whole wall from floor to ceiling. Crumple the paper into a ball and spread it out again. The tighter the ball, the finer the finished pattern will be on the walls. If you want a lot of fine, small lines in the finish, ball the paper tightly. If you want a more open pattern, ball it lightly. Plan to do one wall at a time so you won't have to stop in the middle. Prepare all the paper you will need at once and set it aside before beginning with the glaze.
#2 - Roll the Glaze Onto the Wall
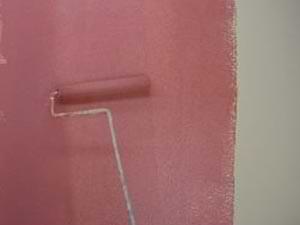
Work on one, manageable section of wall at a time and brush around the corners at the ceiling and trim. Work out 3 or 4 feet onto the wall to start. Lightly fill a 3|8 nap roller and roll the wall space from ceiling to floor. Roll up and down several times to spread the glaze out leaving a thin, even coat. Along the leading edge, roll a border of extra thick glaze, about 6 inches wide. This will keep the edge wet and make it possible to blend the effect into the next wall section to continue the process.
#3 - Pull Some Glaze Off with the Paper
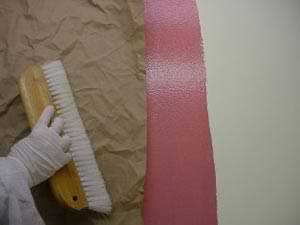
Spread out one sheet of the crumpled paper and lay it over the glaze starting at the ceiling. Butt the squared edge of the paper against the ceiling and any adjoining wall corner or trim molding. Let it flow down toward the floor and lightly hold it in place with one hand while using a dry brush to gently sweep over it, pushing the paper creases into the glaze surface. Work down the wall with the brush, letting the paper fall out and off from the top as you go. At the bottom let the paper fall to the floor.
#4 - Evaluate the Faux Effect
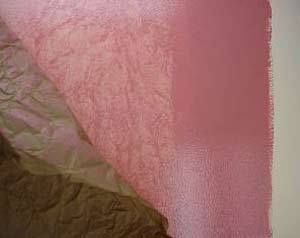
Examine the pattern on the wall. If you're happy with it, move on to finish that section using another piece of paper or if it isn't too saturated with glaze, you can use the same piece of paper again.
If you're not happy with the finish and you want to remove more color or change the pattern, you can lay the paper back in place and starting at the top, sweep over it again to pickup more glaze.
If the paper removed too much color, immediately add more glaze with the brush and roller, going over the whole 3-4 foot section. Try the effect again using a lesser degree of crumpling with the paper to leave more of the color on the wall. When you have the effect you want, do the remainder of that section but don't go into the thick glaze at the leading edge. You will need that untouched to blend it with the next section.
#5 - Start a New Section of Wall
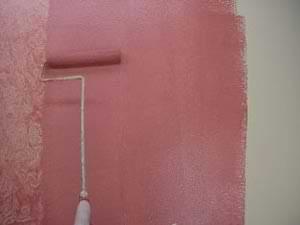
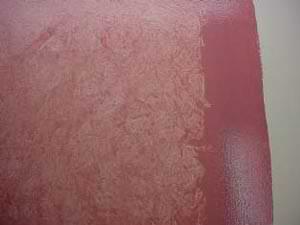
Starting at the thick edge, roll out another 3 or 4 foot section of wall. Go up and down over the wall repeatedly and roll back into the thick glaze to spread it out and blend it into this new section. At the end of the new section, leave another thick leading edge of glaze to blend into the next section.
Spread out a new piece of paper and lay it over the glaze, overlapping the first section by a couple of inches. Use the same techniques as with the first section to manipulate the glaze and continue the pattern. Pay extra attention to the area where the two sections meet to create a smooth transition from one to the other.
Move across the wall like this, a section at a time, to the next corner. For more control, use a small piece of paper at the corners to blend the finish from one wall to the next and along the ceiling and baseboards for a consistent overall pattern. At the next wall crumple more paper and begin at the corner to continue the effect around the room.
Making Adjustments to the Glaze Pattern
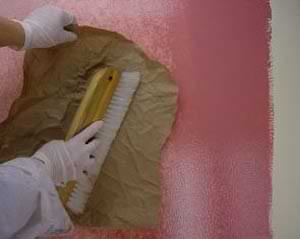
If you want to change the finish to create a different pattern or redistribute the glaze, do so before it can dry. Tear off a small piece of the paper you just used and hold it over the wall while sweeping over it with the brush. This will move the glaze around and allow you to produce the pattern you want. Because this effect is so random, you can manipulate it repeatedly adding more color here and removing it there to "sneak up" on the final effect you want.
After the glaze is dry you can add a second, third or even forth layer using a different, complimentary or contrasting color to create a faux finish with more depth and interest. Also, try adding a sponge painting process over this effect for more variety and originality in the finish.
 Mixing Painting Glaze