DIY House Painting Preparation
by: Dale Cox
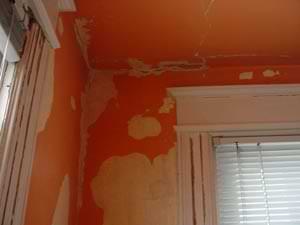
Preparation is arguably the most important part of any paint job. Whether inside or out, if you apply new paint over peeling surfaces, stains, or dirt, your new work won't look good and it won't last. This page contains tips and techniques for preparing surfaces including: drywall, plaster, wood trim moldings, and exterior siding for painting. Links are included to more detailed instruction for extreme situations like water-damaged walls and ceilings and repairing rotted exterior wood. Check here for a video demonstrating how to prep house siding for painting and
how to fill nail holes
#1 - Move Furniture and Cover Everything
Before preparing interior walls, ceilings, and trim for painting, first move all the furniture away from the walls and into the center of the room. You may also want to remove some smaller items such as chairs and the like to make more room to work. Cover the remaining furniture with a drop cloth to help contain dust and paint chips. Also, cover the floors around the perimeter of the room with canvas drop cloths. You can use plastic to cover the furniture but use canvas on the floors to prevent slipping when you walk over them.
#2 - Scrape and Sand
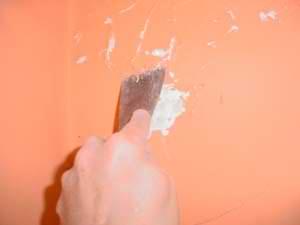
With everything removed or covered, the repairs can begin. First, scrape off all damaged or peeling paint and wall material from the wallboard. While you're at it, remove any nails or hardware that you won't be using again. Clear the debris and dust from the remaining holes. Use a putty knife to dig out everything that appears to be loose. Go around the edges of these damaged areas, pushing out with the putty knife blade to be sure you've removed everything that will come off. The goal is to leave only solid, undamaged surfaces on which to build the repairs.
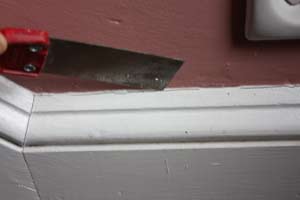
Prep trim molding by going around the edges where it meets the walls with the point of the putty knife to open any cracks there so they can be re-caulked. Also, use the putty knife to scrape off any loose, peeling paint on the flat surfaces of the moldings. Clear cracks between the individual moldings by dragging the blade through them several times. If you're working around windows or french doors with glass panels, use a razor blade scraper to remove any old paint from the glass.
Sand all the trim with medium grit sandpaper to slightly rough up the old paint and smooth out the edges where you scraped the peeling paint. If you're dealing with old latex paint, avoid sanding too hard or it will cut the coating and cause the edges to curl and peel. As a general rule, you can only really sand oil-based coatings to remove the surface. On latex, use only light pressure with fine sandpaper to just scuff the shine a bit.
#3 - Prime Everything That Needs It
Seal any stains from water, smoke, ink, etc. on the walls and trim moldings using a primer-sealer to liberally coat them. This is most important when preparing wall damage like peeling and bubbling paint for repair. These spots need to be thoroughly primed to seal any water or other contamination that caused it to peel.
After these areas have been repaired, prime all the patches using a latex primer or flat latex paint. If you're using flat latex for your finish, you can use it to prime the patches and save yourself a bit of work. If you're using semi-gloss or another shiny paint, you'll need to stick with a flat primer because the joint compound used for repairs will burn through shiny coatings causing flashing in the finish.
#4 - Repair Wall and Ceiling Surfaces
To do the wall and ceiling repairs, refer to: repairing cracks at this link, repair paint bubbling here, repair damaged drywall paper here, repair nail pops here, and repair water damage here.
When the repairs are done, sand all dry joint compound patches using a medium sandpaper. Vacuum the dust off and then wipe the patches lightly with a damp sponge or rag to remove the finest particles.
Before proceeding, pick up the drop cloths from the floor, folding them in toward the center to contain the dust, and carry them outside to shake them clean. Vacuum the dust from the floors and moldings, and then lay the drop cloths back down around the room. Prime the wall repair patches and let them dry.
#5 - Fill Small Holes in Trim Moldings
You can repair nail or screw holes in the trim molding in one of two ways. If the holes are large -more than about a quarter inch- repair them using the nail pop repair procedure and prime the patch with flat latex paint when it dries.
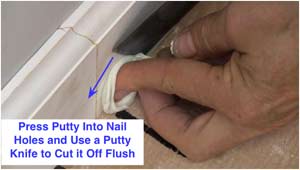
If the holes in the trim are smaller than a quarter inch, which is usually the case with nail holes, you can use painter's putty to quickly fill them. The putty requires just one application and doesn't need priming, making it a much easier solution for holes in wood trim.
To use this method roll a small, one inch ball of putty back and forth in your hand until it is soft and no longer sticky. You may need to add a bit of whiting to it to absorb the excess oil and make the putty more manageable.
When you're ready, use your finger to press the putty ball into a nail hole and hold it there. Slide a putty knife blade, in an upward motion, between your finger and the molding to cut the putty off flush with the surface. Press hard while doing this to fill the hole completely and get a smooth finish.
If the putty edges curl up, gently rub in an outward direction away from the hole to even it out. While rubbing it out, be careful not to press your finger over the hole to avoid creating an unwanted depression. If you mess up the putty in the hole, or if it doesn't fill the space evenly, press the putty ball into it again and cut it off with the putty knife. Repeat this until you get the smooth fill you want. Check here for a video demonstrating how to fill nail holes in trim using this method.
#6 - Caulk the Trim Molding
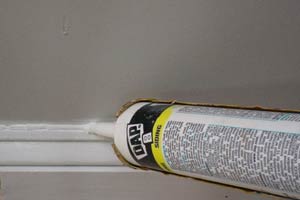
When the wall, ceiling, and trim repairs have been finished and primed, the caulking can be done. Use high-quality caulk to fill the gaps between wallboard and molding as well as the seams between the individual pieces of molding. Don't use a cheap caulk here, they tend to crack very quickly even if the label makes claims of 20 or 30 year durability. Use a high-end caulk like GE® Paintable Silicone Supreme.
Most cracks will be pencil thin but if you have cracks wider than about 1|4 inch, you will need to fill them with something else first and then apply the caulk to finish. You can use thin pieces of wood like MDF in some cases, or spray foam insulation works well to fill gaps and it will remain flexible to reduce the chance of future cracks developing.
Some cracks may require two applications of caulk to completely fill them. With wide gaps like this, build up the caulk on one side of the crack first. Let it set and then fill the remaining space with a second application. Let this extra thick caulk set overnight before trying to paint over it to avoid ruining the finish.
Preparation for Painting House Exteriors
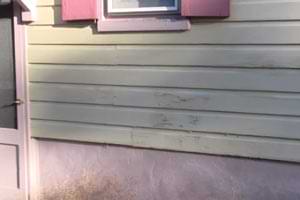
Before disturbing old exterior house paint, check to see if contains lead. If you find lead paint on your house, check this page for precautions to deal with it and avoid the health hazards associated with lead exposure.
Exterior painting is more complicated and labor intensive than interior painting. Exposure to sunlight, rain, cold, and heat is very stressing on the paint coating. Because of the extreme conditions, exterior surfaces require more extensive preparation, priming, and a durable paint coating to ensure a lasting finish.In addition to proper preparation, exterior surface will have to be in good repair before they are painted. If there are any breaks in exterior surfaces such as peeling paint, cracks, or rotting wood, water will certainly penetrate these and ruin the new paint finish very quickly.
About Peeling Paint and Water Damage
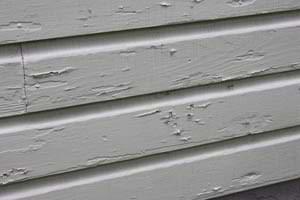
Peeling paint is the biggest problem with most exterior paint jobs. Paint will always peel if there are any contaminants between the house surface and the paint film. Contamination on exterior surfaces comes from a number of sources. Probably the most common is water but dust, rust, algae, mildew, smoke, and air pollutants can also cause exterior paint to peel if these contaminate a surface and are not removed or sealed first.
Moisture affecting exterior painted surfaces can come from within or it may be saturating the surface from the outside, as with rain or an overflowing gutter. In either case, the water source must be remedied before any prep and painting can begin. Water from within a wall usually will be coming from a leaky pipe, or rain water may backup in the gutter and run down the inside of the house siding.
Gutters are usually easily restored by removing leaves and other debris from them and the downspouts running to the ground. The downspouts will be harder to clean than the gutter, requiring some disassembly at the bottom to clear them. After you've done this once you will likely want to avoid it again by adding gutter covers that will block more debris from collecting. Some gutter covers work better than others so if you can afford it, you should go the extra mile and get a high quality system that works well, and will do so for years to come.
#1 - Scrape and Sand Peeling Paint
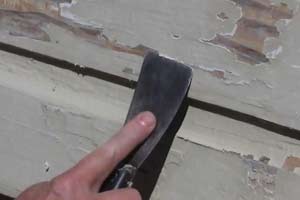
Start your exterior painting preparation by scraping all loose and peeling paint, putty, and caulk from the surface. Slip a putty knife under to lift off loose material and use a pull-type paint scraper to remove paint, etc. that looks loose but doesn't come free easily.
Lightly sand the edges of any bare spots created by the scraping with 120 grit sandpaper for latex paint, and 80 grit for harder, oil/alkyd-based paints. To determine the type of paint you're working with, try sanding it lightly with 120 paper. If you create dust by sanding the paint, it's oil or alkyd-based. If the paint balls up or flakes come away from the surface, it's latex paint. Because of this tearing away of the paint coat, don't sand too hard on latex paint. It will create a rough edge that will protrude when painted and encourage future peeling.
In addition to sanding to remove debris, you should also rough up any shiny paint like semi or high-gloss with a quick pass of the sandpaper. This will give the surface "tooth" and help the new paint to bond better than it otherwise would to the slick finish.
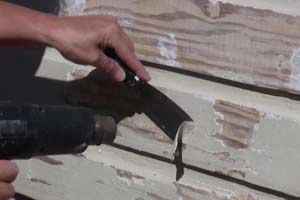
If you have old, oil-based paint on exterior wood, you may have some areas where the paint has come off completely and adjacent spots with lumps of old, thick paint remaining. In these cases, you can use a heat gun to force this stubborn paint off. Start with a low setting on the heat gun and slowly heat the paint by passing the tip back and forth over it. When the paint is soft, slip a putty knife under and scrape it off. Sand these areas well when you're done. Check here for a video demonstrating how to use a heat gun to strip paint.
#2 - Wash the Surface
After all the scraping and sanding has been done, wash the surface to be painted. Use a garden hose to rinse all the dust off the siding and then scrub it with a nylon brush or broom dipped in a cleaning solution of dish detergent and warm water. If you have a mildew problem, add a cup or two of household bleach to the solution before scrubbing.
For a more eco-friendly mildew treatment, instead of bleach, try spraying the surface with white vinegar and let it sit for a while before washing with the cleaning solution. An oxygen cleaner will also work to treat mild mildew problems and will be kinder to the environment. Just add some to the wash bucket instead of detergent and scrub with the brush. Refresh the oxygen cleaner and water frequently for the most effective cleaning. After washing, rinse the siding and let it dry completely before proceeding.
#3 - Prime All Bare Spots
With your clean, dry exterior surface you're ready to do any necessary priming, caulking, and repairs. Prime before you caulk or patch to ensure a good bond with the fillers. Use a top grade oil or alkyd-based exterior primer to be sure your new paint won't peel. Latex primers simply don't stand up well outside unless you get Mad Dog Primer which is considerably more expensive and harder to find than conventional primers available locally.
There's no need to prime existing paint that is still in good condition. Primer is only needed to bond to bare spots and block stains or water damage. Let the primer coat dry overnight before proceeding but don't let it stay exposed for more than a week before finish coating.
#4 - Caulk, Repair, and Prime Some More
Use a good quality latex/silicone blend caulk for cracks and let it cure overnight before applying your new paint coat. As mentioned for interior prep above, use only a high-end caulk like GE® Paintable Silicone Supreme. This is particularly important for exterior surfaces where caulk durability is really tested.
Be sure to caulk all cracks due to splitting wood, and joints around all trim like door and window casings. If you're painting the trim too, caulk any cracks between the moldings, such as where a door or window jamb meets the casing and along the sill apron.
Use an exterior spackling paste for minor repairs to wood trim and siding, and an epoxy filler for severely damaged and rotted wood. Let the patching material set according to the label directions and then sand it smooth. A sanding block or power sander will be needed to sand most exterior patching compounds because they become quite hard. When you're done, remove the sanding dust with a duster or vacuum and spot prime the patches before proceeding with the finish paint.
 How to Caulk