How to Repair Water-Damaged Plasterboard
by: Dale Cox
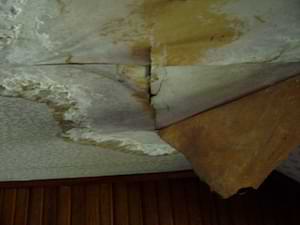
Repairing cracks and water-damage in old plasterboard is not very different from repairing newer drywall because the two surfaces are so similar. Both are constructed using boards of gypsum covered with a paper veneer. The difference is how they are finished to create a smooth wall surface.
With old plasterboard, the paper veneer on the boards is not intended to form the finished surface as with drywall. Instead, the sheets of gypsum form a foundation for the finished wall or ceiling surface. The joints between the sheets are not taped at all and a coat of white plaster is spread over the entire surface to form a hard, smooth finish.
Repairing cracks in these two types of surfaces involves the same basic process. With water damage, however, there are some differences in the repair process. To repair water-warped drywall check here, and here to repair minor water damage on drywall. The instructions on this page can be used to repair water-damaged and warping plasterboard.
What You'll Need
#1 - Remove the Damaged Plasterboard
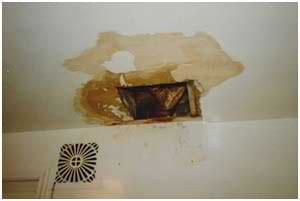
For the easiest repair, locate the nearest wood framing around the damaged area and cut the old plasterboard out along those lines. Keeping the patch area in a regular squared or retangular shape will make it easier to make a seamless repair.
In most cases, cracks will form along the seams between sheets of old plasterboard. This will happen over studs or joist and in the hollow spaces between the framing members. These cracks can be helpful in determining where to cut out the old plasterboard to install a patch.
Use a utility knife to score the lines around the patch area. Use a straight-edge if necessary and score repeatedly with a sharp blade until you cut completely through the old plasterboard. If necessary in hollow spaces, a drywall saw can be used to cut if a knife won't work. This can cause a lot of vibration that can damage areas not intended for repair, so it should be a last resort.
Be sure that cuts made over studs or joists are done along the mid-point of framing member so the surrounding plaster remains securely attached. Expose only enough of the wood frame, an inch or so, to attach the new wallboard. Remove any nails holding the old plasterboard in place and pull the damaged material free.
#2 - Scrape and Primer the Area
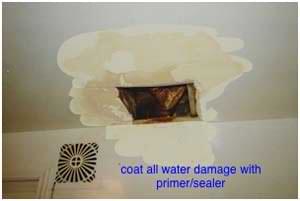
Scrape around the perimeter of the patch area to remove all loose, peeling paint and wall material. Use a shopvac to remove all the dust and debris and then wipe the surrounding surface with a damp rag to remove any residual lime and plaster dust.
Let the surface dry and then coat all stains and exposed plasterboard with primer-sealer.
#3 - Install a New Wallboard Patch
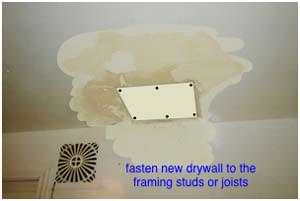
Cut a piece of drywall the same size as the patch area. Choose a thickness a little less than the depth of the surrounding surface to allow room to apply a finish coat of new plaster over the whole area.
Check the fit of the new patch board to be sure it doesn't sit higher than the surrounding finish and that it butts against the edges of the old plasterboard. Pay attention to how the new patch fits in the hollow area between the framing. If the new and old boards don't mate up at the same level, they will have to be tacked together. If the two mate up, the patch can be installed using drywall screws to secure it to the joists or studs and the joint compound can be applied.
If the new patch doesn't align well with the old plasterboard, use a 1x3 furring strip attached to the back of the boards on each side to draw them together. Cut a length of 1x3 to fit between the framing members. Place it behind the old plasterboard so half the width shows in the patch area. Hold it tightly with one hand while driving drywall screws through the wallboard and into the wood strip to fasten it in place. Use one screw on each end and every 8 inches or so along the remaining length. Install the patch board and after fastening it to the framing, fasten it to the furring strip over the hollow space to tie it to the old plasterboard.
#4 - Tape and Mud the Seams
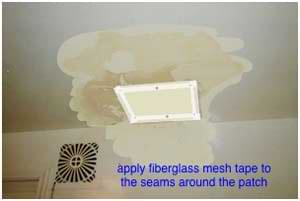
Tape the seams between the new patch and the old plaster using fiberglass mesh joint tape. Apply the tape so it follows the contour of the uneven joints and sticks flat to each surface. Taping these joints will prevent cracks from forming around the new patch.
Apply a thick coat of setting-type joint compound, also called mud, over the taped seams and skim off the excess working in crossing strokes to spread it out onto both surfaces. Use light pressure to avoid pulling the tape off but press hard enough to leave only a thin covering over the surrounding, finished plaster surface.
#5 - Cover the Whole Patch with Joint Compound
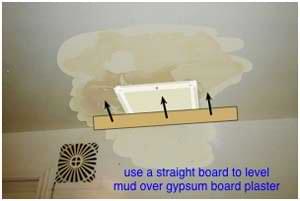
When the seams dry, lightly sand the tape fibers on the surrounding, finished plaster to knock them down or they may show through the next coat of mud. Remove any sanding dusts and apply another coat of setting-type joint compound over the whole patch to level it with the old plaster. On large areas, use a slow acting compound like Durabond90® to give yourself time to work.
Use a broad joint knife to apply a thick coat of mud that fills in over the patch and overlaps the surrounding surface. Immediately float the mud over the patch to level it using a straight edge like a 1x3 long enough to span the whole repair. Rest the board on the surrounding surface and draw it across the patch stopping to remove the collected mud as you go. Work across the patch like this to smooth out the surface and then go back over the whole area again in one complete stroke to smooth out any missed spots.
Around the perimeter, use the joint knife to skim the mud thinly so it blends with the old plaster. Let the mud set completely before proceeding. Ignore minor voids or ridges in the surface, they will be filled in the next application.
#6 - Smooth the Patch
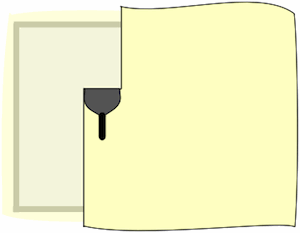
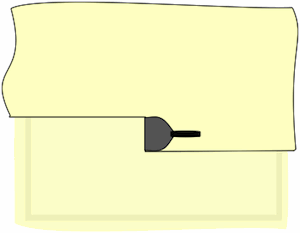
When the mud has hardened, scrape off any protrusions using the joint knife. Don't try to completely smooth out the surface here, just knock off any peaks or ridges in the mud. Around the edges of the repair, lightly sand to remove any tape fibers and blend the new mud with the old plaster finish. Brush or vacuum the surface and wipe with a damp rag to remove the sanding dust.
Apply another thick coat of mud over the whole area overlapping the edges of the previous coat. Immediately skim the excess mud off using a joint knife. Make parallel strokes across the patch using firm pressure with the knife. Ignore any ridges left by the edge of the blade.
Let the mud set and use the joint knife to shave off any ridges in the surface. If necessary, lightly sand to smooth around the edges and wipe off the dust. Use this process to apply as many subsequent mud coats as needed to build up a smooth surface over plasterboard patch.
With each coat, skim in the opposite direction from the one before. If you skimmed vertically the first time, apply the next with horizontal strokes. Reversing direction like this with each application will help eliminate any ripples or uneven surface.
Always overlap the edges of the previous coat of mud and skim it out as thinly as possible around the perimeter to make final sanding easier. For a smoother finish, ready-mix joint compound can be used for the final coat on a repair like this. Allow the final coat of mud to set and dry completely before final sanding.
#7 - Sand and Seal Again
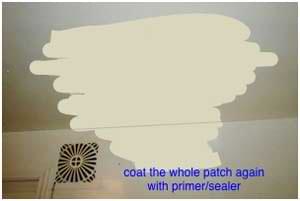
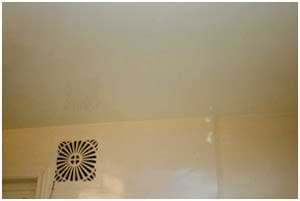
Sand the dry joint compound lightly with 120 or 220 grit sandpaper paying particular attention to the edges to blend them with the surrounding surface. Vacuum or brush all dust from the surface after sanding and wipe the area with a damp rag before priming and painting.
If you're repairing severely water damaged plasterboard, it's best to seal the finished patch with another coat of primer-sealer. If latex primer or paint is applied directly over this type of repair, a water stain may bleed through the finish.
Flat latex paint can normally be used on wall and ceiling repairs both as a primer and finish coat, but if a water stain appears after it has dried, a sealer will be required to cover it. In addition, a sealer coat will be required before using any glossy or oil-based finishes. Because of the risk of staining, it's best to avoid any extra work and just seal the repair first before touching up the paint.
