How to Remove Wallpaper
by: Dale Cox
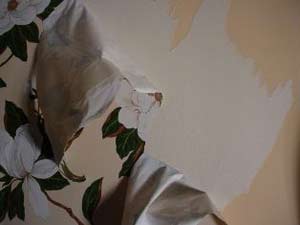
Wallpaper removal is a messy job no matter how you do it but if you want to get rid of old wallpaper, you really have no choice but to strip it. While it may be a bit of a hassle, it's well worth the effort when the result is a fresh, new wall to decorate.
Stripping the paper off the walls is probably the toughest part of the job but the most important part is dissolving the paste. After the paper is gone the paste will be left behind, causing new paint finishes to crack and even new wallpaper to peel. To be successful, you need to dissolve and get rid of all the paste. For this we recommend Savogran® Fast Wallpaper Remover. Not all liquid wallpaper strippers or solvents will dissolve the paste so it can be washed off the walls but in our experience, this one does a good job with the least effort.
Dealing with Vinyl Wallpaper
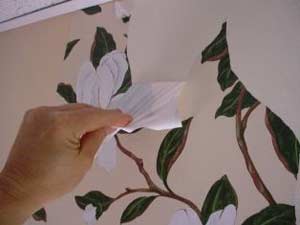
Before beginning to remove wallpaper, it's important to consider the type of paper you're dealing with. For instance, vinyl wallpaper will be impervious to liquid solvent, so the vinyl topcoat will have to be removed before attempting to wet it. Fortunately, it is usually easy to pull the vinyl cover off.
To determine if you're dealing with vinyl, try peeling it off the wall using a joint knife to lift the edge. If the surface coating comes away from the wall in a sheet, it's vinyl. Thick vinyl will come off in full sheets and paste will usually be all that's left on the wall. With some other types of vinyl, a backing sheet may remain on the walls in addition to the paste underneath.
Thinner vinyl paper will tear randomly as you pull the coating off and will almost always leave a backing paper on the walls. If you're dealing with thin vinyl like this, pull off as much as you can before it tears, and then use the knife to lift a new edge to start peeling again. Continue until you have removed all the vinyl and all that remains is the backing paper and paste. Because the backing paper is porous, it will quickly soak up the liquid solvent and aid in saturating the paste underneath.
Dealing with Paper-Wallpaper
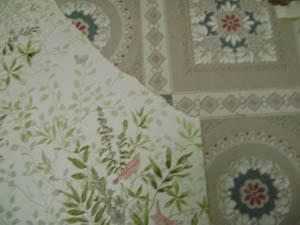
"Paper-wallpaper" is another type that may be encountered, especially in older houses. Old wallpaper like this is usually easy to strip because it will absorb the liquid quickly and scrape off the plaster walls with little effort. Newer wall coverings like Grass Cloth will also absorb liquid quickly and be fairly easy to remove.
Some paper found in newer houses are very thin with a slick finish similar to vinyl but the surface will not peel off. If you're dealing with one of these, it may have been applied over unpainted drywall. This will be a problem if you try to use a lot of water to remove it.
Find an inconspicuous spot and check to see if the wall surface under the paper has a coat of paint, or wallpaper sizing, which will have a hazy blueish finish. If so, then it will be safe to use water and solvent to remove it. Use a scoring tool to break the surface of the paper and allow it to absorb more liquid.
If the drywall is bare under the wallpaper, you will certainly damage it no matter what removal method you use. The best that can be done in these situations is to cover the paper with paint or new drywall. These papers can usually be painted successfully if a good oil-based under coater is used first to seal it. Following the sealer with a coat of oil-based finish paint will ensure that the paper doesn't pucker and that the paint job will last. Don't use a water-based paint like latex to paint over wallpaper unless you apply a couple of thick coats of oil coater first to be sure it's good and sealed.
#1 - Prepare the Room and the Wallpaper Solvent
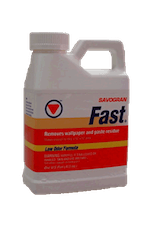
What You'll Need
- wallpaper remover solvent to soften paper and dissolve paste
- a garden-type compression sprayer for applying the liquid
- cotton drop cloths to absorb runoff
- flexible joint knife for removing paper
- trash bags to collect the old paper
- water bucket, scrub brush, and rags to wash off paste
- stepladder to reach the top of walls
Begin the process by mixing the liquid remover solvent with warm to hot water in the compression sprayer. To prevent foaming, add the water first and then add the appropriate amount of remover. Put the pump on the sprayer and pump up the pressure.
Cover floors with cotton drop cloths to soak up runoff from the sprayer. Some wood floors may be stained by the solvent, test a hidden spot on these for damage before continuing. If the floor is affected by the liquid, tape 1 mil or thicker plastic to the baseboard and cover with the drop cotton drop cloth to keep water and solvent off the floor.
#2 - Soften the Wallpaper
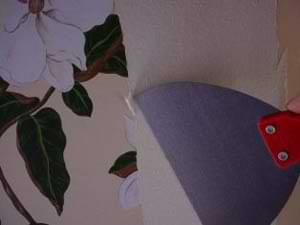
Completely saturate the paper with the solvent mixture working in manageable sections. Spray a 4 foot swath of the wall, soaking it completely from ceiling to floor with a fine spray. Wait 5 minutes and spray the same space again. Move to the next 4 foot swath of wall space and soak it in the same way. Go back to the first swath and spray it a third time, then spray the second section again. Wait a few minutes and go back to the first section to begin removing the paper.
Try to peel up an edge of the paper with a joint knife, if it comes free from the wall easily, it's ready to be stripped off. If it doesn't come away easily, spray the wall again and keep spraying it until the paper softens enough to come off. When it's ready, spray everything once more to keep it wet before beginning to remove the softened paper.
#3 - Remove the Paper
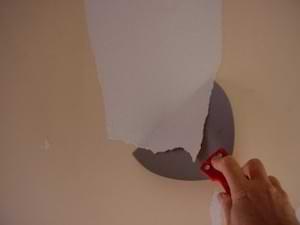
Slide the blade of the joint knife under the wet paper and skim it off the wall. Deposit it into a trash bag immediately to avoid creating a mess that you will have to clean up later.
After removing the paper from the first section begin the softening process on a third and fourth 4 foot swath of wall space. Keep each section wet by soaking it every few minutes. Move around the room spraying a few sections ahead as you work. Let the solvent do the work. The more you spray, the easier the paper will be to remove. Spray as many times as needed to make it soft and easy to remove with the joint knife.
NOTE: If you are dealing with plaster, all this spraying will have no real effect on the wall surface. If, however, you are working with a drywall surface, particularly un-painted drywall, you will want to use less liquid and be careful with the joint knife when removing the paper. To avoid tearing the drywall, use gentle pressure and don't force wallpaper that's not ready to come free. Also, be aware of how much stripping liquid has penetrated the surface. Don't let the drywall paper become too saturated as this will cause the surface to ripple and pucker. If you think this process will damage your drywall, it my be best to try and paint over the old paper instead of removing it. See Repairing Torn Drywall Paper for help with this type of damage.
#4 - Dissolve and Remove the Paste
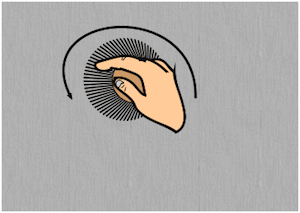
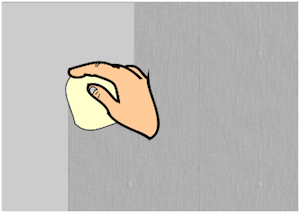
When the paper has all been removed, go back to the starting point and spray the paste in the same manner. Soak a few sections of wall space at a time and spray the paste repeatedly before attempting to remove it.
When you're ready, use a soft scrub brush, a cotton rag or sponge, and a bucket of warm water to wash the dissolved paste off the wall. Start at the ceiling and scrub a small area at a time, use a circular motion with the wetted brush to loosen the paste.
Saturate the rag with clean, warm water. Wring it out and wipe the paste off. Turn the rag to a clean spot frequently and rinse out paste buildup as it collects to avoid spreading it around the walls. Work from the ceiling down so the water runs off the cleaned areas. Refresh the rinse water frequently as it becomes saturated with paste.
When you have the paste off the walls, wipe the baseboards and floor with a rag dipped in clean water and let everything dry. Let the walls dry for a day or so before doing repairs and decorating or painting.
 Repair Drywall Paper