How to Repair Small Wall Holes
by: Dale Cox
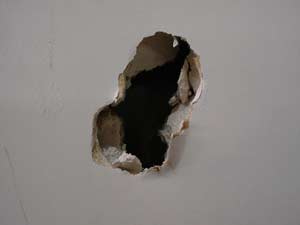
This page contains instructions for repairing small holes in drywall or plaster walls. A couple of different methods are included depending on the cause and location of the hole. Check these links for some other methods to repair larger holes in walls and ceilings. Check here for a video demonstrating how to repair small holes in walls.
#1 - Prepare the Hole
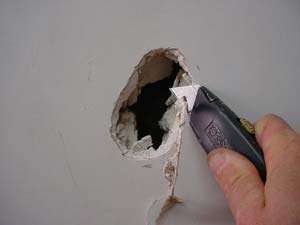
If the wall damage is due to water or there's any other contamination present, seal the surface around the hole with a primer-sealer and let it dry for about an hour before proceeding with the repair process. Bubbling may develop in the finished repair if contamination inhibits bonding between the existing surface and the new drywall patching materials. Sealing the surface will prevent this problem.
Clean the hole using a sharp utility knife to cut around the perimeter to remove all the loose wall material and torn drywall paper so it doesn't prevent smoothing the finish of the patch. For plaster holes, clean out any loose sand and white coat using a putty knife, and scrape around the edges to remove any peeling paint.
#2 - Cover the Hole
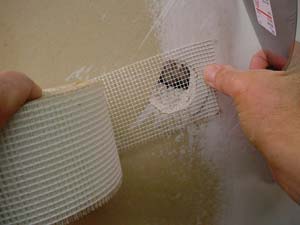
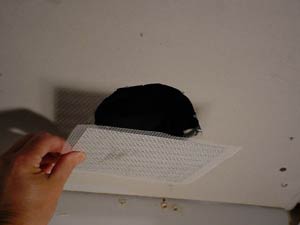
Self-sticking fiberglass joint tape can be used to cover most small holes in walls but if you have a hole from a doorknob, use a sturdy aluminum reinforced patch to prevent future damage. These patches are self-sticking and also work well to repair ceiling holes because they prevent gravity from causing the joint compound to sag creating a bulge in the finish. Another method for repairing small holes in walls but not ceilings, involves the use of a small drywall square to plug it as illustrated on this page.
After covering the hole with the patch, use setting-type joint compound, also called mud, to finished it for a durable, smooth repair in about 2 hours. Don't use ready-mixed compound or vinyl spackling paste for this repair. Ready-mixed, because it takes too long to dry and is too soft to make a durable repair and vinyl spackling paste because it takes too long to dry and is too hard when it does, causing problems with sanding.
#3 - Apply a First Coat of Joint Compound
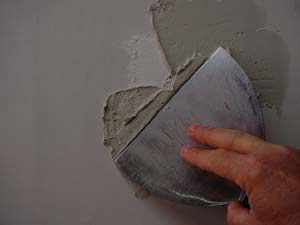
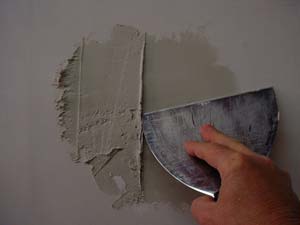
Use a small joint knife to coat the patching tape with a thick coat of mud to cover the whole thing and the surrounding wall surface. Stoke back and forth to "butter" the surface like a piece of toast. Be careful not to press hard against the center of fiberglass tape with the knife to avoid moving it and pushing it out of shape.
Immediately go back and skim off the excess mud using parallel strokes to leave a thin covering over the patch and surrounding wall. Hold the joint knife at about 30° and press down hard as you stroke across the patch but not hard enough to lift the patch or move it around. If this happens, straighten it out flat again and spread a little more mud over it before skimming again.
Ignore any ridges left in the mud by the knife blade, they can be removed later, just try to leave a consistent thickness over the whole area. Don't try to hide the patch with this first coat, it will require a couple more to completely cover and blend the repair with the wall.
Allow the mud to set until it hardens, about 30 minutes, and then use the joint knife in an upward motion to cut off any ridges. Next, sand the whole area with medium grit sandpaper to knockdown the raise tape fibers and remove any other roughness in the surface. Brush off the dust and gently wipe the patch and surrounding wall with a damp rag to remove the residue before applying another coat of mud.
#4 - Apply a Finish Coat of Joint Compound
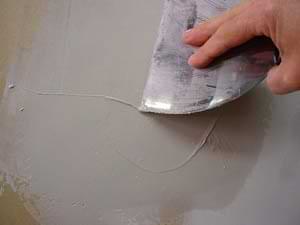
Mix and apply another coat of mud using the same method of buttering and skimming. Cover the whole area, overlapping the edges of the first mud coat and spreading onto the surrounding wall. Immediately skim the excess off stroking perpendicular to the previous strokes. If you skimmed the mud horizontally before skim vertically this time to help fill in any pits and smooth out an uneven surface. Let the mud set, scrape, and sand as before and if necessary, apply another coat. Follow this procedure to apply as many addition coats of mud as needed to completely cover the patch and smooth out the wall. Apply each new coat stroking perpendicular to the previous one.
#5 - Sand and Touch Up the Paint
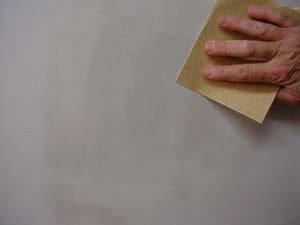
Allow the final coat of mud to set and dry completely and then use medium sandpaper to sand the repair, feathering the edges into the surrounding surface. Be careful around the perimeter, especially on drywall, the sandpaper can dig into the surrounding wall while you're trying to smooth out the rough edges. Lightly sand to feather a smooth transition between the two surfaces.
Brush the dust from the repair and wipe with a damp rag to remove all joint compound residue before priming and painting. If you are using flat latex finish paint it is self-priming, if you're using semi-gloss or other shiny paint, prime the patch with flat latex paint or a latex primer first.
 Repair Drywall Paper
 Repair Holes in Walls and Ceilings