How to Paint Wooden Windows
by: Dale Cox
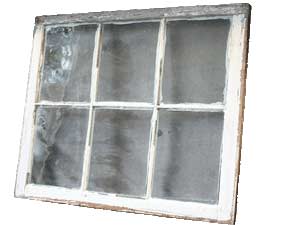
Old wooden windows with glass panes divided by thin wood strips, or mullion, are classified by the number of panes they have. For instance, a window with 2 rows of 3 glass panes is referred to as a 6-light window.
You can use the process on this page to prepare and paint these types of windows but if you need to paint the exterior, you will probably be dealing with window glazing that needs attention as well. See this link for help with reglazing around the glass on these old wooden windows.
Preparation to Paint a Wooden Window
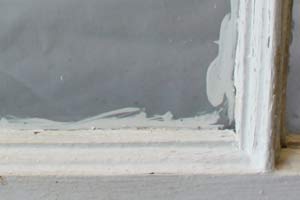
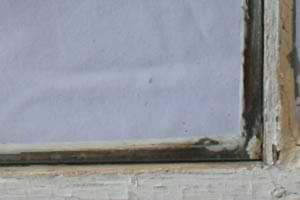
The mullions -wood strips separating the glass panes- are typically shaped with a decorative profile on the interior of the sash and cut with a squared L shape on the exterior.
The window glass is placed into the L shaped mullions from the outside and flexible glazing putty is used to help secure it in place and seal the gap between the wood and glass.
Window sashes and frames are usually done with an enamel finish paint. Enamels are available in both latex and oil-based formulas and come in shiny finishes like semi-gloss and high-gloss. Because it dries to a hard, durable finish, enamel paint provides lasting protection for trim surfaces that tend to see a lot of wear and tear. And because it is so durable, enamel can be washed to remove dirt and still maintain its shine and beauty.
Prepare your wood trim whether it's bare wood or previously painted, so it's primed, clean, and has no holes or gaps. "Primed" simply means the trim has a good base coat foundation. Whether that's because it's been painted before or you've just applied primer, it amounts to the same thing.
If your new color will be much darker than it is now, tint your undercoat primer to more closely match the final color before applying it. For a durable finish that will last, undercoat with an oil-based product and let it dry for 12 to 24 hours. Lightly sand the dry primer and remove the dust with a vacuum or tack cloth before applying the finish enamel.
#1 - Scrape the Window Sashes and Frames
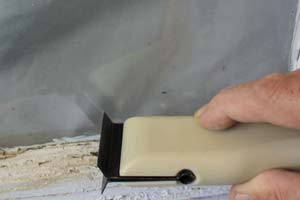
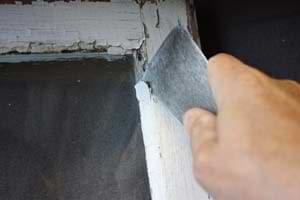
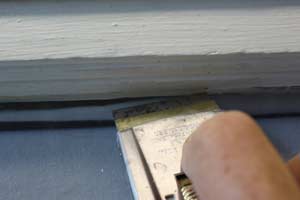
If your wooden windows have peeling paint or loose, cracked glazing around the glass pane, you will need to remove all this loose material and apply a good primer to any exposed bare wood. Scrape all the peeling paint off using a pull-type paint scraper to go over the widest parts of the wood sash and frame. Remove popping glaze using a putty knife to pry it off the wood and glass.
Sand all the wood parts, paying close attention to the edges around missing paint to smooth out any rough ledges. Along the mullions, sand the peak of the wood but be careful not to touch the glass with the sandpaper. The abrasive will leave very noticeable scratches in the glass with even slight incidental contact.
On interior sashes, remove any old paint from the glass panes using a razor blade to shave it off. Run the blade along the glass next to the wood a couple of times to loosen all the paint and then use a dry clean brush to sweep it away. Sand the shaped wood next to the glass using care not to scratch the glass there.
#2 - Prime and Patch the Wood
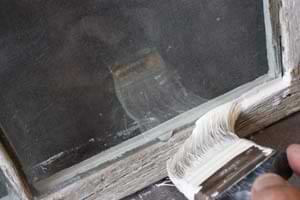
Prime all the bare wood with a good oil-based under coater. Work the prime into the edges around the glass to ensure a solid protective coating. When the primer dries, use the razor blade again to scrape any paint overlapping onto the glass on the interior of the sash. Brush away any dry paint debris before proceeding.
On sash exteriors, leave the overlapping paint on the glass to improve the seal between the mullion and pane. When the primer is dry, reglaze the glass panes as needed.
With the primer dry, fill any cracks with caulk and any split or missing wood with filler. On exterior surfaces you can use an exterior spackling paste or an epoxy filler.
On interior window wood, use an interior spackling paste. Let the filler dry and if needed, apply a second coat to fill in any shrinkage or other missed areas. When the final application of filler has dried, sand it smooth, remove the dust, and spot-prime the patches before proceeding with the finish coat of enamel.
#3 - Paint the Window
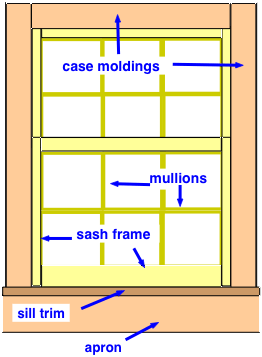
Paint windows starting at the top, inner most parts and work your way out. Paint each facet of the window, applying a liberal coat first and then immediately brushing it out smooth. Let the paint from each part overlap onto the adjoining part a little and then paint that part next. Join the painted parts together like this, coating each to overlap onto the next and then brushing the paint out smooth to blend the parts together.
For the window pictured here the order would be, the mullion molding around the glass in the upper sash first and then the sash frame. Follow by painting the lower sash in the same order. After the sashes are done, paint the trim around the window including: the jamb, the casing, the sill, and finally finishing by painting window apron.
If you're painting the exterior of a window with new glazing, first be sure to clean all the oil from the glazing process off the glass. Apply the paint over the new glaze, letting it overlap onto the glass along the edge of the glazing bead by a bit. This will create a seal between the glaze and the glass to block moisture from penetrating.