Repairing and Painting Masonry Surfaces
by: Dale Cox

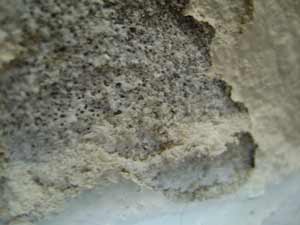
Masonry surfaces are often coated with a sealer to protect against moisture or with paint to improve the finished appearance. In addition to applying these protective coatings, masonry may also require repair if it's cracking and crumbling, or cleaning if it has surface stains and efflorescence (pictured). This page contains procedures for preparing, repairing, and painting concrete, brick, and other masonry surfaces.
Problems with Masonry Surfaces
Masonry around the house is primarily susceptible to two problems: physical damage from cracking and crumbling, and surface degradation due to efflorescence.
Efflorescence is the white powdery substance that bubbles up on masonry surfaces like basement walls. It happens when moisture penetrates concrete, causing the alkali salts in the masonry lime to leach out and deposit on the surface. This is a normal process of curing with new masonry, however, when masonry is old and previously painted this process will cause the surface coating to pop and peel off.
If moisture is a constant problem in a masonry structure, that issue will have to be addressed before using any process for curing an efflorescence problem. Check downspouts and drains for the source of the water and repair the problem. If the ground slopes in toward the wall, mound it up so water will run away from the building when it rains. These measures should eliminate water related problems in masonry structures.
Removing Efflorescence
Efflorescence must be removed and neutralize before any coating will adhere to the masonry surface. Muriatic acid is commonly recommended to treat efflorescence but because it is so caustic, it is not the best choice for use around the house. Also, because it will damage existing paint coats, it should be avoided if you are treating efflorescence on painted masonry.
A better choice for treating efflorescence on household masonry surfaces is white vinegar or a concrete cleaning product made specifically for this purpose.
If you're going to deal with efflorescence on previously painted concrete, a strong vinegar solution is the best choice as it will dissolve the alkali deposits while leaving the paint coat unharmed. Reducing the vinegar by half through boiling will double the normal 5% acid content and make an effective treatment for tough efflorescence deposits. More than one application may be required for the most severe cases.
First remove all loose material from the masonry surface using a putty knife and a stiff bristled brush. Rinse the spots with water and then apply the vinegar with a spray bottle. Scrub with the brush to loosen surface particles and spray with the vinegar again. Rinse the spots with clean water and let it dry completely before applying paint.
Using Muriatic Acid
Muriatic acid is about 30% hydrochloric acid making it an exceptionally dangerous household chemical. It should only be used by the typical do-it-yourselfer as a last resort and then only outside. If you must use it to remove efflorescence, apply only the weakest solution possible on bare masonry to make it ready to accept a new paint coat. Don't use muriatic acid on painted surfaces, use vinegar instead.
Be very careful when using this acid solution, it is extremely corrosive and will burn everything it touches including: your clothes, skin, and eyes. Even a minor splash of the acid solution can do permanent damage so wear long sleeves, rubber gloves, eye protection, and a respirator to keep fumes from burning your nose and lungs. Don't remove your protective gear until you have finished the acid treatment and cleanup afterward.
Read the label instructions for the product you are using. As a general rule, diluted the acid to about 10% for etching and treating efflorescence. Use plastic containers and tools for mixing and applying the solution. Dilute by carefully adding the acid to water in a plastic bucket, DON'T ADD WATER TO A POOL OF MURIATIC ACID, this can cause it to bubble up and emit noxious fumes.
Keep a source of water ready to dilute any acid solution that spills or spreads to surrounding surfaces and vegetation. Wet the masonry with a spray from a hose before applying the acid solution. Apply the acid solution with a brush or a spray bottle. Avoid spraying in windy conditions or it may damage surrounding surfaces and vegetation. Let the solution sit for about 1 minute and then scrub with a stiff brush if the efflorescence has not dissolved completely. Rinse the surface with plenty of clean water and apply a rinse of 1 cup ammonia and 1 gallon of water to neutralize any acid residue. Rinse with water again and let the surface dry completely before applying any paint.
When you're done with the acid treatment you will need to dispose of any leftover solution and neutralize any acid runoff. To neutralize runoff spread garden lime over affected areas. You can also use lime to neutralize leftover acid solution. In a bucket large enough to contain any splashing, pour 4 cups of lime into 1 gallon of water and mix well. Slowly pour the leftover acid solution into the bucket while adding more lime until all reaction (fizzing) has stopped. The bucket's contents can then be poured into a utility sink drain or toilet if you have municipal sewer service. If, however, you have a septic tank you will have to find another disposal solution such as a toxic chemical collection event.
Repairing Concrete Cracks

To repair cracks in foundations, walls, slabs, and walkways, first be sure the movement that caused the crack has been stabilized. If the movement causing the crack is minimal, it may be possible to fill it with a concrete caulk that will move with the crack for a permanent seal. If the movement is more severe, it may be necessary to reinforce the footer or foundation to stop movement. Multiple cracks are an indication of major problems with the stability of the structure that should be addressed before attempting repairs.
Thin cracks in concrete can be repaired using masonry caulk to fill them. First, clear any loose concrete by running a putty knife through it once or twice. Vacuum out all loose debris and fill the crack with an overflowing bead of caulk. Immediately smooth over the bead with a putty knife and feather the edges into surrounding surface. Use a damp rag to wipe away any excess caulk and leave it to set. You can paint over the caulk when it dries.

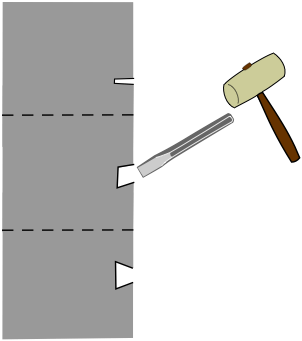
To repair large cracks up to 1-1/2 inches or so, use a vinyl reinforced patching concrete to fill them. First, use a cold chisel and hammer to undercut both sides of the crack, creating a ledge that will hold the repair compound. Clear out all debris with a spray of water and apply a concrete adhesive to aid in bonding the old masonry with the new patch.
When the adhesive becomes tacky, apply the vinyl patching compound to fill in the crack and feather the edges into the surrounding surface. Some manufacturer's may recommend building up thin layers of the filler in deep cracks, allowing each to set before applying another. Always check the label and follow the instructions provided by the maker.
To repair cracks wider than 1-1/2 inches use a patching concrete or sand mix to fill them. Prepare the crack as above and apply the concrete patch to fill the damage and feather the edges into the surrounding surface. Cover a thick patch like this with plastic sheeting for several days to retain moisture while it cures.
Preparing for Painting
New masonry will require a short time to cure and become completely hard. Concrete makers recommend 5 to 7 days for curing depending on weather conditions. It will take 30 days to 6 months, depending on the paint type, before a coating may be applied to new masonry. This extra time is required for the moisture content to dissipate enough to allow a paint coat to dry completely and bond with the surface.
Test for moisture content in new concrete by taping a 4x4 foot square of plastic to the surface and timing the formation of moisture under the sheet. If the time is longer than the curing time of the paint, then it will bond with the surface before moisture becomes a problem.
Old masonry surfaces should be prepared for painting or sealing by removing any flaking damage, cleaning, and then repairing before any paint is applied. Scrape away flaking with a masonry trowel or putty knife. Dig in and around cracks and other damaged areas to remove everything that will come free. If the masonry has been painted before, scrape off all peeling paint with a putty knife. Use a stiff wire or nylon brush to go over the entire surface to remove all small particles that will come free.
Next, rinse the entire surface with a forceful spray of water from a garden hose to wash away dust and clear cracks and holes of debris. If the surface is stained with oils or other contamination, use detergent or a concrete cleaner, available at home stores, to scrub the problem areas before rinsing. Remove any standing water from the concrete and proceed with repairs and painting.
Applying Paint to Concrete
Painting any masonry surface is difficult when trying to get good coverage. A bare concrete surface is the toughest because it's so porous it will absorb every bit of moisture that comes in contact almost instantly, and it will keep absorbing moisture until it's completely saturated. This can mean that a full roller of paint will not go very far and it will require many roller refills just to cover a few feet. To make coverage easier on a bare concrete surface try these few tricks:
- Be sure you have a very thick roller nap. To spread the paint into all the little pits and crevices and carry lots of paint to the surface at a time, you will need a nap of an inch and possible 1-1/2 inches for very rough textures.
- Use an acrylic latex paint where possible and mist the surface lightly with water just before applying it to make it spread easier.
- Plan to do two or three thin coats on bare masonry to catch all the missed spots rather than trying to cover every inch with a single coat.
- Thin the paint with a bit of water for the first couple coats but make the last coat at full thickness for a durable finish and uniform coverage.
Patching Stucco
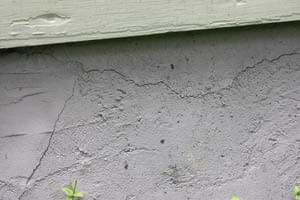
To repair most cracks in stucco, you can use masonry caulk as a filler. Overfill the crack with the caulk and use a trowel to flatten it and feather out along the edges. Blending the stucco finish to make a good match may take a little practice. A whisk broom or similar stiff-bristled brush can be used to stipple the surface lightly and achieve a reasonable match to the stucco finish.
To repair loose and crumbling stucco, remove all the damaged material from the area using a putty knife or similar tool. Use a wire brush to remove all remaining loose stucco from the surface and vacuum or blow out the dust. Check the metal lath underneath for damage and prime any rust with a metal primer. If the metal is degraded and breaking, replace it by cutting out and replacing the damaged lath.
Loose and crumbling stucco can be repaired with a pre-mixed patching compound or compound can be made with 1 part portland cement, ½ part hydrated lime and 4½ to 6 parts very fine sand. Mix all the dry ingredients and then add enough water to make a thick paste that will stick to a vertical surface. If you make a mistake and mix the paste too thin, combine more portland cement, lime, and sand in the proper portions and then add the mixture to the paste to thicken it. Once it is mixed, the paste will be workable for about an hour.
Use a trowel to apply the patching compound to the area. Mist the area first with a spray bottle of water and apply the stucco paste while the surface is wet. Press the compound into the area and level it off with the surrounding surface. Use a brush or trowel to match the texture of the existing finish.
As the new patch sets and cures keep it wet with a mist of water several times a day for two or three days. If the patch is in the sun, hang thick plastic over it to keep it moist. This will prevent cracks from forming as it dries and help to normalize the pH in the stucco so it can be painted. Wait 30 days or more before painting to give the coating time to cure completely.

Repairing Loose Bricks
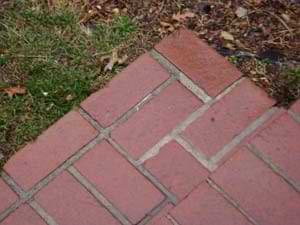
Replace bricks that have come loose on steps and other minor masonry structures with a pre-mixed mortar. If you don't have the original brick to replace, you should try to find one that closely matches or the difference may be distracting. If the structure you want to repair was build before the late 1800's, don't use modern mortar and bricks to repair it. Because modern masonry is much harder than the older version, the patch will crush the surrounding, older structure as it moves naturally over time. Also, don't make repairs to older structures if freezing temperatures are likely for several days to keep ice crystals from forming.
Preparation
Soak the replacement bricks in a bucket of water for a couple of hours before replacing them. This will encourage a strong, permanent bond with the new mortar. This is the most important thing you can do to make sure the replaced bricks stay put. If you're repairing an older structure, especially one with noticeably soft bricks, don't soak them as long or they may absorb excess water.
Also, soak the wall where you're working using a spray bottle or a hose to saturate the surface repeatedly. The more water you can get it to absorb the more likely the repair will be a success. If the replacement brick has old mortar on it use a cold chisel to chip it off. Also clean mortar off the wall where you are working. Soaking the brick in water overnight may help to loosen the mortar and make it easier to remove. Use a hammer and a cold chisel or a chisel-blade joint knife to get as much of the old mortar off as possible. The more you can remove the better the repair results.
To set the bricks, heap mixed mortar onto all contacting sides of the brick and spread a bit on the wall as well. Press the replacement brick into the mortar and shift it back and forth until it settles into it's original position. Scrape off the excess mortar as it oozes out. Use a flat wood stick or a mortar pointing tool to level the mortar joint to a little below the brick face. Wipe any mortar off the face with a wet rag of sponge before it sets. Be careful not to disturb the mortar between the bricks with the rag.
Lay all the missing bricks in this manner and let the mortar set for about 24 hours before touching it. If the replaced brick is on an incline and likely to sag, support it with a board or something else that will hold it in place until the mortar can set. Be careful not to disturb the placement while doing this.