How to Repair Cracks with Expanding Spray Foam
by: Dale Cox
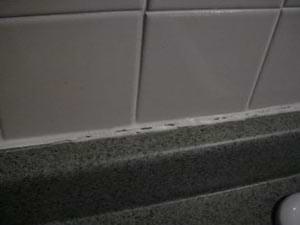
When cracks in places like kitchen countertops keep coming back, no matter how many times you caulk them, or wall cracks continue to reappear after repairing with tape and joint compound, the problem is movement in the two adjoining surfaces.
With counter cracks, either the backsplash, the countertop, or both are moving due to things like, a poor installation job; wall damage that leaves loose wallboard hanging in the breeze; or simply expansion and contraction due to normal atmospheric changes.
This movement will quickly crack any caulking along counters as the caulk becomes rigid and the counter continues to move. And cracks will quickly reappear in walls as loose wallboard or plaster continues to move and the joint compound patching material doesn't.
The obvious solution to all this movement is to securely fasten each surface in place, usually with nails or screws. Unfortunately, that's not always possible for surfaces like countertops and backsplashes, or wallboard with no nearby framing. With these surfaces it can be impossible to use fasteners to stabilize movement like this. One solution is to use expanding spray foam insulation and inject it behind a countertop or into a wall crack to hold things in place and limit future movement. When spray foam meets the air it expands very quickly and as it cures, it becomes somewhat rigid but still flexible enough to absorb the movement of a countertop or wall. The following process describes how to use expanding spray foam insulation to stop recurring cracks around the house.
#1 - Choose the Right Expanding Foam
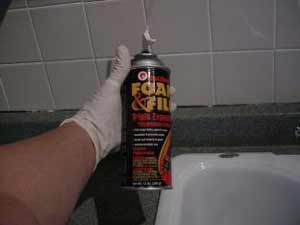
Spray insulation is an expanding urethane foam in an aerosol can. Some foam labels may state: "for wide gaps" but as a general rule, they all tend to expand by about 3 times when exposed to the atmosphere.
For repairing cracks, use a spray foam that requires acetone for clean-up. This information will be on the back of the can. Don't use water-based foams that call for soap and water to clean up, they are too soft and flexible when they cure and will not stop the crack from coming back.
Wear latex gloves and safety glasses when spraying the foam to keep it off your skin. It will stick to everything and will damage many surfaces, so mask any vulnerable surrounding areas that may come in contact with it. Also, have a rag and acetone handy for cleaning up spills. Nail polish remover will work for clean-up also if you don't have acetone. Be careful when using these solvents though, they will remove the finish on many surfaces including: furniture, flooring, painted surfaces, and possibly the dye in some fabrics. They will also mar plastic, rubber, and other soft materials.
What You'll Need
- Spray Foam Insulation
- Razor-blade Scraper
- Putty Knife
- Denatured Alcohol
- Acetone or Nail Polish Remover
- Disposable Gloves
#2 - Prepare the Crack for Repair
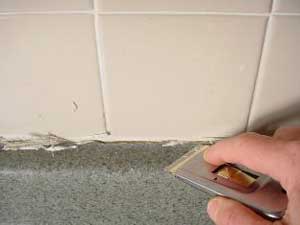
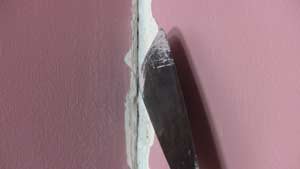
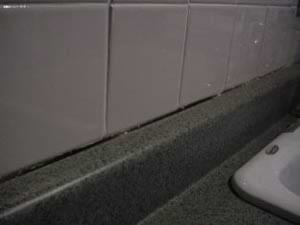
Begin counter crack repairs using a putty knife to remove all loose wall material and scrape hard surfaces like tile backsplash and countertops with a razor-blade scraper to get everything completely clean. Then use the putty knife to pry any remaining caulk out of the gap between surfaces.
Clear wallboard cracks by pulling a putty knife through the length several times to dislodge and remove all loose material. Also be sure to remove any loose, peeling paint on each side of the wall crack. Use a vacuum cleaner to clear the crack of any dust or remaining wall material. On counters, also clean both surfaces well with spray cleaner or denatured alcohol to ensure a good bond when you re-caulk the gap later.
For counters, you'll need about a quarter inch opening along the crack to allow for inserting the applicator tube. Wall crack will require less foam and are easier to fill by pointing the applicator directly into the gap.
If after the crack is cleared of all old caulk, the counter gap isn't wide enough, it will be harder to force foam between the two surface. If possible, try to widen the access by removing at bit of the grout on the backsplash tiles right where it meets the countertop. You can also use shims to pry the counter out slightly every six inches or so to allow for deeper insertion of the tube and then remove them immediately after application.
#3 - Fill the Crack with Foam
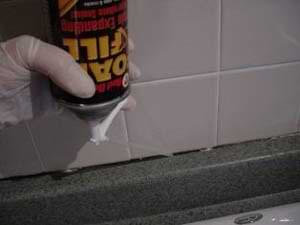
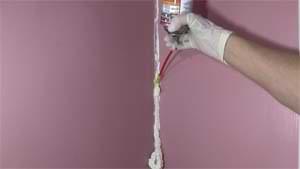
Spray foam insulation expands quickly when it meets the air and unwanted spray will be difficult to remove from surrounding surfaces so use care as you begin. It can be a good idea to start the spray on some newspaper and get an idea of how fast it come out of the can.
Before beginning, shake the can well for one to two minutes. To avoid unwanted overspray, first attach the tube to the trigger and then thread the trigger onto the can before shaking. When you begin, pull the trigger slightly to start the flow and get a feel for how much pressure is required. Have a large cloth to throw over the tip if necessary to catch overflow. Some new applicators may have a shutoff tip you can slide up and down to stop the flow instead of having to resort to using a rag.
To fill cracks, hold the can upside down and push the end of the tube into the gap. Squeeze the trigger for a couple of seconds or until the foam begins to expand out of the tube. When it has started flowing, release pressure on the trigger. The foam will continue to flow from the tube, so don't pull the end out of the crack until it stops.
Wait a few seconds to see if the foam starts to expand out of the crack. If it doesn't, pull the trigger again for a few seconds or until the foam starts to overflow. If it doesn't start overflowing a counter gap within a few seconds, push and/or pull the tube back and forth to reposition it while applying the trigger until it does. The foam must make contact with a solid surface behind the counter to fill the gap, so try to reposition the tube until it does.
#4 - Check for Gaps
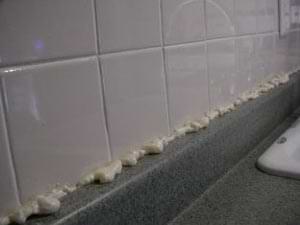

Some spaces will require more foam than others. In areas where the space is minimal, the foam may expand immediately from the crack. If this happens, quickly relieve pressure on the trigger and pull the can along to fill the crack like you would with caulk.
If you can't move along the crack, pull the tube free, hold a rag over the end and immediately insert it into a new spot. The goal is to produce a bead of foam to evenly fill the length of the crack. If you need to, go back and catch any missed spots until the whole crack is overflowing with foam, too much is better than too little.
When you're done with the job, if you have any foam left in the can, you can keep it and use it again. You can either let the foam set in the end of the tube and then cut it back to where the foam is still liquid to start again, or you can clean the applicator and store it with the can for later use.
Acetone can be used to completely clean the trigger and applicator tube. Before the foam sets, remove the parts from the can and use a small container to soak them in bath of acetone for a minute or so. Also, dribble a bit of acetone into the spout on the top of the can to soften the foam and keep it from clogging there. Tape the cleaned parts to the can and reassemble them when you want to use it again.
#5 - Trim the Cured Foam
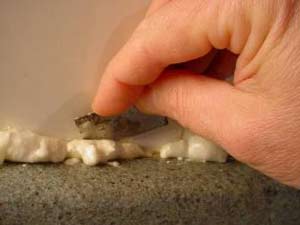
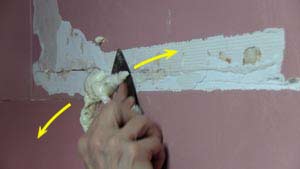
When the entire crack has been filled, let the foam cure for an hour or follow guidelines on the label for curing time. To test for cured foam, push on the surface with your finger. It will be rigid and smooth like Styrofoam when it has cured.
When it's ready, use a razor blade to trim the excess that overflowed between the countertop and backsplash. As with the prep, you can use the razor-blade scraper to clean excess foam off of hard surfaces like backsplash tile and countertops.
On wall cracks, slice back and forth with a putty knife held flat against the surface to cut the excess foam flush with the surrounding wall. Also scrape all surrounding surfaces to completely remove any overspray before making repairs with joint compound.
#6 - Repair Walls and Re-Caulk Counters
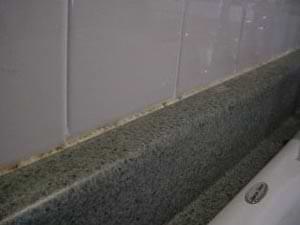
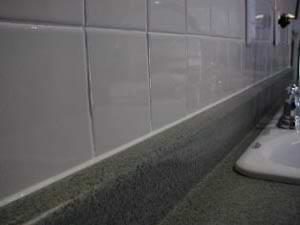
On counter cracks, cut back all the protruding foam so it's a bit below the level of the surrounding surface to ensure a smooth finish when re-caulking.
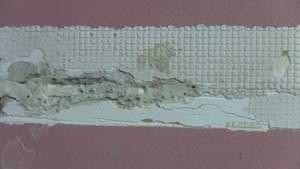
On wall cracks, make sure none of the cured foam remains higher than the surrounding wall surface to avoid an uneven repair.
Caulk over the foam filled counter gap with an acrylic latex caulk or use pure silicone caulk in areas that are exposed to a lot of water like behind a kitchen sink and around bathroom tile. Use only enough caulk to cover the foam and slightly overlap onto the joining surfaces. Smooth out the caulk to leave a uniform bead along the whole length. Check this link for caulking techniques and tips for choosing and applying caulk.
Cover foam-filled wall cracks with mesh drywall tape and joint compound using the repair process described on the How to Repair Wall and Ceiling Cracks page.
 How to Caulk