How to Sponge Paint Walls
by: Dale Cox
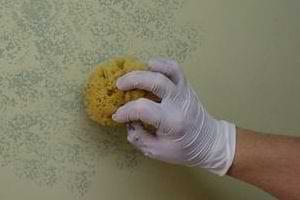
Sponge painting is one of the easiest faux finishes to do for beginners and ranges from the ultra-simple to the fairly complex. These effects can be used to decorate walls, furniture, or just about any paint-able surface and they are particularly well suited for hiding rough wall surfaces.
There are basically two different techniques that can be used to create these effects: positive sponging and negative sponging. Positive sponging involves applying glaze, a little at a time, using a sponge to dab the color onto the surface. There are degrees of positive sponging, using just one application of glaze for a transparent effect that allows much of the base color to show through, and using multiple patterns, one over the other, to create an opaque effect that almost completely covers the underlying color.
Negative sponging is so called because after the glaze is applied to the surface, a sponge is used to removed some of the color, leaving a pattern of light and dark areas on the surface. This technique doesn't allow much room to be creative with the finish but it can be a good choice for a small powder room where you don't want to get too "busy" with the wall covering.
In addition to the basic technique of applying random color with a sponge, more glaze colors can be added over these finishes to create more complex and interesting effects such as adding a craft paper wall finish or a flowing pattern across a sponged wall to create more depth in the finish.
#1 - Choose Your Tools

When choosing the applicator for sponge painting, it's best to use a natural sea sponge. Natural sponges are better at creating a consistent pattern without adding too much glaze to the surface than the other choices available like synthetic sponges. In addition to synthetics, sponge rollers are also available for this type of painting. The problem is synthetics tend to get clogged with glaze and rollers can be hard to control when trying to create the finish you want. Also, rollers are useless at corners where you'll need to blend the pattern with the next wall or stop it all together.
If you're doing a simple finish with just one glaze coat, a quart of glaze will probably be enough for an average 9x12 room. You will also need a cup of paint for every quart of glaze you use. If you're doing a more complex pattern using 2 or more colors, use a gallon of glaze and divide it up for each separate color you will be using. Mix all the glaze you will need at one time to keep the colors consistent over the whole finish. See this link for instructions to choose colors, mix painting glaze, prepare surfaces, and base coat projects.
What You'll Need
- Sea Sponge
- Base Paint
- Painting Glaze
- Coloring Tints (if you're making your own colors)
- Paint Brush
- Paint Roller
- Roller Tray
- Masking Tape
#2 - Prepare Your Room and Tools
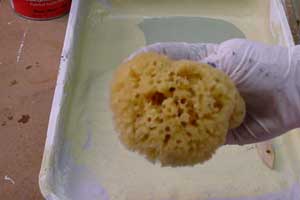
Mask the ceiling and around trim moldings like door casings and baseboards to keep the glaze off of these surfaces. Using two strips of 1½ inch painter's tape to create a wide border around the project will prevent any accidental stains that could be hard to remove later and would distract from the overall effect.
Wear latex gloves while handling the sponge, glaze will spread to your hands very quickly and can be hard to remove completely. Use a roller tray to hold the glaze and blot the sponge to get it ready to use. Also, have a bucket about half-full of clean water to rinse the sponge when necessary. Have some paper towels or dry rags ready to wrap around the sponge and squeeze out all the excess water after each rinse. This will prevent runs as a very wet sponge can add too much water to the glaze.
Prepare the sponge by submerging it in the water bucket to saturate it and then squeeze it out completely. Wrap a dry rag around it and squeeze hard to absorb all the excess water. If the sponge is too wet, runs will develop in the finish.
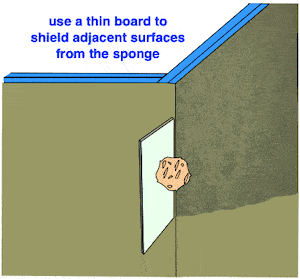
Before beginning to sponge on the walls it's best to practice your technique using a test board such as a large piece of cardboard to get the pattern and depth of color you want. When you base coat the walls, paint the test board too and set it aside to dry for this purpose. Also, have a piece of cardboard small enough to hold in one hand and use it to block the sponge at corners. This will keep the pattern off the adjacent wall until you're ready to do that surface.
When working at corners to join your pattern, use the same piece of card board to keep the sponge from touching the previously glazed side. Also, cut a smaller piece of sponge and use it at the corner to get deep into the crease. This will make it easier to get a consistent pattern with not gaps.
#3 - Practice Your Technique
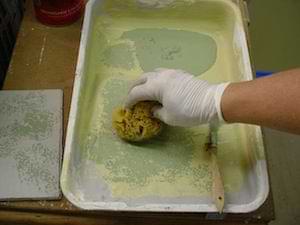
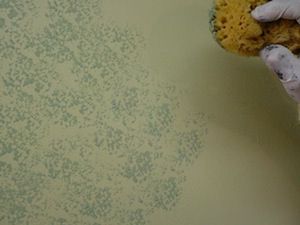
Pour the first glaze color into a paint tray and squeeze the sponge to make it pucker out on one side. Dip it into the pool of glaze just enough to saturate that side. Keep the sponge puckered and press it lightly onto the tray. Swirl it around a bit to distribute the liquid evenly on that one side.
Dab at the test board to practice your technique before moving to the wall. Use different pressure and angles until the desired pattern is produced.
Avoid rocking or dragging the sponge while it's in contact with the surface. Touch lightly and lift straight off in a gentle pouncing motion to leave a subtle impression of the sponge behind. When you're ready, add a little more glaze to the sponge, swirl it around on the paint tray and do an initial dab at the practice board before beginning with the wall.
#4 - Create a Sponge Finish on a Wall
After developing a pattern you want to create, begin applying it to your walls working from one corner. Work from the starting point all the way to a break point without stopping to avoid creating an unwanted seam in the middle of the finish. If you plan to continue the sponging affect around corners and onto the next wall, you can let the sponge touch both at the end. But if you're not sponging the adjacent wall or another surface like trim molding or a ceiling, use a wide piece of cardboard or similar tool to protect that surface from unwanted glazing.
Transparent Sponging Techniques
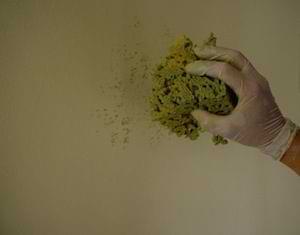
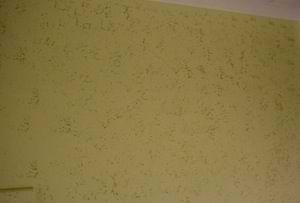
To do a transparent finish, begin at the ceiling in one corner of the wall. Dab at the surface with the sponge in either a regular or a random pattern.
To create a regular pattern, work across the wall in line with the ceiling, or in diagonal lines from a top corner down to the floor. Go all the way to the next corner and then go back to start a second row. With a transparent finish you just want to leave a slight, spattering of glaze color over the base coat. With such a light application, you should be able to make one or two complete runs across the wall before you have to reload the sponge. When you do reload, be sure to dab out the excess on the practice board before going to the wall to be sure you can produce the same degree of color density and keep the pattern consistent.
To create a random pattern, start in the middle of the wall and work out in a radial motion. Avoid repeating the same impression over and over by working in all directions and turning the sponge slightly with each pounce. Refill the sponge as needed and dab it out on the paint tray or test board before going back to the wall. If the sponge becomes too full of glaze it can sometime leave a thicker pattern on the wall than you want. It's a good idea to wash all the glaze out completely from time to time to keep the pattern consistent.
Opaque Sponging Technique
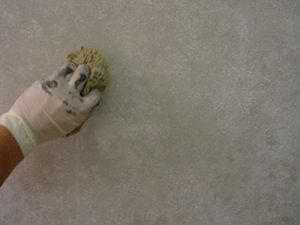
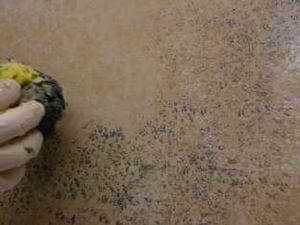
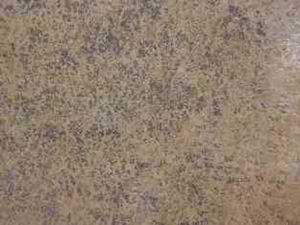
With an opaque sponging technique, a heavier touch can be used to apply the glaze. Because a denser color is the goal, the surface can be dabbed repeatedly in the same place to spread the color. This action will produce some spots of dense color and some spot of less color. Keep dabbing to produce a fairly uniform coat with minor differences between the dark and light spots, while still allowing the base coat to show through the glaze.
Do all the walls with this first color and then come back after it dries and do another, accent color over it. Clean up the tray and sponge and let them dry while you're waiting for the walls to dry.
When the first is dried, pour the second color into the paint tray and begin with the same technique of filling the sponge and testing your technique. When you move to the walls, apply less glaze this time using the same technique as with the transparent sponging described above. Make sure this coat allows the underlying colors of the base and first glaze color to show through. Do all the walls with the second color and let the glaze dry.
If you're happy with the finish at this point your room is done, if you would like to add more depth to the finish, lightly sponge on another accenting glaze color. Use progressively thinner patterns of glaze with each new coat to let all the underlying colors show through. This will create a feeling of depth in the finish.
Negative Sponging Technique
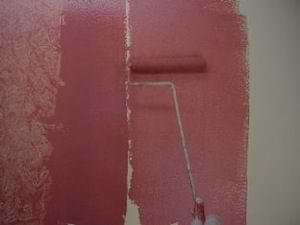
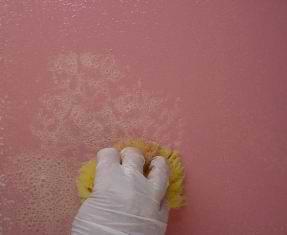
Negative sponging can be a difficult technique to master. Often times the finish created can be disappointing and blotchy looking. If you want to try this technique before beginning, have the sponge ready. Dip it in a bucket of water, wring it out, and squeeze the excess moisture out with a dry rag. To do this effect, work on a 3 or 4 foot section of wall at a time. Coat the area with glaze before doing the sponging part. Use a brush to apply the glaze at the corners, and a roller to do the wide spaces. Fill the roller lightly with the glaze color. Avoid submerging the nap in the pool so as not to overfill it, too much glaze in the roller will put too much glaze on the wall and make it hard to remove enough with the sponge to get a satisfactory effect. Roll back and forth repeatedly to spread the glaze out and leave a thin, consistent coat over the area. At the leading edge, leave a narrow band of thicker glaze to help keep it wet until you can blend it into the next section.
Work quickly so the thin glaze doesn't dry too much and press the sponge lightly against the wall. Immediately pull it straight up again to lift some of the color off. Turn the sponge to a clean spot and do another pounce. Squeeze the sponge with a dry rag to remove most of the glaze and go back to the wall to lift off more color. When the sponge becomes too saturated with glaze to keep the pattern consistent, wash it out in the water bucket again and dry it with a rag before continuing.
Don't work the sponge into the band of thick glaze at the edge of the first section. Use the brush and roller again to spread a second 3 or 4 foot section and roll that thick band of glaze into this new area. Leave another band of thick glaze at the leading edge of the second section and begin with the sponge using the same technique to continue the pattern. Do an entire wall like this before moving to the next, adjacent wall.
 Mixing Painting Glaze