Preparing Wood for Painting
by: Dale Cox
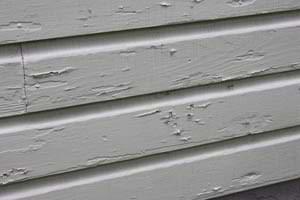
If you need to paint wood whether it's exterior siding or interior trim molding around walls and ceilings, taking time to prepare the surface properly will reward you with a beautiful, durable finish for years to come.
If you're dealing with bare wood or it has been painted before, you will need to be sure the surface is smooth and all holes and gaps are filled before the finish enamel is applied. This page contains steps and techniques for preparing bare and previously painted wood, both interior and exterior, for painting. Check here for a video demonstrating painting preparation techniques.
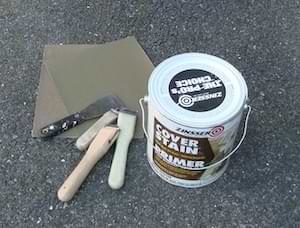
What You'll Need
#1 - Scrape Loose Paint
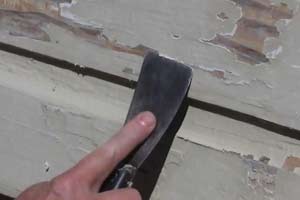
Previously painted wood may require scraping to remove loose, peeling paint. This is often the case with old, oil-based paint when it pops off in random spots, leaving rough edges between sound areas and bare spots. Use a flexible putty knife on these spots to force off all the loose paint that will come free. Work pushing out from the center, in all directions to encourage paint with a weak bond to come off.
Stripping Old Paint
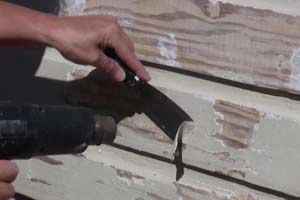
When it comes to old, oil-based paint on woodwork there will often be patches where some of the old paint has come off and the rest is still intact, leaving a patchwork of paint chips. If you want to restore a finish like this to a consistently smooth surface, you will need to remove the areas where the original coating still remains, bringing everything down to the same level. The best way to achieve this is with a paint heat gun. Check here for a video demonstration of this method.
Stripping this old paint, which most likely contains lead, present a problem with lead fumes released into the air. This may be prohibited in some areas by state or local regulations. It can also be a health hazard for the person using the heat gun to melt the old paint. If you choose to use this method to strip paint, the heat gun you use must not exceed 700 degrees Fahrenheit, according to EPA rules, to keep fumes out of the air. Even at this temperature it's a good idea to wear an appropriate respirator to avoid breathing the fumes while using the heat gun.
#2 - Sand Bare Wood
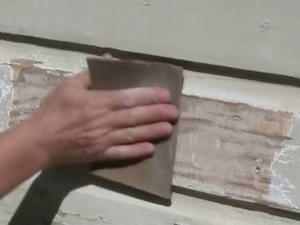
Sand bare wood spots and rough paint edges with 80 grit sandpaper to blend a smooth transition with the sound paint that remains. Remove the sanding dust with a vacuum cleaner, or a duster followed with a tack cloth and then "spot prime" these areas with oil or alkyd-based under coater.
If you have old latex paint on your woodwork, don't sand it with a course sandpaper. Use 220 grit instead and go over the surface very lightly. Latex paint will not sand into dust the way oil-based will, instead it tends to curl up, leaving ragged edges where the sandpaper tears the old paint coat. This uneven surface will show through the new paint coat so avoid rough treatment when preparing old latex for repainting. If it's peeling, scrape the loose paint using a putty knife as describe above, and then go over it lightly with the 220 sandpaper. On interior surface you can prime bare spots with a latex under coater on exterior surfaces it best to use an oil-based undercoat over these areas.
If you have newer latex paint in good condition with no peeling, you can use an eraser sponge to clean the surface for repainting. If you're dealing with newer oil-based paint, use 220 grit sandpaper to gently scuff it up a bit, giving the surface "tooth" to aid in bonding with the new paint coat. With no bare spots there's no need to prime, you can go ahead and apply your finish paint after removing the sanding dust with a tack cloth or vacuum cleaner.
#3 - Prime All Bare Wood
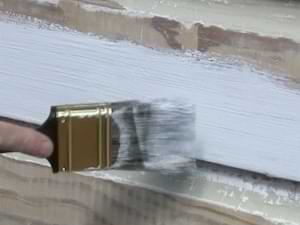
If you have new, bare wood you will need to prime it with a good quality oil or alkyd-based under coater to give the finish paint a solid foundation. This is true whether you're using latex or oil/alkyd finish enamel. Latex primer isn't recommended here because it doesn't soak into the wood the way solvent primers do and it may peel off over time if it's exposed to lots of handling or high humidity and moisture. Using an oil/alkyd undercoat will ensure your painted wood looks its best, and stays that way for a long time to come.
First, be sure you're starting with a smooth surface by going over all the new bare wood with 120 sandpaper or sanding sponge. Most new wood trim will be smooth to start with but there may be some rough spots that need attention like over scarf joints or at corners where two pieces of wood molding meet.
Vacuum off the dust and then wipe the entire surface with a tack cloth to remove all the dust particles before applying the primer. Let the undercoat dry at least overnight before proceeding. If you want the best possible finish, apply a second coat of primer over bare wood before applying the finish enamel. This is an especially good idea if you're using oil or alkyd-based finish enamel because new wood tends to absorb these paints quickly. Two coats of primer will ensure a uniform finish with no dull spots across the whole surface. Don't wait longer than the label recommends before applying your finish paint so the primer remains fresh and at its best.
#4 - Fill Holes and Gaps
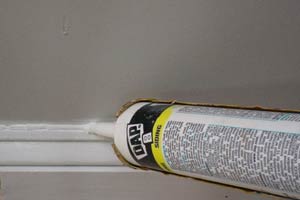
When the primer is dry, make any repairs to gouges and large holes using wood putty or spackling paste, also fill small nail hole with painter's putty. Spot prime these repairs after they dry. Fill all gaps and seams with a good quality latex/silicone caulk. Fill gaps where wallboard meets molding and seams where molding pieces come together. Use plenty of caulk to completely fill the space and wipe off all the excess before it has time to set. Let the finished caulking dry completely before applying the finish enamel paint coat.